Saturday, April 1, 2017

Practical Preparedness – Simplify Your Shopping List

Written by R. Ann Parris on The Prepper Journal.

When we embark on the road of preparedness, whether we aim small or plan to survive a nuclear holocaust, there are a million and five things to learn, build, do, and buy. It can be overwhelming at every stage. In fact, it can almost be more overwhelming at some of the intermediate stages than early on. You have great piles of stuff, but then you start thinking longer-term, sustainability, self-sufficiency, and the needs/wants just balloon all over. In some cases, the financial aspect alone is such a burden that people fall out and let go of the preparedness bug.

One thing that can help is to simplify the shopping list. In some case it’s about paring it down. In other cases, it’s about finding multi-purpose items.

The major benefit of the latter is that it can simplify things for beginners and old hands alike. When we pick something that can do multiple jobs right now, it gives us the ability to later expand to more specialized items as we’re ready. I’ll mostly focus on those items. I’ll also touch on some items I commonly see stocked deep that can get reduced or eliminated.

Pine Cleaner & Dish Detergent

Pine Sol is proof of a higher being or Mother Nature that loves us. Pine cleaner can be just about all things. It’s a disinfectant, and it doesn’t create color changes in fabric or wood. As such, pine cleaner can be used for:

  • Floors (tile, linoleum, hardwood, carpet)
  • Laundry (electric HE washers to hand-scrubbing)
  • Toilets & bathrooms
  • Kitchen and butcher area surfaces
  • Vehicles
  • Dusting surfaces with rags
  • Bedding

Happily, it also comes in a whole variety of scents for those of us who don’t actually like lemon or pine scented cleaners.

Pine cleaner also has a major case for being the be-all number-one cleaning product because it can be had in super condensed forms that you dilute as much as 10:1 and 25:1 by purpose.

Dish detergent is another one that can do a lot of jobs. As a pet owner and cook, little breaks the grease around the stove hood or sickness stains in carpets the way dish detergent will – and usually, especially with hot water and a decent scrubby sponge or brush, with the least amount of elbow grease of anything else I’ve purchased.

This is the stuff we count on to kill the raw chicken germs on our cutting boards and knives, and to prep jars for another year of canning – it’s fine as a surface cleaner for nurseries, kitchens, and sick rooms.

Dawn gets counted on to work pants from whatever my father and I picked up through the day. The incredible oil breaking compounds also save critters after oil spills. While it will upset the microbe communities, Dawn is safe to use for potted plants and garden beds, which lets us reuse the water we’ve pulled for cleaning and laundry.

Bleach

Bleach has its place in the cleaning world and in preparedness, but usually in limited quantity. Plain, unscented bleach gets used 5-8 drops per gallon to help clean water for drinking – a single bottle will do hundreds or thousands of gallons of water.

However, that bleach has a shelf life, and the more unstable the temperatures, the faster it breaks down and loses its abilities.

Bonus fact: When you use bleach in hot water, you’re nullifying its purification abilities. It’ll brighten whites, but it’s the hot water killing germs in those cases.

Since you can wash anything in Pine Sol that you could in bleach, and get it sanitized to the same degree, consider keeping a little around for water supplies and cool-water post-wash dips for food service or sick room supplies, but you don’t really need a gallon a week or even a gallon a month.

Vinegar & Windex

Instead of stocking up on both window cleaners and vinegar, consider just going with vinegar. And if you’re not yet, give your windows and bathroom bright-work a scrub-down using sheets of newspaper or phone book pages instead of paper towels next time around.

Vinegar can be used full strength if needed, or diluted and combined in various ways for doing windows and mirrors. It can also be used to unclog shower heads, remove water spots, kill ants, deodorize drains (or, change the smell coming from them, anyway), and act as a fabric softener in laundry water.

And, of course, there’s the fact that we can use white vinegar for canning and cooking, something we’d never do with a window cleaner.

Windshield Glass Cleaner

If you do want to have and stockpile a separate, specific window cleaner, consider getting the tabs and concentrate packets that fuel stations use for restocking their squeegee buckets such as Kwik Blue, 303, or Bug Blitzer . They dissolve in even cool water, then can be transferred to a spray bottle for cleaning. They can cost pennies per gallon while storing very compactly.

Baking Soda & Epsom Salts

Baking soda had its own article as a prepper must-have item. Both were also mentioned in some of the barter articles. Between them, they do a lot of jobs in and on the body, in and around the home, out in the yard and garden, and on the road.

I could hardly write an article about do-it-all shopping and not include them, but they truly deserve 6-12 articles all their own.

Standard & Common Ammo/Firearms

As much as possible, I try to standardize at least ammunition if not actual firearms. I also try to pick up long-production-run and common firearms. Doing so means increased aftermarket parts and accessories at (more) affordable rates.

That allows us to use a step-up program.

I can buy a basic firearm, then a different/extra barrel or stock. I can upgrade as I’m able, using the reviews that abound for the more-common firearms, accessories and gear.

Being a freak, I also tend to take both magazine cost into account, as well as the variety of pouches and holsters with and without a rail/light system and-or the sling systems available for the firearms.

And then sometimes I pick a firearm because it has a wide range of magazines it will accept, as opposed to one that only takes its specific model, or the H&K AR model that is ever so slightly different and is thus restricted to H&K mags made just for it.

The same applies to ammo.

Rimfires like the 10/22 that aren’t picky about what type of ammo they get fed are also more likely to come home with me.

By sticking with common calibers, I can readily find an affordable round that shoots just like my preferred self- and home-defense ammo for practice. In some cases, it means I have a wider array of hunting, defense, and special-purpose rounds and-or bullets ready and waiting for me on the shelf.

Having commonly-used calibers also means that there’s a better chance even if somebody can’t use my magazine or stripper clip, they can reload theirs from mine if need be.

Bedding & Clothes

Cheat on your bed linens. If there’s a queen and a full bed, just buy queen sheets for both. You might have to tuck the sheets in further and tighter and more often for the full, but they mix and match. That means when a set or two rip, it’s no big deal. I have used king blankets and comforters on queens and full beds half my life. It works.

Fun fact about that king comforter: It folds up to fit either a full or a twin bed as a mattress pad just fine, and you can tuck it under queen bedding if needed as well most of the time.

That means that as age starts wearing mattresses, we can extend their lives. It also means that should somebody be sick or potty training, we can throw some garbage bags between the mattress and the comforter, and the bags won’t shift as much (and annoy the sleeper). Should somebody sneeze or giggle and dribble a little, we’re washing and drying a big blanket and sheets, not trying to clean, then cover a mattress, and inviting mold and mildew right into bed with us while it dries much slower.

Clothing can also be simplified with some regularity.

Shoes are pretty specific and socks need to fit a well, although with kids we can skip sizes and plan for 2-3 pairs of socks. Most other clothing has some leeway. If we make sure there are drawstrings and belt loops, we can tighten, add suspenders, pin up, and roll clothing.

Also, a hair elastic makes a hand sleeve garter for washing hands and dishes, or any other time rolled-up sleeves might try to un-roll or slide down.


As somebody who now gets her nephews’ hand-me-downs instead of us passing things to them, I can tell you that some oversized clothing is hazardous because it will catch and snag, but a M-L and a L-XL soul can share a lot of outerwear if it’s purchased in the larger size.

Storage Containers

As we start seriously accumulating things, we need somewhere to put it.

Tip #1: Avoid the “I’ll sort it later” trap of a junk drawer, junk shelf, “Misc.” box, and a catchall laundry basket.

If you truly go through weekly and put things in their place, that’s cool. Most of us toss, say we’ll get it later, don’t, toss, repeat, toss, repeat, and a 5-15 minute job of sorting turns into an hour+ that we then really start dodging.

There are lots of options for holding our goodies, any of which let us sort things as they come home.

Laundry baskets of varying sizes are cheap, and pretty durable. Lined with a sheet, towel or garbage bag, the holes don’t matter. If at some point we need to, they allow us to re-line or remove the liner and plant in them. They can be doubled up into fish traps or holders, large baskets can be turned into cribs (lined! lined well!) or puppy crates, we can use them harvesting larger produce, and then we can sponge them with pine cleaner and turn them into something else all over again.

Accounting or banker’s file boxes with the separate lids aren’t as durable as storage totes, but most of mine actually keep their lids better than the storage totes. They readily fit on shelves and they’re a size that’s reasonable to carry whether they’re packed with papers, books, or (oops) canned goods. They stack well and uniformly across manufacturers.

It’s easy to pop up a lid instead of re-taping or doing the four-corners tucks, which will also help us keep our storage supplies fairly neat.

The downside to them, of course, is that they’re not water- or bug proof. We can line them with trash bags, and-or wet-pack our supplies in gallon and two-gallon Ziploc, but it still leaves the potential that at some point, the cardboard will dissolve into sodden mess. Still, apples to apples with standard cardboard boxes, they hold their own.

They’re less expensive than most moving boxes, but if there’s a liquor store, go with the free boxes there instead – those will be nice and sturdy, too.

Then there are the things like kitty litter buckets we might get for free or buy instead of a smaller container of litter.

While not appropriate for everything, they, too, hold a ton of weight, and multi-function when needed. Today they might be canned goods, medical stuff, or actual litter for winter weight and traction. Tomorrow they might be a water catchment system, a stacked vertical tower for the garden, or sub-irrigated gardening containers. Given another year, they might start holding bulk seeds or garden tool heads.

Like the file boxes, square buckets have an advantage in being a nice, standard size (which simplifies shelving) and not wasting as much space as a rounded and deeply V-ed storage tote or bucket would.

Defunct coolers are another that can make for nice storage containers. The downside to those is the space lost to insulating, but wheels, sturdy handles, and a flip-top lid can definitely be handy sometimes.

Simplified Shopping Lists

Hopefully these few examples were enough to start the brain churning for experienced preppers and beginners alike. From things like pasta that we can use to make a dozen different distinct dishes to having two firearm calibers, from what we stock for cleaning to the lawn-and-garden supplies, there are a million ways we can simplify our shopping and thus simplify our lives. Working off lists of multi-use items can be an affordable way to get started, or to fill in gaps we’ve started noticing after a trial run.

In some cases, we can buy one thing and cross eight others off our lists as a result. Other times, we might choose to hold off on some of the diversity we want to add.

By simplifying lists, we can also eliminate a little of the pressure on our storage spaces, and we may be able to identify and rectify gaps in our supplies when we sit down to compare what we have to what we use normally. It might also let us make a switch in our daily life that will save money in the long run, opening up the budget for extra seeds, Sevin dust, shoes, sugar and storage racks.

If you liked this article, please rate it.

The post Practical Preparedness – Simplify Your Shopping List appeared first on The Prepper Journal.


from The Prepper Journal
Don't forget to visit the store and pick up some gear at The COR Outfitters. How prepared are you for emergencies?
#SurvivalFirestarter #SurvivalBugOutBackpack #PrepperSurvivalPack #SHTFGear #SHTFBag

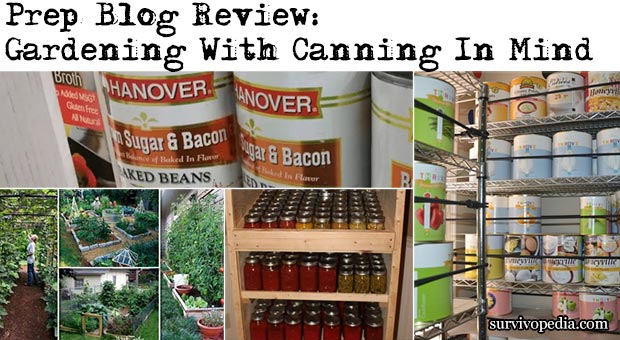
Prep Blog Review: Gardening With Canning In Mind

As spring is coming, I am already thinking about my healthy and beautiful garden and I am getting ready for the new preserving and canning season. One of the best things of growing your own food is that you and your loved ones will enjoy healthy and tasty food, fresh or canned, for a long time.

With this thing in mind, for this week’s Prep Blog Review I’ve gathered 4 articles on this topic to help you plan your garden with canning in mind.

  1. 22 Ways for Growing a Successful Vegetable Garden

“Spring is fast approaching, so are you planning to grow a healthy and beautiful vegetable garden that will help beautify your home’s outdoor and be a place of relaxation?

Growing your own fruits and vegetables in the yard lets you spend more time outside, at the same time saves your money for buying organic food.

So if you have the space to grow your own vegetables, you should definitely take advantage of that.

Even if you only have a small space, it isn’t an obstacle anymore in your effort to vegetable garden. In the following projects you will find a lot of vegetable garden designs to help you start your neat and tidy veggie garden that produces fresh and tasty food for you.

Take a look and get started!”

Read more on Backdoor Prepper.

  1. 7 Secrets to Successful Canning – How to Preserve This Year’s Harvest

“Now is the time to get ready for a successful canning and preserving season!

One of the best things about growing your own food is keeping it the year around for great homemade taste!

For an individual who wants to start canning for the first time, or for the seasoned veteran, here are a few secrets to help you have a successful canning season this year.

The results of our canning efforts one summer.

The most important thing to remember about canning is to simply not be afraid to try!  Maybe you have only water bathed before and never uses a pressure canner. Whatever it is, if you are feeling a little nervous, ask someone to help you or try it out with you.”

Read more on Old World Farms Garden.

  1. More Thoughts on Canned Goods and Food Storage

“Several weeks ago we established that canned goods are safe to eat far past their expiration date thus a great choice for food storage programs.

I received an email from someone saying that they felt tremendous pressure to prepare right now and due to their budget just could not afford to stock up on freeze dried food for the long term.

This motivated some additional words on the subject.

Every tragic disaster that takes place ultimately causes the question of “What now?” to be asked. More often than not “What are we going to eat?” and”How are we going to get food?” are also asked.

This doesn’t have to be in a Third World country as most anyone who has experienced the loss of a job or some other major financial personal SHTF has asked similar questions.”

Read more on 1776patriotusa.com.

  1. How to Store Food Storage In a Small House

“Have you sometimes wondered “how can I store food storage in a small home?”

Well, I have a fairly small home, it’s only 1900 square feet.

I am going to show you my home in small doses because otherwise, the post would take too long to load.

I have a three car garage, if you can call it a three car garage with the narrow one car section. You can barely fit two very small cars in the double garage and one car in the third stall.

Mark and I use the third garage section for our emergency preparedness items that can withstand the heat in the summer.

Everything else is stored inside my home.”

Read more on FoodStorageMom.

This article has been written by Drew Stratton for Survivopedia. 


from Survivopedia
Don't forget to visit the store and pick up some gear at The COR Outfitters. How prepared are you for emergencies?
#SurvivalFirestarter #SurvivalBugOutBackpack #PrepperSurvivalPack #SHTFGear #SHTFBag

Friday, March 31, 2017

How to Hunt Deer with a Bow Effectively

Written by Guest Contributor on The Prepper Journal.

Editor’s Note: This post has been contributed by Joseph. If you have information for Preppers that you would like to share and possibly win a $300 Amazon Gift Card to purchase your own prepping supplies, enter the Prepper Writing Contest today.


Deer hunting can be done in two ways; either by using rifles or using bows. If you are one of the many hunters who prefer the latter option, this is the perfect article for you to know the practice tips to hunt deer with a bow. Dedicated hunters will know that practice sharpens your skill on shooting a bow with precise and accurate shots. Thus, here are a few tips to pave your way to become a skilled bow hunter.

Practice during unfavorable conditions

Obviously, a good hunt is scheduled during the peak seasons when the weather is favorable for hunting and trekking. However, weather can be a greatly unpredictable thing, and while out on a hunt, it’s better to be prepared for anything.

Practicing in windy conditions where the direction and force of the wind can greatly affect your accuracy can improve your bow skills. Think of this way; if you can shoot well in crappy weather, then you can do so better in normal conditions. More importantly, you are prepared for any kind of situation when you’re out hunting.

Take it slow

If you’re planning to shoot your first buck from a tree stand, you cannot do so successfully without learning how to shoot from a higher position.


It’s not wise to push your limits while at the beginner stage of bow hunting. The best strategy to gauge your skills is to start slow. Start shooting at small distances until you can perfect your shot at that distance. Only then should you further increase the increments.

This strategy can also minimize frustration because it will let you know the farthest distance where you can shoot most accurately. On the field, it will help you gauge your Effective Kill Range (EKR), or the distance range wherein you are most likely to take down a deer without messing up the shot.

Learn how to use a bow sight

A bow sight is an essential tool when shooting long distance. The best bow sight can greatly enhance your long-distance shooting by a tenfold. Basically, it has pins set at different distances which can help you shoot long-distance targets from stagnant position, such as a tree stand.

Other than a bow sight, you should also use other essential bow accessories such as a bow stabilizer. A bow stabilizer, on the other hand, is an accessory that helps minimize torque, stabilize shots, and increase the accuracy of your shots.

Know how to shoot from a higher position

If you’re planning to shoot your first buck from a tree stand, you cannot do so successfully without learning how to shoot from a higher position. Because the trajectory will change once you shoot from an elevated place.

So one of my tips is to practice shooting dummy targets from a tree stand. Once you get a hold of this skill, you’ll find tree stand hunting an easy task.

Target for easy-kill areas

The most humane way to kill a deer is to shoot it in the chest area, where the arrow can pierce through the lungs or heart and deliver almost instant and painless death. To practice this skill, you can use target print-outs of a deer in order to enhance your ability to kill instantly.

Moreover, this will also minimize the possibility of the deer running away because of a shot in the belly, hind, or legs. With accurate shots to the chest area, you can harvest your kill easily.

Don’t hesitate to ask questions

If you’re not sure about something, ask a more experienced bow hunter than you. Remember that it’s not a competition of who is best. Every great bow hunter starts somewhere, and while you’re a beginner, it’s best to take advice from experts and use it to work on your weak points.

Other than constructive criticism, you can also form bonds with other bow hunters and potentially join them on their next bow hunt. This will be a big plus for you: because not only do you have new hunting buddies, you also have a lot of people to help you work on your skills.

Practice with your bow in low-light conditions

You can also master shooting with it during near sunset or near dawn conditions.

Most often, whitetail deer make an appearance before sunset when the light is dimming and your bow sight is getting difficult to use. Although most bow sights come with a glow-in-the-dark pin feature, it will be much wiser and a skill-builder to practice shooting in low light.

If you have a bow sight with a low-light feature, you can also master shooting with it during near sunset or near dawn conditions. In this way, you won’t need to fumble with your bow sight while on the field.

Adjust your bow according to the wind

The wind plays a big role in the accuracy of your shot because, as said before in this article, it can affect the direction and/or trajectory of your shot. When hunting deer with a bow, you’re also most likely confined to shooting from far distances. Therefore, it’s better if you learn to adjust your aim with the wind.

Most importantly, with this skill you can reap rewards when a supposed to be sunny day turns into a windy one. Remember: the weather is completely unpredictable, and as a hunter, don’t expect it to always be in your favor.

Work on your form

As a beginner, the best form for archery is one of the most difficult aspects to master. It’s imperative that you work on your form every time you practice shooting. Moreover, you can also ask an experienced bow hunter to evaluate your form and tell you the mistakes that you’re making.

Why does this need to be done? Well, a great form will directly affect the accuracy of your shot and help you shoot better. Otherwise, a bad form can lead to inaccurate and imprecise shots that will just leave you discouraged. Thus, remember to work on this aspect along with everything else.

Learn how to wait for the perfect shot

In deer hunting, timing is everything, whether you shoot with a bow or a rifle. The proper timing of your shot will decrease the chances of a botched kill. Since deer are highly receptive of sound, you can scare away a bunch of them if you have off timing with your shots and they end up on a nearby tree or the ground.

Unfortunately, the only way to practice your timing is to do it on an actual deer. Because automated practice targets have predictable movements, they aren’t great options for practicing timing. Unlike with deer, you can learn how to assess their movements and make it predictable to you.

Conclusion

Here, we’ve highlighted the best practice tips to hunt deer with a bow. It’s not the actual camping and hunting that’s the most difficult part, but the practice on shooting a bow. Thus, the best option you have in order to be the most prepared hunter in the world is to practice at every chance you get.

Did you like this article? If you did, leave us a comment below and tell us what you think. You can also share this with your friends. Thanks for reading!


About the author: Joseph Gleason is the founder of Captain Hunter. CaptainHunter.com is a site dedicated to the sport of hunting. We have a deep respect for nature and for the environment, and we therefore take the sport of hunting very seriously.

Never think that you are alone in the woods again. Our goal is to share what we know with who needs it most.

If you liked this article, please rate it.

The post How to Hunt Deer with a Bow Effectively appeared first on The Prepper Journal.


from The Prepper Journal
Don't forget to visit the store and pick up some gear at The COR Outfitters. How prepared are you for emergencies?
#SurvivalFirestarter #SurvivalBugOutBackpack #PrepperSurvivalPack #SHTFGear #SHTFBag

'I don't blame him,' says alleged getaway driver of OK resident who killed teens

'I don't blame him,' says alleged getaway driver of OK resident who killed teens

via YouTube Video Don't forget to visit the store and pick up some gear at The COR Outfitters. How prepared are you for emergencies?
#SurvivalFirestarter #SurvivalBugOutBackpack #PrepperSurvivalPack #SHTFGear #SHTFBag

COOKING ON A CAMPFIRE


from TheSurvivalistBlog.net RSS Feed
Don't forget to visit the store and pick up some gear at The COR Outfitters. Are you ready for any situation?
#SurvivalFirestarter #SurvivalBugOutBackpack #PrepperSurvivalPack #SHTFGear #SHTFBag

Warning: Do You Recognize these Five Common Piles of Prepper BS

The golden horde

drive-4600_640The golden horde theory has been portrayed for years by survival authors, bloggers, and fiction writers, but will the golden horde of hopeless refugees swarm like hundreds of thousands of locust from the cities to the countryside after an economic collapse?

No, they won’t, not after an economic collapse anyways, in fact, I look for the opposite to happen, with hordes of people packing it up and leaving rural areas for the cities to look for work (when things settle down and after the initial riots that will occur in some areas). Recent examples of this happening...

Read the whole entry... »


from TheSurvivalistBlog.net RSS Feed
Don't forget to visit the store and pick up some gear at The COR Outfitters. Are you ready for any situation?
#SurvivalFirestarter #SurvivalBugOutBackpack #PrepperSurvivalPack #SHTFGear #SHTFBag

What did you do to prep this week?

Well folks, here we are again, another week of prepping and another week closer to TEOTWAWKI. The warning signs are all over the place but you’re a survivalist aka a “prepper” so you’ll be ready and have a far better chance of surviving and even thriving after the balloon goes up…

You are prepping right… doing something every week to get ready for the big fall over the cliff that we are heading for. We are in a slow collapse now and it’s just going to get worse no matter who is sleeping in the White House.

If you’re just starting out and not...

Read the whole entry... »


from TheSurvivalistBlog.net RSS Feed
Don't forget to visit the store and pick up some gear at The COR Outfitters. Are you ready for any situation?
#SurvivalFirestarter #SurvivalBugOutBackpack #PrepperSurvivalPack #SHTFGear #SHTFBag

Prepper News Brief March 31, 2017

1. Mike Flynn Offers to Testify in Exchange for Immunity…

Mike Flynn, President Donald Trump’s former national security adviser, has told the Federal Bureau of Investigation and congressional officials investigating the Trump campaign’s potential ties to Russia that he is willing to be interviewed in exchange for a grant of immunity from prosecution. Via The Wall Street Journal.

Whatever he tells probably won’t be good for Trump… why else would he be seeking immunity?

2. Animal to man, fear of the next pandemic…

The close biological relationship between the two...

Read the whole entry... »


from TheSurvivalistBlog.net RSS Feed
Don't forget to visit the store and pick up some gear at The COR Outfitters. Are you ready for any situation?
#SurvivalFirestarter #SurvivalBugOutBackpack #PrepperSurvivalPack #SHTFGear #SHTFBag

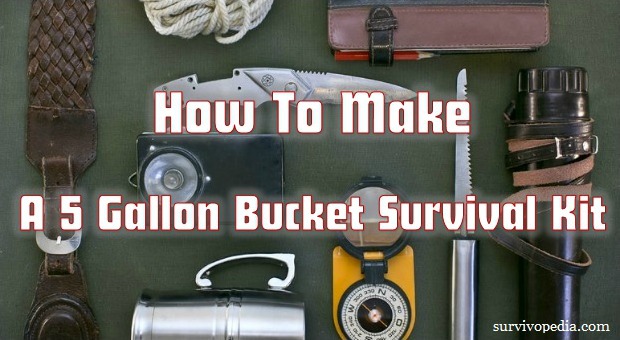
How To Make A 5 Gallon Bucket Survival Kit


If you love buckets and survival, you’ve landed in the right place, as today’s article is about 5-gallon buckets and survival, or how to use an already-legendary item in the prepper community for building a survival kit.

And yes, I am talking about the famous 5-gallon bucket, which seems to be at the top of the list when it comes to survival and sustainable development.

Besides gardening, building pyramids, and putting a man on the moon, this inconspicuous item can be used for improvising an emergency/survival kit as it’s large enough to hold quite a few items of survival gear, it’s tough and water resistant, and it’s pretty easy to carry around depending on what’s in it.

These DIY emergency kits are easy and cheap to made, and in a crisis situation they’ll prove to be highly valuable.

3 Second SEAL Test Will Tell You If You’ll Survive A SHTF Situation

The idea is to have as many as possible placed in strategic places, i.e. one in your car, one in your basement, one in your vacation home, one in your office – you know what I’m talking about.

To begin with, let’s concentrate a bit on the bucket itself. Not all buckets are created equal; you need to get a good one that hasn’t been used to store toxic chemicals.

How to Choose a High-quality Bucket

Here are a few places where you can get a high-quality (as in solid) 5-gallon bucket for free:

  • Wendy’s
  • Tim Hortons
  • Dunkin Donuts
  • Sam’s Club
  • Chick Fill A.

You can also try Mc Donald’s, Walmart and Subway but these guys are so environmentally conscious that they usually recycle their plastic buckets. It’s worth a try anyway.

Also, you should go for food grade buckets at all times, because you never know what you’ll be storing inside after all, besides your emergency survival kit, alright?

Another important factor to consider is that your bucket is strong enough to withstand pressure and comes with a plastic lid – that’s quite important.

If cruising the multinational corporations proves to be unsuccessful in terms of acquiring free 5-gallon buckets, you can always go for the unthinkable option and buy some from Home Depot, Foodland, McHappy’s, Lowes or FireHouse Subs. A brand new bucket from these guys will cost you anywhere from 2 to 5 bucks, lid included (the lid may cost extra).

These are just a few ideas, so don’t start throwing rocks; I’m only a messenger. If you’re not happy with my tips and tricks, just use your imagination.

If you end up with free but stinky plastic buckets (the ones which were used for storing pickles are the smelliest) don’t worry, they can be cleansed in a jiffy with a solution made of 1 gallon of hot water and 1/3 cup of bleach. The same stuff can be used for cleaning your bathroom by the way, but don’t tell anybody.

Another interesting factoid to consider: the best food-grade buckets are marked with a 2 on the bottom. The number represents the type of plastic used in its construction and 2 is the least toxic variety. However, if you put Mylar bags inside, you can forget about the food grade status of your bucket.

If you’re definitely never going to store food inside the bucket, it doesn’t really matter what you use.

With the “how to choose the ideal-5 gallon bucket for my prepping endeavor”  science taken care of, let’s move on to the most important part of the story.

What to Put in Your 5 Gallon Bucket Survival Kit?

Well, there are various schools of taught about the actual content of a proper emergency kit, but let’s play it safe and follow the golden rule of survival, or the holy trinity.

The trinity of survival goes something like this: regardless of what you’re thinking about, whether it’s an alien invasion or a natural disaster, you’ll have to take care of 3 main things if you want to stay alive and tell the story to your kids, friends, or favorite pets: food, water and shelter, that about sums it up.

With all these simple things considered, your survival emergency kit must be able to provide you with the necessary items/gear/stuff or whatchamacallits for allowing you to eat, drink and stay safe for at least 3 days (the more the better).

Video first seen on Robert Martin

With water being a crucial survival item, you should pack 3-4 water bottles in your survival bucket, along with a quality water filter. The problem with water is that it’s voluminous and heavy to carry around, so you’ll have to figure that out for yourself (I am talking about how many bottles of water to store in your emergency kit depending on your geo-location).

Freeze dried meals are also must-have items in a survival emergency kit, together with a few protein bars, chocolate, and other long shelve life, easy to carry, light, compact, and high-calories foods. A rip stop tarp is essential, as it can be used for a number of purposes, including as a makeshift shelter (a 6×8 would be enough, and grommet holes are a must).

Tip: disguise your 5-gallon bucket survival kit into an Ottoman and hide it in plain view (think along the lines of easy to grab if SHTF).

Video first seen on Emma Catherine

These are the most basic items to store inside your 5 gallon bucket survival kit, i.e. food, water and shelter. But there’s plenty of room left, so let’s go a little bit more high tech: a gun would be nice, also a quality survival knife, which is essentially a multi-tool. Being able to protect yourself and your family, especially in a crisis, is crucial. A few extra rounds of ammo wouldn’t hurt either. 

A fire starter kit/BIC lighters, some weatherproof matches, duct tape, a mini multi tool (I’d go for a Leatherman), a whistle, and some wet wipes would be nice to have in any emergency situation I can think of, so keep those in mind too. A compass, an LED lighter with some spare batteries, a couple of N 95 dust masks and a small sliding saw would be also advisable to add to your survival stash.

A shortwave radio is essential in a catastrophe as it gives you the possibility to gather essential intel from local authorities, so throw one in just in case – the smaller the better.

Paracord! Need I say more? Check out my articles about paracord if you have any doubts. 25’x2 would do.

A cool addition for your survival kit would be several 30-gallon trash bags, as they can be used for various purposes, including as a makeshift rain poncho.

A first aid kit is a must, together with some over the counter/prescribed medicine, depending on one’s health condition.

A couple of Mylar thermal blankets would be nice as they’ re awesome if you have to camp outdoors and they take up so little room it really doesn’t matter.

If you still have room left, you can consider split leather gloves, extra batteries (for your radio/flashlight, remember?), glow sticks, safety goggles, a can opener, a sewing kit, a bar of soap and even some toothpaste/toothbrushes.

Another handy item to have in your emergency survival kit provided you have enough room for it would be a solar charger for your cellphone (I’d go for an old-school feature phone with long-lasting battery and all that). You can find those on the Internet (Amazon etc).

A 5 gallon bucket survival kit is a life saving equipment to grab in a crisis situation when panic is the greatest killer.

How long will you survive in a SHTF situation?

Click the banner below and find our more!

Banner_620_273_7

This article has been written by Chris Black for Survivopedia. 


from Survivopedia
Don't forget to visit the store and pick up some gear at The COR Outfitters. How prepared are you for emergencies?
#SurvivalFirestarter #SurvivalBugOutBackpack #PrepperSurvivalPack #SHTFGear #SHTFBag

Thursday, March 30, 2017

Start Prepping Without Feeling Overwhelmed

Written by Guest Contributor on The Prepper Journal.

Editor’s Note: This post is another entry in the Prepper Writing Contest from Kena K. If you have information for Preppers that you would like to share and possibly win a $300 Amazon Gift Card to purchase your own prepping supplies, enter today.


Everyone has different reasons for prepping. For us it was the combination of hearing about the increasing devastation of more natural disasters in the U.S. and abroad, and seeing how many people lost their jobs and homes during the economic recession. Initially, our thought was just to have some extra food in the cupboards in case I lost my job. We started by emptying out the closet in our extra bedroom, which allowed us to get rid of some of the extra “stuff ”we all seem to accumulate. Next, we purchased a few shelving units on sale, and secured them to the wall inside the closet. From there, we researched food items with longer storage lives like beans, instant rice, oatmeal, pasta, instant potatoes, honey and sugar and then started buying a little extra food each time we went to the store, focusing on sales to keep things cheaper. Once home with the the food, I wrote the “use by” date on the labels of the food before storing them in the closet so the items that expire soonest would be used first and those with the later expiration dates would be placed behind those to be used later.

As time went on our food storage grew and became more diverse. We began to compare our closet to a savings vault and the more food we put in it, the richer we felt. Coincidentally, the more we collected, the more interested we got in the whole prepping concept. I organized the food according to categories like beans, rice, oatmeal, canned fruit, canned vegetables, canned fish and meats, boxed meals, spices, baking items, drink mixes (coffee, tea, hot cocoa, hot cider, instant milk, Gatorade, Tang, Kool-Aid, etc.) and so on. We not only thought of ourselves, we also planned for the possibility that other members of our family might have to leave their homes, so we downsized more of our “junk” to create more space, and collected more food.

The biggest challenge for me was storing water. I didn’t want anything to be so heavy it would fall on our heads, collapse the shelves, or worse to leak and ruin our food, so I boiled water and stored it in glass quart jars that I had saved from empty juice containers, and then dated the jars and placed them upright, underneath the shelving units where lucky for me, they fit perfectly. I also purchased and stored some plastic drinking water bottles. Since the minimum recommendation is to save one gallon of water per day, per person and pets, and since water is life, I found it difficult to determine how many days we should save for and where to find enough space to store it all. Eventually, I got creative and found other places throughout the house to store more water and we kept empty 5 gallon water containers with our camping gear so we could use them to gather more water, as needed.

Prepping isn’t a new idea – What is new is the idea that you don’t need to prepare.

At some point, we began to expand our storage items from just food into thoughts of our pets needs, first aid, extra indoor and outdoor clothes and shoes, towels and blankets, soap, shampoo, lotion, toothbrushes, toothpaste and the like, again purchasing items on sale. We started going to garage sales to look for things like oil lamps and camping items. We made Bug Out Bags for ourselves should we need to evacuate at a moments notice and I even stored a few emergency items in my purse and in our vehicles. We have a camp trailer so we also got it ready with extra sleeping bags, food, hygiene items, books, puzzles, cards, and toys for the grandkids. It became a game to us, always thinking of things we might need and how to purchase them without spending tons of money. We bought things like tools, personal protection items, backpacks, cooking and camping gear for each other for our birthday and Christmas presents. During the winter when the weather was too bad to go outside, I used my time to copy our important papers, put family pictures in a small photo album, and wrote down their addresses, phone numbers and birthdays and anything else of importance I could think of (scars, blood types, etc). We stored some state and Forest Service maps in the glove box and our backpacks in case we had to travel or use the back roads. I also started collecting recipes for ways to use the freeze-dried foods we’d purchased.

In the spring we expanded our garden area and mostly planted food that we could freeze, dry or can. We felt really good growing our own food because we kept it organic and knew it would taste so much better in the winter than grocery canned foods. We read articles on sprouting and bought seeds so we could try it. Since we owned an acre of land outside the city limits we figured we should utilize our property to help us survive, so instead of a yard full of grass and ornamental trees, we opted for edible landscaping by planting a few fruit trees, berry plants, rhubarb and herbs. We even raised our own chickens for eggs and meat, and had rabbits and turkeys for awhile.

Keep in mind that none of this happened over night by any means. It was something that we started that grew over time. It grew because we saw the importance of it, turned it into a game and then had fun doing it.

What could possibly go wrong?

As our adult children came to visit they began to notice all the food we were collecting and they laughed saying if the Cascadia Fault line acted up, they would just bring their friends and come to our house since we were already so stocked up. I had read an article about someone who opened his property to a few friends who ended up bringing other friend after the Katrina hurricane in 2005 but no one brought anything to contribute towards the cause and soon the years worth of food that he had saved for himself was gone because he had to share it with everyone else. Remembering this, I told the kids that they were more than welcome to come and to think about what they could bring to contribute (food, bedding, towels, etc), and that we had indeed planned for them to stay with us if need be, but then I had to let them know that we did not have enough for their friends, so they would have to prepare for themselves or plan on going someplace else. I felt like I was being a bit mean, but when the SHTF, we all have to decide who can enter our domain and who can’t…and what we are willing to do in order to back that up.

Major cities affected by a disturbance in this subduction zone include Vancouver and Victoria, British Columbia; Seattle, Washington; and Portland, Oregon.

That year for Christmas, I gave the kids a mini survival bag for the glove box of their cars that included things like a metal cup with a bit of food, a pocket knife, flashlight, fire starter, and hand warmers and a tiny address book that I wrote our address and phone number in, thinking that in an emergency they may not have cell service so it would be helpful to have important numbers written down with the hope they might be able to use a land line. I told them it was just a starter kit, and encouraged them to add to it.

After some time, I noticed it seems the kids have been paying attention. They have started to collect extra food in case the power goes out or they get sick and can’t go to work or get to the store. My 80 year old mother recently had to rely on the water and food she had stored for just such an occasion when she was unable to leave home due to a heavy snow storm. Fortunately she didn’t lose power, but if she had, she would have been OK because she had candles, a flashlight and an indoor propane heater on hand that we had given her. She had extra blankets and winter clothes too, all things we had given her or that she had gotten for herself. It was a big relief to know she was prepared as we do not live in the same town and are in fact divided by a mountain pass that may have been impossible for us to go over during the storm. Fortunately, she also has a kind neighbor who helped keep her walkway shoveled and some folks from her church who stopped by to check on her. I would prefer that we lived closer so we could help her more, but for now at least, that is not the case.

Whatever your reason, I hope this article inspires you to begin your prepping adventure. Keep it simple, make a game of it, and don’t spend a ton of money upfront if you don’t have it. Second-hand stores, Dollar stores, garage and estate sales, all have great deals. Online stores and military supply stores are great places to look for backpacks, camping supplies, military clothing and a whole host of other items without paying an arm and a leg for it like you might at a specialty-type store. There are numerous prepping articles full of great advice and helpful lists of whatever you might be interested in, like what to put in your first aid kit or your bug-out bag for example. There are also plenty of prepper-type stores online to buy freeze-dried and dehydrated food if you choose to go that way, and they tend to have different items on sale every month, which is how I am building up our freeze-dried and dehydrated items. You can even find a limited supply at some stores like Walmart. So, there are lots of options, and the more you get into it, the more you will want to do. Perhaps you can get others to join you – encourage your family, friends and neighbors to have extra supplies on hand “just-in-case” explaining you never know when you might get sick or when the power will go out. Let them know they don’t want to be the one stuck without gas, food or water. They wouldn’t want the power to go out and be sitting in the dark without some sort of light, heat, or a way to cook and clean. Invite your friends to go to a garage sale with you as a fun way to get started.

There is still so much I want learn like emergency first aid, tying knots, identifying edible mushrooms and wild foods. Reading books and watching survival-type shows is a fun way to be introduced to different ways to build shelter, make fires, use weapons and just live off the land, but of course nothing prepares you for this type of survival like taking a class and practicing your skills and I look forward to it all. I hope you do, too.

If you liked this article, please rate it.

The post Start Prepping Without Feeling Overwhelmed appeared first on The Prepper Journal.


from The Prepper Journal
Don't forget to visit the store and pick up some gear at The COR Outfitters. How prepared are you for emergencies?
#SurvivalFirestarter #SurvivalBugOutBackpack #PrepperSurvivalPack #SHTFGear #SHTFBag

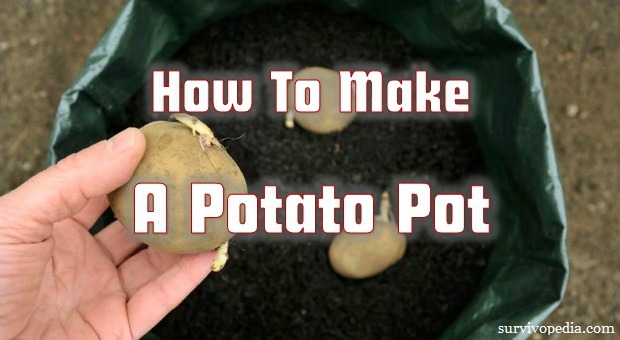
How To Make A Potato Pot

I love potatoes. Boiled, mashed, fried, baked – it doesn’t matter how they’re served, I’ll eat them. They help stretch your food supply and provide energy when you need it the most.

Unless you have a place to grow a traditional garden, you may have discarded the idea of growing them, but you can make a potato pot and grow them wherever you want – and you can even take them with you if you need to bug out.

If you’re shooting for the “potato” that offers the most health benefits, shoot for yams or sweet potatoes. Though the names are often used interchangeably, they are not the same vegetable, nor do they have the same nutrients, though they’re both high in vitamins, particularly vitamin A. Technically, neither one are even potatoes but that’s outside the scope of this article.

How to Store Your Potatoes

If you were raised in the country, you likely remember the root cellars. Ever wonder why they’re called that? Me too, and the best explanation I can come up with is that they were used to store root vegetables – traditional white, yellow, or red potatoes, onions, garlic, carrots, etc. All of these will store all winter if kept at the right temperature. The important thing is to not wash them because the dirt extends their shelf lives.

Unlike other potatoes, sweet potatoes love the warmth – unlike traditional spuds, room temperature is great for them. They’ll keep up to a year! Again, don’t wash them. And if you’re growing them yourself, as you’re going to be after you make your pots, do your best to leave them somewhere warm – 80 degrees is great – for 10 days or so after you harvest them. This promotes the growth of a chemical on the skin that protects them from rot and also “cures” them to make them sweet.

Another advantage to growing sweet potatoes is that you have a tremendous yield. Believe it or not, you can yield as much as 130 pounds of sweet potatoes from just 3 potatoes.

You can grow both sweet potatoes and “regular” potatoes in pots, but the process is different. We’ll take about the easiest and fastest way first, then tell you how to grow sweet potatoes.

Now, are you ready to get your hands dirty and make a potato pot that will produce a great crop of potatoes? Good. Let’s get started.

These lessons of yesterday will teach you the basic skills for survival cooking! 

Making a Standard Potato Pot

First off, I have to say that this is the perfect  idea for a prepper because once you get it going, you’ll have potatoes literally forever without even needing to add dirt or fertilizer. It’s absolutely brilliant, but so simple that anybody with 1 potato, soil, water, and access to clover can do it.

Of course, any potato crop is self-perpetuating, but with this one, you don’t need fertilizer and you won’t have to dig in the garden.

Expect to yield about 10x (perhaps just a bit less) the weight of potatoes that you plant; that’s ten pounds for every pound, so you don’t have to do math.

  • First, choose your container. You can grow them in anything from a 5-gallon bucket up. Use a bucket or container that has never been used to store any type of chemical or poison. A great place to get food-grade buckets is local restaurants and bakeries. They usually buy in bulk, and items such as pickles, lard, sugar, flour, and frosting often come in 5-gallon buckets.
  • Fill your container with a mixture of potting soil and compost. I’ve even heard of people using sand and sawdust, but for this method, use the potting soil and compost.
  • Let your potato sit long enough to start growing eyes. That way you know that it will grow because some are treated with chemicals that keep them from sprouting in order to extend shelf life. While you’re waiting, prepare your bucket and get your clover growing.
  • Drill holes in the bottom of your bucket for drainage and make sure that you have a place to put the bucket so that it’s not in direct contact with something such as dirt that can clog the holes and prevent drainage.
  • Put a few inches of gravel (and sand if you’d like) in the bottom of the bucket and fill it with soil to within several inches of the top.
  • Sprinkle white clover seeds across the top of the soil and just run your hand over them to get a bit of soil over them.
  • Once your potato sprouts eyes and you know it’s good to grow, your clover should be starting to grow, too. Dig a hole 12 inches deep or so in the center of the bucket. Don’t worry if you have to dig through the clover – it will grow back.
  • Plant your potato at the bottom and cover back up with dirt.
  • You’ll see a plant within just a couple of weeks, then all you have to do is water it once or twice a week and let it grow. After 3 months or so, the plant will die back. When it does that, your potatoes are ready to harvest.

Video first seen on Hollis & Nancy’s Homestead

Making a Sweet Potato Pot

This has several steps and takes quite a bit of advance wait time, but your yield will be awesome. Plus, sweet potatoes are delicious and nutritious just as they are. Not to say that a good old regular potato isn’t delicious, too!

Because the yield is so high, you may want to use 20 gallon buckets for this. That’s what was used here – if you’re only using 5-gallon buckets, just put one slip per bucket. You’ll know what that means in a minute.

  • Start with a single sweet potato. Unless you want to be overrun with them, or intend to sell them or trade them, you don’t need more than a couple because one potato seriously can yield forty pounds or so.
  • Find cups, jars, or containers that are wide enough and deep enough to accommodate one half of the potato, lengthwise.
  • Stick 3 toothpicks into the potato at equal distances around the middle so that you can dangle one end of the potato (half of it or so) into the glass or jar and have one end sticking out. You want to have at least a half-inch or so all around the potato between it and the inside of the container.
  • Put the potato into the container so that it’s suspended by the toothpicks.
  • Now it’s time to wait for the slips to grow. Slips are basically shoots that grow into individual plants, and one potato can yield up to 50.
  • The slips will begin to grow off of the bottom and up around the potato and will be ready to separate after a couple of months.
  • Once they are, separate them out into different jars, and you can even cut and root new slips off the first ones as they grow. Once you have the slips that you want and they’re at least 12 inches tall, it’s time to plant them.
  • You’ll want a trellis behind them because sweet potatoes vine, and they root where they touch the ground, so if you’re using containers, you don’t want them vining all over your yard.
  • Fill the buckets with equal parts potting soil, peat moss, and compost to about 6 inches of the top.
  • Ramp the dirt so that one side of the container (the one furthest away from the trellis) is 8 inches or so more shallow than the side closest to the trellis and soak it with water.
  • Place 3-6 slips in each bucket so that the tops are facing the trellis and the roots are at the side of the bucket that’s furthest away from the trellis.
  • Add soil mixture to cover the roots and make the dirt level. It’s OK if you cover up some of the leaves and only just the tops are sticking out.
  • Water it again a bit and cover with straw or mulch to keep weeds from growing.

Video first seen on OFF GRID with DOUG and STACY

They love hot weather and take about three months to mature. They’ll get super bushy, so try to encourage any long vines to grow up the trellis. The plants will also grow really pretty flowers, which makes them great for ornamentals. Since the good stuff isn’t visible, if people don’t know what they are, they’ll just think they’re bushes – hiding your garden in plain sight.

The leaves will start to turn yellow. After that, leave them for another week or so and test a part of the bucket by digging down to see if they’re ready. Or, you can just dump a bucket and see how they are. Though remember – you only get one shot if you do it that way.

Now you know how make a potato pot.

Potatoes are the ultimate survival crop and they were included almost in every meal during the Great Depression.

Discover more about how our forefathers handled their survival food.

Click the banner below and uncover their secrets!

This article has been written by Theresa Crouse for Survivopedia. 


from Survivopedia
Don't forget to visit the store and pick up some gear at The COR Outfitters. How prepared are you for emergencies?
#SurvivalFirestarter #SurvivalBugOutBackpack #PrepperSurvivalPack #SHTFGear #SHTFBag

Wednesday, March 29, 2017

5 Insects You Can Eat To Survive In The Jungle

Written by Guest Contributor on The Prepper Journal.

Editor’s Note: This post has been contributed by Christina. If you have information for Preppers that you would like to share and possibly win a $300 Amazon Gift Card to purchase your own prepping supplies, enter the Prepper Writing Contest today.


When you’re out hiking or camping, you can never be sure of what awaits. A simple unpredictable weather event or losing track of where you are on that hike into the wilderness, can ruin everything including your clothing and food. For some reason, you might be forced to stay in the jungle longer than you had planned. But regardless of what happens, the last thing you want to be is starving. The great news is, you can never starve in a jungle – if you are motivated, but it is always up to you differentiate between what is safe for eating and what is not.

As a regular camper, I would suggest that you turn to insects. Reason being, they are rich in nutrients including proteins, fiber as well as fats you will need to survive in the jungle. Another great piece of news is that it is unlikely that they will make you sick. But just like any other food, there are those insects that are safe for eating as well as those that are not.

This post has compiled a list of five edible insects that might save you from starving when you are stuck in the jungle. They are easy to access, could allow you to survive in the jungle, and the best part is they don’t require a long procedure to prepare.

Locusts

One insect you can never miss while you are out in the jungle is a locust. Locusts are always everywhere and most importantly, nutritious. Up to 50 percent of locust’s dry weight contains protein which is quite high than what you will find in cows. Other valuable nutrients include fats, carbohydrates and more.

You can catch more locust during the day because that is the time they are most active. All you need is some net. But make sure you release them in some bucket immediately, you’ve caught enough to prevent them from eating your net. You can then prepare some locust meal, by dry roasting them, adding some salts and serving.

Crickets

Crickets serve as an excellent source of food in many parts of the world. They are also among the most nutritious insects you can easily catch in the jungle. For example, 100 g of crickets has up to 121 calories, 5.5 grams of fat, 12.9 g of protein.

The insect also packs many nutrients including calcium, phosphorous and much more. To catch some crickets, place some sugar into a deep bowl or a jar. Find their location and sink the jar into the ground. Leave it there overnight and expect a large meal of crickets very early in the morning. You can also store them for some time by adding a breathable material on top of the jar. You can then dry roast them, add some salt and eat them.

Ants

Ants are always everywhere and the best part, easy to catch. They are packed with proteins providing your body with the amino acids. They are also rich in copper, phosphorous and many other nutrients. Ants are easy to catch because they always match in one line. Just look around to see if you can find one or locate an ant hill.

If you’ve found an ant hill, place some stick through the opening. The ants will start climbing on it trying to bite it. When this happens, take the stick out and dunk the ants on the stick into a container filled with water. Once you have gathered enough, you can boil them for approximately, five minutes to neutralize the acid in them and then eat.

Termites

If you want something tasty, then you will love having some termites for lunch or dinner. Apart from being among the most nutritious insects in the jungle; they also offer a variety of health benefits. For example, they have been used for medicinal purposes, particularly in the rural areas of the world. Studies have also shown that they have some antiviral properties that make them effective in treating a variety of complications including asthma, bronchitis, sore throat, whooping-cough and more.

To catch some termites, break and open a log and then shake them out. If it is raining, you can place some light into a bucket. They will gather around the light. You can then collect as many as you want. Prepare them, by roasting them in a dry pan on a campfire.

Stinkbugs

You might despise their name, but stinkbugs are great when prepared well. They are also among the best delicacies in Mexico. Apart from being nutritious, they offer a variety of health benefits just like termites. Stinkbugs are easy to access and catch during winter. You can find them hiding or taking shelter under logs or rocks, and sometimes you will see them on the open ground.

Stink bugs unlike many insects in this list can be eaten raw, but it is always advisable that you soak them in some warm water for approximately, 10 minutes then roast them in a dry pan. You don’t have to eat them immediately. After being boiled, stinkbugs can last a week without going bad.

Additional Tip

Even though most insects are nutritious and safe to eat, it is advisable that you be a little bit cautious when choosing your food. For example, experts advise that you avoid brightly-colored insects and those with strong smell because they can be toxic.

Also, remember; some of the edible insects mentioned here such as ants and the rest produce some toxic chemicals when offended. So, make sure you’ve prepared them well. Also, make sure that your cooking water is safe. No matter where you are planning to get your water, make sure it is boiled properly before use. If your only source is spring, I would suggest that you consider spring water testing.

Final words

If there is one thing I’ve learned about camping is survival. One fact is, a jungle has everything you need to survive, but it is up to you to figure that out. These five insects will without a doubt serve you well, but that never implies that they will be available at the location you will choose to set your tent or at the time you need them most. Using the methods mentioned above, make sure you’ve collected enough when you get the chance, prepare and store safely to use later.

About the author:  Christina is a young blogger who is very passionate about her work. Her long experience has a blogger made her an expert on different niches like home, lifestyle, leisure, etc. As a blogger, she believes in quality content and backs up all of her posts with relevant research information. It is her goal to share this quality information in the form of guidelines, reviews, lists, and other types of blog posts to her readers. She believes in constant exploration and evolution as a blogger. You can learn more about Christina at RainyAdventures.Com

If you liked this article, please rate it.

The post 5 Insects You Can Eat To Survive In The Jungle appeared first on The Prepper Journal.


from The Prepper Journal
Don't forget to visit the store and pick up some gear at The COR Outfitters. How prepared are you for emergencies?
#SurvivalFirestarter #SurvivalBugOutBackpack #PrepperSurvivalPack #SHTFGear #SHTFBag