Written by Guest Contributor on The Prepper Journal.
Editors Note: Another guest submission from Mitchell, founder of Musket Hunting, and another timely article as hunting season is upon us. As always, if you have information for Preppers that you would like to share and possibly receive a $25 cash award like Mitchell, as well as being entered into the Prepper Writing Contest AND have a chance to win one of three Amazon Gift Cards with the top prize being a $300 card to purchase your own prepping supplies, then enter today!
After hunting your award-winning deer, you don’t have to throw away the hide. Tanning the hide, with this simple procedure, will help you to preserve it. You will have a nice hide that you can use as rug, a fur coat, or for home decorations. Here is a simple way to tan the hide of a deer or any other animal that you hunt.
Materials Needed:
Some of the most important materials and tools you will need include:
* A flat working surface like a wide sheet of plywood or an old work bench
* A 10-gallon container made of wood or a plastic garbage bin
Procedure
- Take off All Fat and Flesh From the Hide
Cut away all pieces of flesh that may be attached to the skin. Trim the ragged edges from the flesh side. If you cannot start the process of tanning within a day, you need to cure the pelt promptly. This will keep the hide from degrading and stop the hair from slipping in future. Curing also helps to improve the absorption of the tanning agents.
To remove flesh from the skin, lay it on a cool concrete surface or flat rock. Use a flesher or knife to get all the flesh off the skin so it does not rot. Do this immediately after you have skinned your deer. Be careful while scraping flesh so you don’t pierce or damage the hide.
- Cure the Pelt with Non-iodized Salt
Salt the deer hide immediately after you take off the flesh. It will help to remove moisture and prevent flies from infesting the pelt. Hides should be tanned immediately after they are dried so they are not damaged by insects.
To salt the hide, lay the fur side down on a wide surface. Sprinkle fresh non-iodized salt on the flesh side. A good rule of thumb is to use a pound of salt for a pound of hide. Sprinkle the salt evenly and rub it into all the cut edges, the legs, neck and wrinkles. You can repeat this procedure in two or three days after the first application gets wet.
- Dry the Hide
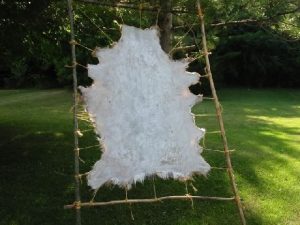
Position your hide so fluid can quickly drain off it. The salt you put will help to remove a lot of moisture from the hide. If necessary, you can hang the hide after you salt it until it is completely dry.
- Soak and Clean the Hide
Soak your hide in the 10-gallon plastic container or garbage bin. Do not use a metal container because the salt and tanning chemicals can react with it. Keep changing the water until the deer skin is soft. In most cases you may need to soak it for one to two hours before the hide becomes soft.
After the skin softens, place it on a plywood board and work on it with your hands. Stretch out the skin on a board and then pull hide back and forth against the edge of your board. Dry skin has a shiny layer of tissue which needs to be broken up before it is removed with a dull metal saw blade.
When the skin is getting tender, you can add baking soda to the water, soak the skin in water and then stir it with the paddle. This simple operation will ensure that the skin becomes very tender and that the tanning solution is fully absorbed.
- Remove Hair
If you want to tan the hide into buck skin, you should take the fur off before tanning it. Mix four quarts of hydrated lime with five gallons of water. Ensure that the skin is totally immersed and no air is trapped in the skin.
Keep the hide soaked till the hair slides off the hide with ease, especially when you use your hand to push it off. Some hides may take up to six days to shed their hair with this method. Then you can place the skin on a board and push off the hair with the backside of a knife.
- Tan the Hide
You can achieve the most effective results by using tanning agents available in form of home tanning kits. But if you want to produce your own tanning solution, you may use any of these options: brain tanning, alcohol and turpentine, or salt and alum.
The commercial solution requires the least amount of effort, so you should try it first. You can buy a pack of hide tanning formula for $20 or less. To clean the hide and take off excess salt and grease, you should soak the hide in soapy water. Put on a pair of gloves and work the tanning solution into the flesh side of the skin. Apply pressure and some creative strokes so the solution can saturate the hide.
To use the deer’s brain to tan the hide, you need to take it out of the skull and preserve it in a refrigerator till you are ready to use it. Later, you can put the deer’s brain in a saucepan and add one cup of water. Cook the brains and the water until the brain becomes liquid. Blend the mixture with a spoon to remove all lumps.
After washing the hide with water, and mopping up the excess water with towels, you stretch the hide out on a table, pour the brain mixture on the hide and work it in with your hands. After rubbing in the mixture, place it in a freezer bag and put it in the fridge to allow the brains mixture to penetrate the hide.
- Soften the Hide

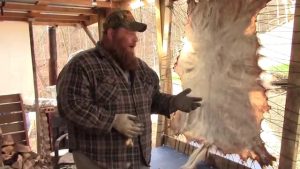
To stop the hide from becoming too stiff, you need to soften it. You should remove it from the refrigerator and put it on the drying rack. Use a cloth to wipe the excess brain mixture and then soften the hide by running a large stick back and forth on it till it is soft and pliable.
The post An Easy Way to Preserve and Tan the Hide of a Deer appeared first on The Prepper Journal.
from The Prepper Journal
Don't forget to visit the store and pick up some gear at The COR Outfitters. How prepared are you for emergencies?
#SurvivalFirestarter #SurvivalBugOutBackpack #PrepperSurvivalPack #SHTFGear #SHTFBag


No comments:
Post a Comment