Saturday, December 17, 2016

Survival Group Selection: Would You Take Yourself?

Written by Guest Contributor on The Prepper Journal.

Editor’s Note: This post is another entry in the Prepper Writing Contest from GoodPrepper. If you have information for Preppers that you would like to share and possibly win a $300 Amazon Gift Card to purchase your own prepping supplies, enter today.


Survival groups whether you call them that, a Mutual Aid Group, “The Team”, or any other monikers have become ever more popular over the past few years. While I think this is a fantastic idea for those of us that see what is coming I also see a lot of online bragging in forums about how “prepared” their group is followed by 3 paragraphs detailing firearms purchases and maybe some references to a few members being ex-military. Tactical skills are great but I see two problems with the way most individuals and groups approach them.

First, people tend to focus nearly 100% of their time, money, and attention on the sexy gun stuff with nearly nothing left over for the other skills that make for a well-rounded survival group.

Second they tend to overestimate their tactical abilities. I once heard it said that buying a gun (or dozens of them) doesn’t make you a marksman any more than buying a piano makes you a pianist. Having been in the military doesn’t necessarily mean a person has much competency with firearms. Many units only get to the range twice a year and almost never with pistols. Add to that the vast majority of those in the military (all branches) aren’t trigger pullers but rather are in support functions sitting on the FOB or on a ship out at sea and you will see why having even someone with a deployment under their belt also doesn’t guarantee you have a gunfighter on your hands. I myself was in the army for 15 years to include a year in Afghanistan but recently I had to come to face the fact that I was a mediocre marksman and a poor gunfighter (2 different things) at best. Now after several years of spending thousands of dollars on quality training instead of buying more guns (I couldn’t properly fight with) I have improved by leaps and bounds and wish I had half these skills when I was deployed.

Are you as good as you think you are with a firearm? On a related side note how is your gear? Of course you won’t know the answer to this unless you have gone out and run it hard in a realistic class setting. I recently had a coworker that went out and bought the latest cool guy holster everyone on the internet told him the Israeli soldiers were using (so it must be good then, right?). He went to a class I recommended for him and 30 minutes into the class the holster broke into pieces. Had he not gone out and really run the thing he would have been potentially betting his life on a bad piece of kit.

I myself was in the army for 15 years to include a year in Afghanistan but recently I had to come to face the fact that I was a mediocre marksman and a poor gunfighter.

But back to the topic at hand, if many survival groups are mainly made up of people whose only skill set is “providing security” and for some reason you found yourself looking to join a group either now or after a collapse, would you take you? If you are honest with yourself the answer is probably “no”. The reason is, you’re just not worth the calories it takes to feed you when running gun battles might only be occurring 0.001% of the time in any given week or month depending on your location (if they are more than that you might want to relocate). So the next question is what other skills do you have or can you develop to be worth someone taking you in?

What skills do you bring to a survival group?

I personally see the following as the new member value hierarchy. This is based on the composition of prepper groups I have seen firsthand or read posted about. If your entire group is made up of a commune of expert farmers and ranchers then that skill set would obviously not be as high a priority. So in order of low to high for me:

Guy with a gun– Low value, even lower if they have the low skill-set and poor equipment many firearm owners do. (90+% of preppers)

Guerrilla Gardening

Gardener– Someone who regularly kept a backyard garden, this person might also have learned to can their excess. You definitely won’t have to shoot it out with the zombie mutant biker hordes every day but you do need to eat every day! (20% of preppers….most preppers meant to develop this skill but “never got around to it”, “didn’t have space”, or “insert other excuse here”).

Communications person– Someone who knows their stuff, not the guy that went out and bought the $30 Baofeng UV-5r and plans to learn how to use it later and doesn’t want to get licensed because “when the SHTF there won’t be no FCC around to stop me”. I’m talking about someone who has accumulated the extensive equipment required and trains on it regularly. This guy can run something like PSK31 digital mode transmission to still communicate around the world during even the most challenging propagation conditions. He might also be your power person because he has spent a lot of time researching batteries and solar setups to keep his rig running while out in the field for extended periods. This guy might even be higher up than I have listed, after all without him you might literally not know what is going on in the world beyond what you can see from your window. (Less than 5% of preppers)

Someone who knows their stuff, not the guy that went out and bought the $30 Baofeng UV-5r

Farmer/Rancher– This person devoted their livelihood to raising food – either vegetables or livestock of some combination of both. They understand how to produce on a large-scale and how to deal with procuring the inputs needed and dealing with the unused byproducts. (Less than 5% of preppers)

Medical professional– TRUE medical professional. While taking a CPR class and buying an Israeli bandage is nice this is not the same thing as being in the medical profession. Also while natural medicine has its place as off the shelf medicine becomes scarce you will want someone who has experience operating on people at an EMT level or above to address trauma and is expert at diagnosing larger issues such as whether an infections requires a gram positive or gram negative antibiotic to treat. (Less than 1% of preppers meet this category.)

In SHTF, you won’t be able to count on medical treatment being available.

I’ve surely missed some here like skill sets here like someone who is an expert in human waste sanitation, or a logistician that can track your supply usage or even something more exotic like a blacksmith. Part of this is because I don’t think these are full-time jobs unless you have a very large group and partly because the purpose of this article isn’t to feed you the right answers. What I want to get you thinking about is that if you step back and look at what your own group would need or imagine the needs of a group you are looking to join, would you take someone like yourself in?

You might not like the answer so pick something higher up the hierarchy and get to work! Much like anyone that tells you that they don’t have 20 minutes a day 3-4 days a week to exercise is lying so is anyone that says they don’t have the time or money to learn a new skill. You may not be able to become a doctor but in my case I decided I would become a ham radio operator. It seemed daunting, I didn’t grow up around this stuff and in the military I just called over the S-6 private to fix my radio in the MRAP whenever it wasn’t working. Turns out it is VERY EASY and inexpensive to get your license in amateur radio. Whole articles have been written about it but I will say it really only takes about 45 minutes of studying every night for 10 days to 2 weeks and then about $10 (or sometimes free) to sit the test and you’re on your way with a Technician class ticket. Now get to know the old guys at the ham club in your town that administered the test and you’ll be amazed at how generous they are with their time, they’ll even let you use their equipment for free! Plus who here doesn’t know how to use YouTube to learn almost any new skill….for free! I’ve since upgraded to General and then Extra class (the highest level). I have put together a highly portable mobile set up and I get out in the field to test my equipment and refresh my skills at least twice a month. That’s just one example of how you can build worth as a group member beyond being the “gun guy”.

Lastly if you decide you only care about guns and are “too cool” to learn anything else at least learn as much as you can not only in training and tactics but also maintenance and repair. Attend an armorer course and acquire the tools and spare parts to do the work. You still won’t be worth as much to me as a farmer but you won’t be a dime a dozen.

I realize this article might offend some but hopefully it gets you thinking and honest about your value especially if you are currently a “lone wolf” looking for a pack. People have covered how to find other preppers but I wanted to include some information on how to be as valuable as possible once you find them. Good luck and get learning!

If you liked this article, please rate it.

The post Survival Group Selection: Would You Take Yourself? appeared first on The Prepper Journal.


from The Prepper Journal
Don't forget to visit the store and pick up some gear at The COR Outfitters. How prepared are you for emergencies?
#SurvivalFirestarter #SurvivalBugOutBackpack #PrepperSurvivalPack #SHTFGear #SHTFBag

Prep Blog Review: How to Survive Winter In The City

Winter survival

Winter holidays are just around the corner and I am sure you are dreaming about unforgettable moments with your loved ones. But don’t lose focus from your prepping and be ready to overcome any survival situation, even though you live in the city.

For today’s prep blog review I’ve gather five articles with useful tips for winter survival in urban areas.

1. 5 Strategies To Survive In The City When SHTF

Survive in the city

“When we think of survival and disaster preparedness the images most people conjure up are basically rural. Preparedness is all about being ready to harvest the essentials from the land, and there’s a distinct echo of pioneer families about it all. But is this realistic? The latest figures, from 2015, show that 82% of Americans now live in urban areas. If you’re one of them, being ready for the worst brings a whole new set of challenges with it.

In rural America space equals time. People are more spread out, and that buys time in all sorts of ways. Civil disorder will take longer to spread, giving you time to prepare. You probably stockpile essentials anyway, rather than buying them a few times a week from the convenience store, so you have at least some reserves to fall back on. In a city it’s different. You’re in close proximity with thousands or millions of other people, and things are a lot more precariously balanced. If the SHTF in a city it’s going to do it fast, and you need to be able to react fast to stay ahead of events.”

Read more on Ask a Prepper.

2. 7 Greatest Dangers for Preppers in the City

Dangers for urban preppers

Although I think it’s possible to survive most types of disasters while living in the city, that doesn’t mean the city isn’t more dangerous than the countryside. By choosing to remain in the city, you are facing several potential dangers, and it’s important that you be aware of those dangers. In this article I’ll cover the 7 greatest dangers for preppers in the city.

Scarcity

“One of the biggest drawbacks to hunkering down in a city is the lack of resources and space. Big cities are not typically self-sustainable, and instead have many lifelines of food and supplies shipped in from a multitude of locations.

Food is a vital resource that will quickly become scarce. Foraging is a short-term plan at best, since grocery store shelves don’t restock themselves and your average downtown area isn’t exactly teeming with herds of game.

The natural way to combat a food shortage is to already have a stockpile available. If you have the space to do so, stock up on several months of an emergency. And if you don’t have the space, then make space. You should also have an escape route planned and a bug out location to go to.”

Read more on Urban Survival Site.

3. Winter SHTF Planning and Preparation

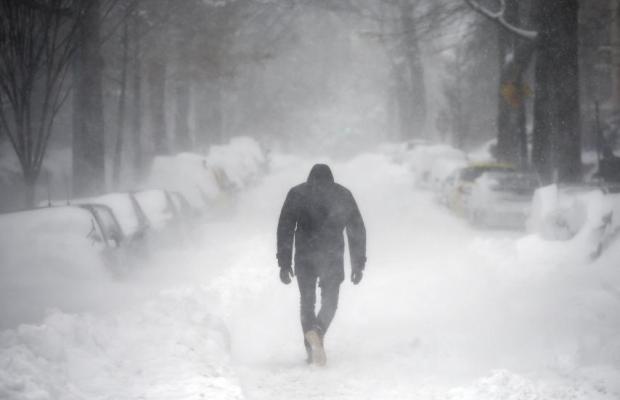
Snow Storm

“Currently enjoying the first real Winter storm of the season up here in Canada and I must say I really like it. Got me thinking about those things relating to Winter survival that are either not really talked about or, worse yet, ignored. I am assuming you do not have a massive solar array and geothermal power. I am also assuming you live in the snow belt meaning two to five months of Winter and arctic temperatures.

It is Snowing. A lot!

Here at work I just opened our Storm accommodation plan so staff can sleep overnight rather than risk life, limb, and fenders trying to get home as 20cm of snow falls (8 inches). They have the option to sleep in warm, dry, secure location and get a free meal voucher.

Awesome deal but in SHTF when it snows hard it gets complex. Stay or go? I’d stay put until the obvious storm front has passed me by as I really will have no idea if the snow is stopping in an hour or going to keep dropping the next three days.”

Read more on The Prepper Journal.

4. DIY Heater for Emergencies

DIY Heater

“Each year, as the weather gets colder, I receive emails from readers who lose power in their homes or apartment.  They are worried about heating their space when the power is out.

I have written about keeping your apartment warm in the winter without power.   The following article provides some good instructions on making a homemade heater with items that are easy to obtain.  Please note this DIY heater is not meant to replace a heating system.  The flower pot heater is a backup so you can heat up a room in the event that power is out.”

Read more on Apartment Prepper.

5. Prepping for a Blizzard

Prepping For A Blizzard

“Few can deny the common sense behind preparing for something that is definitely going to happen, yet every year, an impending winter storm sends people rushing out to the store at the last minute, prepping for a blizzard that is due to hit in mere hours.

Every winter, if you live in certain climates, blizzards are going to occur. Usually, at least one storm will hit that will cause you to be snowed in.

Often, those storms mean you will also lose power. There is the inevitable rush to the store for milk and bread, during which people battle it out for the last supplies left on the shelves.”

Read more on The Organic Prepper.

urban_survival_cards_optin_620x350

This article has been written by Drew Stratton for Survivopedia.

1 total views, 1 views today

Rate this article!
[Total: 0    Average: 0/5]


from Survivopedia
Don't forget to visit the store and pick up some gear at The COR Outfitters. How prepared are you for emergencies?
#SurvivalFirestarter #SurvivalBugOutBackpack #PrepperSurvivalPack #SHTFGear #SHTFBag

Friday, December 16, 2016

What did you do to prep this week?

Well, folks, it’s that time again… you know where you use an anonymous name to tell others what you did to prep this week, thereby giving them ideas and encouragement to further their own preps. And that’s the goal to become a little better prepared each week so that you will be as prepared as possible when the balloon goes up, bursts or whatever.

But before we get started I’d like to thank Peter W, Mike D and Tammy B for their contributions via Paypal this week. Thank you very much, it is appreciated. If you too feel that this site has helped you in some way, and you...

Read the whole entry... »


from TheSurvivalistBlog.net RSS Feed
Don't forget to visit the store and pick up some gear at The COR Outfitters. Are you ready for any situation?
#SurvivalFirestarter #SurvivalBugOutBackpack #PrepperSurvivalPack #SHTFGear #SHTFBag

How Chemistry Class Saved My Life

Written by Guest Contributor on The Prepper Journal.

Editor’s Note: This post is another entry in the Prepper Writing Contest from West Texas Backpacker. If you have information for Preppers that you would like to share and possibly win a $300 Amazon Gift Card to purchase your own prepping supplies, enter today.


While in high school chemistry class you would have been called a geek or nerd if you ever truly believed that “I am going to use this one day,” while everyone else was saying “I am never going to use this in my future, so why must I learn it now?” I’m here to tell you today that I was that nerd that believed such things and further studied chemistry for another five years into college.

During my academic career my interests always sparked when I learned about chemicals that could be used for some medical treatment, or were able to create an exothermic reaction and generate enough heat to produce a combustion of sorts. One that was very particular to me was a chemical called Potassium Permanganate (KMnO4). Potassium permanganate was especially interesting because if mixed in the proper quantities it can be used as an aseptic treatment to prevent infection on wounds and injuries. To add to its unique properties if mixed with a locally bought form of glycerin it would create an exothermic reaction to cause a small flame to form.

Now that I have given you some background information I will tell you of my experience when chemistry class saved my life. During the fall semester of my junior year in college I joined a backpacking adventure group that was composed of individuals, whom all shared the passion to learn survival skills and backpacking techniques. Being a rookie in the world of prepping this group caught my interests. So as meetings began to start and we practiced various skills such as cooking over fires, knots, survival skills and techniques. As we continued expanding our knowledge we also planned our first outing into the back-country of New Mexico during the month of October.

We assembled our gear and packs and planned out our route with enough food to last our 30 mile trip into the wilderness. Along with the checklist of items that we were given that would be necessary for any camping trip; I thought it was necessary to pack my trauma kit, and some chemicals for a chemistry experiment. This experiment was to take place towards our highest elevation at 13,000 feet above sea level and to be as much for entertainment for the group as an experiment for me.

We trekked for two days up and further into the back-country until the only tracks we saw were our own and the native wildlife. As the group approached the summit the weather began to rapidly change and thunderclouds started to form. We had made a group decision that in order to get back into the tree line for cover, we needed to summit the peak and descend on the other side as quickly as possible, because the route back down on the ascending side if caught in a storm would become even more dangerous due to its steep and narrow trails than the route descending on the other side.

Moving with a purpose the group quickly summited the mountain while fighting the wind that was gusting approximately 60-80 miles an hour the entire time. As the group began the descend one of the female hikers tripped and tumbled down the steep rocky path and received a moderate laceration on her knee. Quickly I dumped my pack and my skills as a nurse took over. I quickly had another member pour approximately a teaspoon of potassium permanganate in a one liter water bottle and shake it until dissolved while I readied the bandages and wraps for her knee. I cleansed her cut with our prepared aseptic solution and bandaged and wrapped her knee so that she could continue down the best she could.

Shortly after our unfortunate event our luck continued to fail and heavy rainstorm began just before we reached the tree line. Quickly the group of six gathered firewood, and threw together a tarp lean-to for shelter. Wet and miserable some of us were experiencing early signs of hypothermia, and we all desperately wanted to feel some small amount of warmth. Several members tried various means to start-up a fire from lighters, storm-proof matches, to even burning their own cotton shirt to get a flame to arise and light our fire. However the wind was awe to powerful and would extinguish our flame before it could ever catch.

It was then I remembered my plans to do an experiment and rushed to my bag and removed the small baggie of potassium permanganate and small bottle of glycerin I picked up at the store. I paused before I began and looked back on my previous trials with this combination. I remembered back home in Texas at 3500 feet elevation it would take approximately 5 seconds to generate a flame, but at this elevation and wind I knew my chances would be limited. So then I figured I’d better go for broke and used my remaining supply of both ingredients. What seemed like an eternity ended up only being about a minute before the greatest sight of our lives appeared.

A huge, bright fire-ball arose from our stack of tinder and kindling, and the group simultaneously began tossing larger logs onto the fire for it to chew on before the wind would have a chance to counter its warm punch. Our fire was a great means for improving morale and keeping at bay the clutches of hypothermia. We were able to dry our wet clothes, cook a warm meal and drink some tea and hot chocolate under the tarp until the rains subsided. After the rain stopped and we were all dry and full we set up our tents and crawled into our sleeping bags for much-needed rest. Once we woke up that morning it was as if the rain had cleansed the mountain of any bad juju, and we finished our adventure safely and pleasantly back to the truck.

There were numerous lessons learned from my first trip into the back-country that I have since benefited from. Most importantly the one that I and the group agreed on was that if there hadn’t been a chemist in the group then we all undoubtedly would have had a much more difficult time fending off hypothermia than we did that night.

If you liked this article, please rate it.

The post How Chemistry Class Saved My Life appeared first on The Prepper Journal.


from The Prepper Journal
Don't forget to visit the store and pick up some gear at The COR Outfitters. How prepared are you for emergencies?
#SurvivalFirestarter #SurvivalBugOutBackpack #PrepperSurvivalPack #SHTFGear #SHTFBag
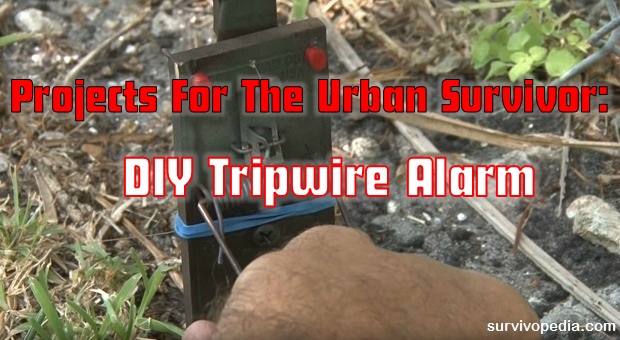
Projects For The Urban Survivor: DIY Tripwire Alarm

DIY Tripwire Alarm

Tripwire alarms are among the simplest yet most effective ways for setting up a home security system.

If you don’t want to spend hundreds or even thousands of dollars on sophisticated pieces of equipment, today’s article is aimed at helping you to design and build a tripwire alarm for your home, dirt cheap and crazy simple – as in budget-friendly and easy to install.

As far as DIY jobs go, making your own home security system is among my top ten best ever. It’s fun, instructive and, most importantly, embraces the essence of prepping: “be prepared, son, be prepared.”

What Is a Trip Wire Alarm

Let’s begin with the basics: what’s a trip wire alarm? Well, as the name suggests, you just run a “wire” across a pathway you want to protect: in most instances, a door entrance, or a gate on your property, or whatever.

Then, if an intruder walks through and trips over the wire, an alarm is activated. Keep in mind that what I’ve described above is the most basic type of a tripwire alarm, as it refers to an actual wire and all that. Obviously, as we live in 2016, there’s always room for improvement.

Now, speaking of “traditional” tripwires, they’re incredibly simple, very intuitive and fairly easy to set up. But in our modern day and age, when wireless technologies and electronic components are dirt cheap and readily available at any Radio Shack or hardware store, we can go a step further and go a little bit more high-tech.

Regular tripwire alarms – the classic variety, so to speak – come with a built-in inconvenience, i.e. you’ll have to actually run a physical wire or line from the tripwire to the alarm itself.

If you want to protect a far-away location or a room or door inside of a building, you’re going to need a lot of wire, making it pretty difficult to set up.

However, you can get around this logistics nightmare fairly easy via high-tech (dirt cheap, don’t worry) gear, by using a small radio transmitter that will activate the alarm without requiring 5 miles of wire and what not.

But let’s not get ahead of ourselves. Let’s start with the basics, shall we?

The conventional tripwire alarm, the one I’ve told you about in the beginning, consists of a line stretched across a path. Once an intruder trips over the respective line, the alarm is triggered.

Wired tripwire alarms are the most commonly used setups when it comes to homeowners installing them themselves, because they’re cheap and easy to install basically anywhere.

And learning how to DIY a tripwire alarm is very easy and fun.

If you want to learn more survival hacks, we recommend these Urban Survival Playing Cards that every prepper should have. Relax, have fun and learn more than 52 life-saving tips.

urban_survival_cards_optin_620x350_1

Types of tripwire alarms

  • Classic direct-tripwire alarm, i.e. the line stretched across a path, directly connected to the alarm using a wire/string/cord;
  • Laser/infrared tripwire alarm, which, instead of a wire/cord stretched across the path, uses an invisible laser/infrared beam;
  • Radio frequency tripwire alarm, when the tripwire assembly is connected with the alarm wirelessly via a radio transmitter.

The good news is that you can DIY at home basically any of these three using dirt cheap gear and basic tools.

Let’s begin with a classic in that field: the BANG tripwire alarm. The BANG particle refers to the actual alarm, which consists of ring caps.

So, for this low-tech and highly effective DIY project, you’ll require the following materials:

  • a mouse trap
  • fishing line
  • tent pegs
  • ring caps
  • screws
  • nails
  • rubber bands.

This type of tripwire alarm is the ideal solution for securing outdoors objectives, such as the perimeter of your home or a camp site. Needless to say, this project is very cheap, fairly easy to DIY and it works awesomely (the BANG part will scare most intruders away in a jiffy).

The basic idea behind this DIY project is that once the intruder trips over the wire, the mouse trap is activated and as it triggers, it detonates a ring cap, making a loud BANG. Pretty smart, huh?

Video first seen on kipkay

However, there’s even a simpler design for a classic tripwire alarm. First, you must select a location to set up the actual tripwire. Again, this is mostly an outdoor project that can alert you to the approach of a wild animal or various intruders. You must choose wisely, i.e. a place where you’ll have to actually walk to get into.

As the intruder passes by, his feet will catch the trip wire and trip an alarm. Obviously, the tripwire must be inconspicuous at a casual glance, or else your alarm will fail miserably. You’ll have to attach the trip line to a fixed location, between two trees for example, or between two rocks, roots or whatever. The idea is that the assembly must be stable enough to pull on the alarm itself when somebody trips over your wire.

Now, as per the alarm, you can use anything, including your imagination. Here are some suggestions: a string of noisy tin cans or an actual siren or whatever, provided it’s loud enough to warn you about an incoming danger. For example, you can use a string of tin cans stretched in a network-fashion hung between trees or something similar.

However, in our day and age, tin cans are kind of obsolete, so instead, you can use a cheap electronic siren. Here’s an even cheaper version of this type of trip wire alarm, which uses a battery and a clothes pin for creating a short circuit upon triggering, i.e. no sound, but a flame. This one works best during the night, obviously, provided is someone watching.

Video first seen on southernprepper1.

Here’s a project about DIY-ing a remote tripwire alarm, which requires building a small radio transmitter to activate the alarm via radio-waves.

Video first seen on Make.

Last but not least, this is the uber-high tech laser tripwire alarm, a fairly easy DIY project for your home security that will require a couple of mirrors, a cheap laser-pointing device and 10 dollars’ worth of electronic parts available at any Radio Shack or on Amazon. Using the laser tripwire alarm, you’ll be able to secure your entire house via an array of light beams which, unlike in B rated movies, are totally invisible and impossible to avoid.

Video first seen on Make

I know there are a myriad of designs and solutions with regard to tripwire alarms, but I’ve tried to select the easiest to build and to install. Try the project that suits you the best and start practicing your urban survival skills.

Get more than 52 survival secrets to survive any urban disaster or breakdown. 

This article has been written by Chris Black for Survivopedia. 

24 total views, 24 views today

Rate this article!
[Total: 0    Average: 0/5]


from Survivopedia
Don't forget to visit the store and pick up some gear at The COR Outfitters. How prepared are you for emergencies?
#SurvivalFirestarter #SurvivalBugOutBackpack #PrepperSurvivalPack #SHTFGear #SHTFBag
Thursday, December 15, 2016

Winter SHTF Planning and Preparation

Written by Huples on The Prepper Journal.

5/5 (1)

Editor’s Note: This post is another entry in the Prepper Writing Contest from Huples. If you have information for Preppers that you would like to share and possibly win a $300 Amazon Gift Card to purchase your own prepping supplies, enter today.


Currently enjoying the first real Winter storm of the season up here in Canada and I must say I really like it. Got me thinking about those things relating to Winter survival that are either not really talked about or, worse yet, ignored. I am assuming you do not have a massive solar array and geothermal power. I am also assuming you live in the snow belt meaning two to five months of Winter and arctic temperatures.

It is Snowing. A lot!

Here at work I just opened our Storm accommodation plan so staff can sleep overnight rather than risk life, limb, and fenders trying to get home as 20cm of snow falls (8 inches). They have the option to sleep in warm, dry, secure location and get a free meal voucher. Awesome deal but in SHTF when it snows hard it gets complex. Stay or go? I’d stay put until the obvious storm front has passed me by as I really will have no idea if the snow is stopping in an hour or going to keep dropping the next three days.

This means in the Winter season you always need to have a Winter bug in kit on you at all times you know you cannot easily get back to home base. You should always have a compass on you in SHTF as fog, rain, and snow can easily get you lost real fast even close to home base. This is my minimum gear I’d have on me if venturing any distance in the Winter season in Southern Ontario away from the home base.

  • Emergency bivvy bag. Many makes of these are available. Get an expensive one you can reuse. In SHTF you cannot reorder from Amazon easily.
  • Emergency stove and fuel. The goal here is to boil water for hot drinks and food and to get a bit of heat. I’d use my BioLite but a basic rocket stove made from an old number 10 tin can would work great. Carry fuel and ignition. Snow means getting a new supply might be impossible. The BioLite Wood Burning Campstove is expensive and heavy but really awesome on fuel usage and heat. It also charges a good light source (get the orange one not the blue version)
  • The clothes I’d be wearing would be Winter proofed. Look up and learn how to dress for Arctic temperatures. I’d have extra gloves, hat, socks, and leg/arm thermal wrapped in the pack as well.
  • Metal water container that can be used to boil water. Some emergency filters won’t work so well in minus temperatures however hard you suck on the ice!
  • Emergency shovel. Dig a hole and then a ditch around the base so water will run away from you. Consider covering it to make a snow cave. Know how to do this safely.
  • Those high calorie life boat rations and MREs would also be great in this situation. I’d want 5000 Cal minimum but 10000 Cal would be safer. Candies and a couple of boil in the bag meals will help with variety.
  • A couple of Mylar survival blankets and a 6 by 10 piece of transparent plastic sheet. The better the survival shelter, the warmer you will be.
  • 50 feet of paracord.
  • Decent amount of duct tape
  • Folding saw and a knife in case fuel is available
  • Flash light that works without solar or batteries. Hand crank or squeeze (I use the BioLite for this one).
  • Sun glasses
  • Sun screen. I never use it except in the Winter. So easy to burn your face

At this point you are probably rolling your eyes but this kit is for my local conditions not for yours! Deep snow is a killer up here and will be much worse in SHTF. Mostly I won’t venture more than 2 miles from home base and this is my minimum carry is for extend trips beyond 10 miles in December through March. It would be a lot smaller for local sojourns. If you can safely get back to home base then get back to it. If unsure bug in and make camp until it is safe to walk home. What did I miss? What should I not carry? Let me know in the comments and why of course.  I excluded snow shoes as I’d have them on if it had already snowed but would not carry them if it had not. I can make a pair using the folding saw, knife, and paracord if I had to.

Winter Storm in SHTF from your cozy bug in or bug out location

If you have prepped right and have been lucky then you should have adequate calories and comfort to survive the storm. If not then you are SOL. However these are some of my ideas that might be overlooked by some in SHTF.

Toilet Paper

I have loads of it but it will run out. The supply I have will be withdrawn from circulation after the first four weeks of SHTF. I will tell my girlfriend she has to let go of the past and embrace the now. Likely she will leave me at this point and I will have doubled my supply of white rice! The paper toilet paper will be strictly only for use if sick or in deep Winter (and her birthday. I’m not heartless). I have precut a large supply of linen toilet ‘paper’ from old jeans and shirts. In the warmer months that is what is used to wipe and polish. In deep Winter the ability not to have to wash the toilet rags will be an awesome asset (pun intended) and avoid a real problem in arctic temperatures.

Fuel

For me this will be wood. I plan worse case and SHTF forever. You need about 5 cords of wood to get through the Winter here but around my bug in home I can collect wood for sure 10 months of the year so this can be reduced. At my bug out cottage that drops to about 8-9 months of the year. Sure I can hack down standing dead trees but realistically how many of them will be close to me abode after a few months? Wood gathering and storing will be a continual endeavor all year-long. Collect birch and ignition materials will also be a yearlong activity. However if I can avoid chopping and processing wood when it is below minus 10C then I absolutely will. Sure that makes for great looking prepper videos but to me it means they did not prep smart.

Exercise in SHTF should be avoided and exercise in arctic temperatures should only be done in a life or death situation. Like the bears your plan should be to basically sleep through the worst of the Winter. Using wood from one or two years ago that has been stacked properly is a great idea but think for a moment. In SHTF you will probably use your entire stock of wood in the first year if you neglect to add to the supply each and every day. Like toilet paper you never, ever can store enough wood but try.

Fuel Storage

Fuel for me means wood. I do not expect gasoline or propane to be widely available in SHTF and do not construct my preps around anything that cannot be found or used 5 years down from the SHTF event(s). Wet wood needs to dry before use. Cold wood needs to be warmed before use as does kindling. You can, with effort, work around this but why even try? Your bug in or bug out place needs to be able to accommodate a large supply of wood and ignition material inside the place. Going outside in a storm is the last thing you will want to do and having an ample inside store means not opening the door and prewarmed and dry wood. Have lots of mouse and rat traps as the critters love wood piles. In the Spring store wood at least 30 feet from your shelter. Have a wheelbarrow to help move wood and water around when there is no snow.

Water

If safe to drink then snow can easily be melted provided you have lots of wood available. Remember to add unfrozen water to the pan and add snow slowly in small amounts and stir. If can and will burn if you just dump it into the hot pan. You need to use a window or an additional chimney to direct the steam outside your shelter. Water vapor gets everywhere and moisture can kill you in SHTF. Bang a few empty cans together and use aluminum foil to funnel the rising steam into the cans. Have it open through a window and use bubble wrap and duct tape to seal. Block the inside end with cloth when not creating steam.

You should have a lot of treated water stored year round but remember to move it inside the warm room before freezing starts to occur.

Home is where the hearth is

One room is your home in the deep Winter. Heat that one room and use plastic sheets and Mylar to reflect heat back into the room and trap heat in the room. Bubble wrap should have been hoarded for all the windows before SHTF. Hand plastic sheets on both sides of all the doors and avoid using them as much as possible. Stack soil and wood around the outsides of that inner room to add insulation but make sure it is in trash bags and is dry.

Set up a tent inside this room to sleep in but, as with the plastic sheets make sure there is zero risk of a fire or a melting happening. Have several fire extinguishers and a smoke and carbon monoxide alarm inside this room as well. If you cannot set up adequate ventilation do not use anything other than the fireplace to cook in. I’m using the BioLite as well as the fireplace but with the additional ventilation system for steam described above.

Plan how to gather more fuel and food in the warmer months. Figure out how to preserve that food for the next Winter. Keep mentally busy as Winter is not a great time to wander around outside when snow is on the ground. It takes far too much energy to do so and has a lot of risks.

The Roof

Have a suitably angled roof for your worst case snow fall activity. Sure you can go up a ladder and sweep it off but I can tell you a lot of elderly males get spinal injuries each and every year in Ontario from doing that. Have your roof renewed more frequently than you need as roofers will be in short supply in SHTF.

Winter SHTF is not all suffering, eh?

Can you skate and do you have frozen rivers and lakes near you? For most of Ontario’s history travel in the Winter was easier than in the Summer and this will happen again a few years into SHTF as the bridges fall and the roads fail. Good time to go out and meet the neighbors. Winter is a wonderland and a great time to think about ice fishing.

Keep a supply of pre SHTF goodies hidden away and some tinsel. December 25th or as near as you guess the date to be wrap up some presents using newspaper and eat some decent food. Sing carols and make merry. This birthday and special day celebration is what makes suffering through SHTF worth while. Never neglect to think about how to make yourself happy in SHTF even if most days it will be as awful as the weather is right now 🙂

Merry Christmas and a Happy New Year

If you liked this article, please rate it.

The post Winter SHTF Planning and Preparation appeared first on The Prepper Journal.


from The Prepper Journal
Don't forget to visit the store and pick up some gear at The COR Outfitters. How prepared are you for emergencies?
#SurvivalFirestarter #SurvivalBugOutBackpack #PrepperSurvivalPack #SHTFGear #SHTFBag
Urban Survival: 9 Tips For Living Small In The City

Living Small In The City

When you live in the country, it’s easy to live small. But what does living small really mean?

The concept is pretty fluid and has different meanings for different people, but the general idea is that you cut the fat and learn to live simply. That’s all.

Unclutter your life, physically and figuratively, so that you can open up other, better possibilities for yourself. It’s about freedom.

Here are the steps to take for living small in a big city. Read the article and look for more: a collection of survival tips can be yours easily!

We’ve surrounded ourselves with so much stuff that we don’t know what to do without it. We don’t know where our food comes from, and most of the people don’t care. We buy things, then throw them away when they break and buy new. We do the same thing with relationships.

We order huge portions of food, then throw half of it away. We buy cars we can’t afford and clothes we won’t wear. Our lives are based upon consumption and waste.

Well what would happen if all of those sources of consumption were no longer there? What if you had to grow your own food, or fix your shoe instead of throwing it away?

What if you had to get to know your neighbors, and work with them to survive? What if you were forced to give up your large living and live small?

It’s not such a horrible concept, and it’s completely possible, even if you live in an urban area that’s built entirely on the precept of living big.

As a matter of fact, learning to live small will teach you to appreciate the truly big things in life.

How to Start Living Small

Living small is a process. You can’t just go from being $50k in debt to living small. Your journey to living small will begin with tiny, fettered baby steps, but can end in long, free strides.

1. Make a List

The first thing you have to do to heal the wound is stop the bleeding. Sit down and make a list of ways that you’re living above your means. Next, figure out what steps you can take right now to live smaller.

Nobody needs a new pair of shoes once a week. Seriously, find out where you’re spending frivolously and decide if having all of those shoes is really worth being tethered to a credit card payment. If it is, then living small isn’t for you. Stop reading.

Now, make a plan to get rid of the debt. Can you really afford your apartment or would you be better off with a smaller place that costs less?

Don’t sacrifice your safety by moving into a bad neighborhood, but don’t put yourself in the poorhouse paying $2k/month in rent when you only make $3k. The big stuff will take a while to pare down. The important thing right now is to NOT make it worse.

Make a list of 5 things that you’re going to change today to live cheaper, because adaptability is one of the key attributes of a survivor. All of the things that we’re going to talk about from here on out are all about adapting a new, simpler lifestyle.

Living small isn’t about giving things up. It’s about living life on your own terms, in pursuit of your own happiness.

2. Fix Things!

Oh no – your jeans have a tear or the leg on your chair is loose? Well grab what you need and fix it! Don’t know how? Well thankfully you have the internet at your fingertips. What happens if you find out that you enjoy sewing?

You may just end up with a new hobby. Even if you don’t you’ll end up with a new skill. And you won’t be in debt any deeper. You just took your first step toward living small.

3. Learn Something

There’s something to be said for the power of learning to do things for yourself. Pick three skills that you’re interested in learning, then learn them.

Be open-minded and flexible. Try something that you may not have thought about doing up until now.

Having skills if SHTF will put you head-and-shoulders above 99 percent of your neighbors. Besides, this country was built by people who knew how to do things for themselves.

You can learn something new anywhere, anytime, even when playing cards with your loved ones.

urban_survival_cards_optin_620x350_1

4. Learn How to Barter

There are flea markets and thrift shops in every city – it’s just a matter of finding them. Learn how to barter, or at least how to haggle. It’s a trait that will serve you well, and you may just find some great stuff that you can use instead of allowing it to go to a landfill.

5. Downsize Your Life

This is, after all, about living small. Go through your closets, drawers, and cabinets and if it isn’t something you’ve used in the last year, get rid of it. I’m not talking about your wedding video, but do you really need those shorts that are two sizes too small or that ugly shirt that your great aunt Sally got you for Christmas?

Don’t throw it away – have a yard sale or give it to charity. Better yet, do you know somebody that could use it? If so, give them first pickings before you take it to charity. This is all about learning to live. Nothing feels better than to do something good for somebody else.

6. Start a garden

So what if you live in a tiny apartment. That doesn’t mean that you can’t grow your own food. There are all kinds of ways that you can garden indoors.

You can live in a city and grow plenty of things. You just have to be creative. Terrariums are great and vertical gardening is good, too.

Indoor Herbs

7. Teach your kids to live small

The path to a better world starts with our kids. Teach your children how to garden, and how to fix things. Raise them with the “living small to be happy” mentality.

Life isn’t about stuff, and now is the perfect time to teach them that life is about embracing what they have and what they can do, not about collecting material things and drowning in debt to get it.

8. Slow down

Take time to smell the roses. Literally. Don’t get so trapped in the rat race that life passes you by. Look at the clouds.

Take time to go for a walk or take a bike ride. Eat lunch in the park. Take the kids with you, but sometimes go by yourself. You only get one go-round so make it worth it. Make memories, not worries.

9. Learn about your resources before disaster strikes

You’re going to need to know where to find water and food if things go on beyond what you prep for, so learn about your local co-ops and resources. Network and find like-minded people. Holing up and making it through on your own may sound like the thing to do, but it’s not.

Build relationships. Since you’re living in an urban environment, it’s going to be next to impossible to live independently because you won’t have the resources to do so.

Know how to get out of the city if you need to. Know what’s around the city, including water sources and escape routes and maybe even hiding spots, just in case.

Living small isn’t about living less. It’s about living life in a way that makes you happy. Nobody is happy living in debt and struggling just to make it from payday to payday. Spending time with your family, and with yourself, and making your life as rich as possible is what it’s all about.

This article has been written by Theresa Crouse for Survivopedia. 

12 total views, 12 views today

Rate this article!
[Total: 0    Average: 0/5]


from Survivopedia
Don't forget to visit the store and pick up some gear at The COR Outfitters. How prepared are you for emergencies?
#SurvivalFirestarter #SurvivalBugOutBackpack #PrepperSurvivalPack #SHTFGear #SHTFBag
Wednesday, December 14, 2016

Bug Out- Building a Load out Plan for Your Vehicle

Written by Guest Contributor on The Prepper Journal.

Editor’s Note: This post is another entry in the Prepper Writing Contest from GoodPrepper. If you have information for Preppers that you would like to share and possibly win a $300 Amazon Gift Card to purchase your own prepping supplies, enter today.


Most people’s primary plan is to bug out by vehicle which makes a lot of sense given how much further you can travel and how much more you can carry. Most of us have a bug out bag that we have packed and repacked (and repacked again) and we know exactly how much it will hold and what goes where. Now how many of you have done this for your vehicle?

If you haven’t, I think you will find much like you probably did with your bug out bag, space fills up FAST!

Today I’m going to teach you one way to plan for a vehicle load out, this will do two things for you, first it will save you time in an emergency by helping you know in advance of the balloon going up what all will fit in your vehicle and where it goes. Also I will help you develop a plan to secure the load so you can travel more safety.

So where to begin? First get out a piece of paper and list out the things you intend to pack. Hopefully by now in your preps you have seen the advantage of using bins or bags to group items so you are able to stay organized and load large amounts of stuff quickly.

Next prioritize these items, what if your loading gets cut short and you have to stop what you are doing and immediately get on the road? What would you want going in there first? For my wife and I it would be our Bug Out Bags and primary weapons followed by water, medical kit, food, spare gas, tools, ham radio equipment, generator, and finally personal luggage.

Plano 1919 Sportsman’s Trunk

Once you have the list prioritized draw out the rough shape of your vehicle’s interior and start “filling” it with the items you plan to pack. So if you know you medical bag is about 1/3 of the width of the back of your SUV then draw that there with the giant vehicle repair and recovery box that you think takes up about 2/3 the width of the back of your SUV next to it. Now what can go on top of that? What can go behind it? At this point you may have to make trade-offs as to what on the priority list gets loaded first because something heavy just has to go on the bottom. That’s okay.

Now if you plan to put a cargo carrier on the trailer hitch, pull an actual trailer, or have a roof rack start “filling” this up as well. As I mentioned above spare gas is high on my priority list but obviously this is stored outside the car.

Okay so now we have a rough plan all done without having to lift anything. If you aren’t great at estimating dimensions you can speed up the accuracy of your first round draft by measuring the inside of your car and then measure some of the larger bulkier items while making your paper draft. Because I had been camping with most the items in the past I sort of knew how much room most of my things took up.

Now it’s time to physically go out and bring each item to your vehicle and see if your plan works. You will discover several things when you go to do this. First your stuff is ALL OVER THE PLACE! How many trips did you make to the basement, garage, kitchen, bedroom, storage room, storage shed, etc? Lots and in some case things weren’t where you thought they were. Imagine going through that for the first time in an emergency?! So while you are gathering the things on your list just note where they are like: “Med kit- Basement top shelf”.

Roof top storage is an often overlooked place to store many items. Make sure you have appropriate tie down materials.

I don’t expect you to store everything in one place, for one thing while it would be awesome to have everything stored two feet behind my truck but my garage isn’t heated and cooled so I wouldn’t want to store medicine in there for example. Second I don’t want all of my preps on display every time I open my garage door! So it’s okay to store things you plan to bug out with in different places but try to limit the total number as best you can and document where each item is. As an added hack I put a small piece of bright red duct tape on each item that is part of my vehicle load out to make it easier to see on shelves next to everyday items that may not be going.

Having gear stored in one location is nice, but not always possible.

The second thing you may discover is you over estimated how much space you have or you fit it all in but in the case of a car instead of a truck you may find it riding on the bump stops. I was actually pleasantly surprised to find out I went too conservative and I had more room to stack things than I planned so I was able to add to my list. Either way now is the time to fine tune and in some cases make some tough decisions as to what doesn’t make the cut. Hopefully everything you pack is just bonus because you are headed to an already well stocked Bug Out Location but I know many folks aren’t there yet. If you do have a place to store things at your Bug out Location this might be time to think about what you can live without at your primary residence and go ahead and preposition more out there.

Once you have become Tetris-master 9000 and fit everything together as efficiently as possible and in an order that makes sense (all while documenting where it came from) you need to do two final things. First ensure the things you want to be able to get to (quickly in some cases) can be. How many times have you seen the people by the side of the road unloading a trunk full of stuff to get to their spare tire? Don’t be that guy! You should be able to get to anything you may reasonably expect to need to assist your vehicle in making it to your destination. Perhaps just as importantly you will need to be able to get to anything you plan to grab should you have to abandon the vehicle and head out on foot, possibly in a hurry!

Careful planning now can save hours of wasted time when you need it.

Lastly SECURE YOUR LOAD! My initial exposure to load out plans came from my very first days in the army when it was impressed upon us how devastating something like a couple of full ammo cans flying around a vehicle in the event of an accident or roll over could be to the occupants. Most of us can imagine the dangerous road conditions under which we may need to bug out and so the likelihood of an accident is much higher than during our normal daily drives. Add to this a loaded down vehicle that will not be able to respond or perform as well as normal and other stressed out drivers trying to make good their escape and you can see why all that stuff in your vehicle needs to be secured as best possible. If you have a pickup truck this is made easier by tie down points. Do you have the ratchet straps or cargo netting you need to do so? Inside of a car can get trickier but it can be made safer. For example the ammo cans I mentioned could be wedged down behind the back of the front seats on the floor board rather than stored on top of a box on the back seat parallel to the back of your head. Use your imagination and actually try tying things down to see if you have what you need. Now add those bungee cords, ropes, and ratchet straps to your list and note their location.

That’s it, you’ve done it, you have a load out plan. I recommend you practice fully loading your vehicle for a load out twice a year. It’s a pain but it will improve your time getting out the door, reveal any items that “magically” moved from where you thought they were stored, and remind you to make updates as your packing list and especially your vehicle possibly changes. Good luck and be safe out there!

If you liked this article, please rate it.

The post Bug Out- Building a Load out Plan for Your Vehicle appeared first on The Prepper Journal.


from The Prepper Journal
Don't forget to visit the store and pick up some gear at The COR Outfitters. How prepared are you for emergencies?
#SurvivalFirestarter #SurvivalBugOutBackpack #PrepperSurvivalPack #SHTFGear #SHTFBag