EDC Backpack 2018 *OCD Organization* Vertx Gamut Review
via YouTube Video Don't forget to visit the store and pick up some gear at The COR Outfitters. How prepared are you for emergencies?
#SurvivalFirestarter #SurvivalBugOutBackpack #PrepperSurvivalPack #SHTFGear #SHTFBag

Saturday, March 17, 2018
What Did You Do To Prep This Week?
Hello, folks, it’s hard to believe that it’s been a full week since our last segment. As they say, time flies when you’re having fun or something like that… You are having fun prepping right? If not then you’re doing it wrong! Are you having fun prepping?
Before we get started with this weeks segment I’d like to invite you to go over and look at a new site that I set up a couple of weeks ago. It’s called “Dude, I’m Broke!” The site is unique in that I search out camping, hunting, prepping and related gear that’s priced at $20...
from TheSurvivalistBlog.net RSS Feed
Don't forget to visit the store and pick up some gear at The COR Outfitters. Are you ready for any situation?
#SurvivalFirestarter #SurvivalBugOutBackpack #PrepperSurvivalPack #SHTFGear #SHTFBag
How to Survive a Civil War in America
Written by Guest Contributor on The Prepper Journal.
The last battle fought on US soil was, arguably, the Aleutian Islands Campaign, which took place during the World War II, in the year 1942. Japanese Expeditionary forces landed on the islands of Attu and Kiska. However, if you define US soil as including “US territories” then the Philippines Campaign (1944–45) might be considered the last war fought on “US soil”. The wars that have occurred in our homeland have been the American Revolution (War of Independence), the War of 1812, the US Civil War – which I will challenge later, The Spanish-American War and there are disputes as to whether the Mexican-American War or the French and Indian Wars (as well as other colonist-native disputes) are considered ‘wars’ at all. We will leave that to the pundits.


So war at home has really been the stuff of movies for the past several generations.
As Preppers it is one of the things we may consider within the realm of possibilities. We certainly all prepare for a loss of the rule of law in emergencies, immediately perhaps, long-term possibly. And preparing for a war has similarities with preparing for any emergency situation, whether caused by man or nature. We consider it an important step toward staying healthy and as comfortable as possible during an unexpected event. As a result a wide range of specialty supplies are available, but the simplest supplies are often the most versatile in a life-threatening situation. Hopefully this simple guide can help you find out which supplies are essential in the event of a war on yours or our home soil.
Basic Supplies
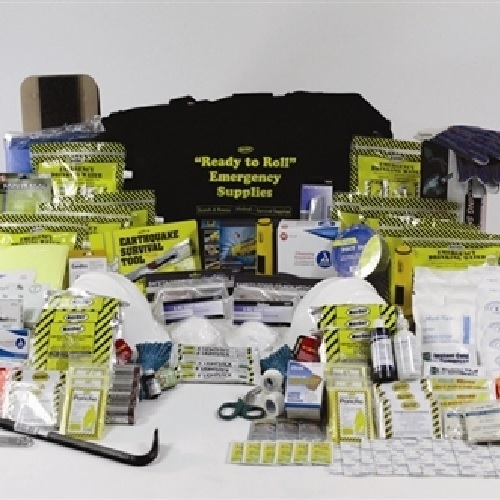
Food and medicine are nonnegotiable supplies if you need to shelter in place. Food supplies can include a variety of nonperishable items, such as rice, beans and legumes, flour, cornmeal, and canned goods. If you use a rotating system, you can easily begin building your food supply without worrying about the food expiring or going bad before you use it.
To rotate food supplies, simply purchase the things you normally buy in bulk quantities, and continue purchasing the food on a regular basis. Use the food according to its purchase date to prevent spoilage. Some types of food, such as freeze-dried meals, have an extremely long shelf life. Choose freeze-dried food if it is in your budget, and store it in a secure location that is cool and dry to preserve it for an emergency.
Bug-Out Bags
Bug-out bags are backpacks,or a similar bag, that are packed with essential supplies, allowing you to easily grab the bag and go if you need to leave home in an emergency. The bags should contain food, water, medicine, clothing, and personal supplies, such as prescription medicines or an extra set of prescription eyeglasses. It should have a 72-hour supply for each member of your family/group.
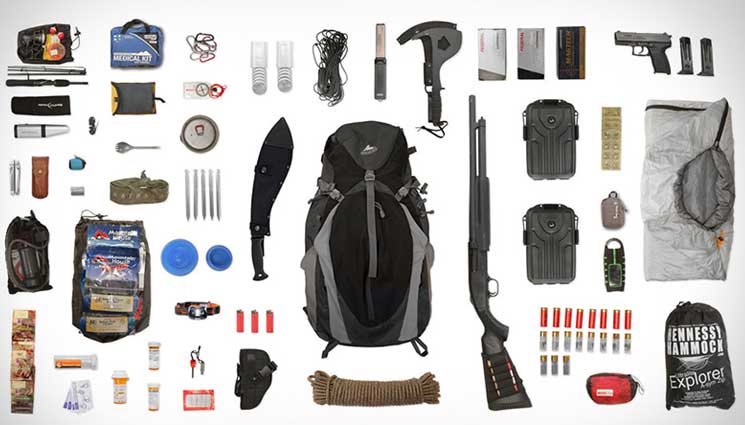
To make the bag lighter and more portable, opt for high-calorie food options that have a longer shelf life. For instance, two-thousand-calorie bars can be lifesaving when you are on the move.
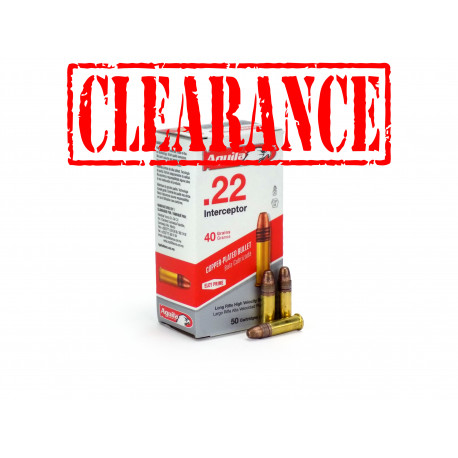 Make sure you have extra ammo packed in your bug-out bag if you plan on taking a gun with you. Extra 22lr ammo is a must-have if you want to live off the land by hunting for smaller game like rabbits, and squirrels.
Investing in water purifiers for each person is also recommended.
Water Purifiers
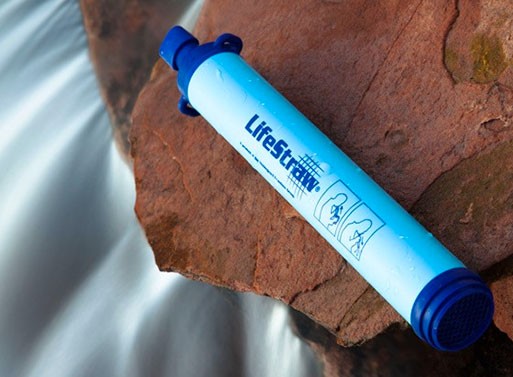
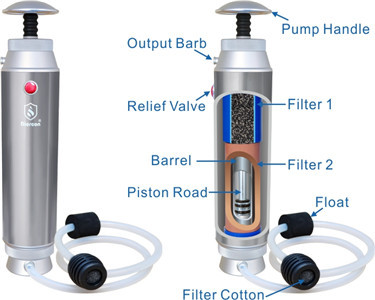
Water-purifying straws are lightweight, long-lasting, and completely portable, making them ideal for your bug-out bags. The straws allow you to drink directly from almost any water source without worrying about contaminants – as long as you read and follow the directions. Most water-purifying straws have a removable filter that allows you to easily reuse the straw for an extended time.
To make the straws last longer in a survival situation, add an extra filter for each purifying straw to each bag. The filters are small and lightweight to make them easy to carry in your backpack, and each one can provide dozens of gallons of clean water. You can also use water-purifying straws at home.
Always Be Prepared
Building your bug-out bags and emergency supplies is an important step toward preparing for any emergency, even a civil war in America. Food, water, medical supplies, and plenty of ammo are the basic supplies you need for a long-term survival situation on home soil. Add to this planning, and an understanding of the situation, which will be harder than it sounds. We are down to few, if any, reliable sources for “news” as it is, in our normal world. Now imagine a SHTF civil war where misinformation is everywhere. Every person with a ham transmitter can set and spring traps for those trying to gleam even a little intel on the situation, safe places and supply sources. In some aspects the movies and TV shows do reflect the reality that will come to pass, except for the fact that their main characters always survive.
One of my favorite books about the reality of war is Normal Mailer’s “The Naked and the Dead”. A great read, a dose of reality in a glamorized world.
Now, About That Civil War (Editor)
The very definition of a “civil war” is that it is a war to change the government of a country, a war, by definition, between citizens of the same country. By this definition the War Between the States was a civil war. However, the South did NOT fight to change the government of the country as a whole or in any state NOT a member of the Confederacy. It fought to succeed its members from the United States and form a separate nation. Right, wrong or indifferent it was not a civil war but a separatist war, and while many will write this off as “splitting hairs” it goes to the very core of KNOWING history and LEARNING from history.
The South had a singular guiding principal – to save and continue their economic model, period. Throw all the sugar coating and spin on it that you want, THAT was their singular purpose. The North, represented by Lincoln, also had a singular goal – to preserve the union at all costs, period, which was also an economic purpose. Many fought on both sides for their own reasons but these were the opposing models that could not be negotiated into an acceptable compromise, resulting in 600,000 Americans dying on American soil to preserve the union. As students of history you most likely already knew this, as a student of history my life experience has been that “lessons learned” is more an oxymoron than a reality and we suffer as a result, and my whole reason for splitting this hair. Stepping off the soapbox now.
Follow The Prepper Journal on Facebook! …and have a safe St. Patrick’s Day!

The post How to Survive a Civil War in America appeared first on The Prepper Journal.
from The Prepper Journal
Don't forget to visit the store and pick up some gear at The COR Outfitters. How prepared are you for emergencies?
#SurvivalFirestarter #SurvivalBugOutBackpack #PrepperSurvivalPack #SHTFGear #SHTFBag
Friday, March 16, 2018
Just What are you aware about writing a program work? Check your knowledge!
Just What are you aware about writing a program work? Check your knowledge!
Course tasks are a kind of separate work of pupils. It really is commonly used through the whole amount of studies and will be performed through the very first to your 5th year of learning. Depending on the aria of knowledge, subject and typology regarding the course work, any paper with this type must be on the basis of the authorized canons. It should have the following structure:
- detailed plan-content,
- introduction,
- main component, frequently composed of 2 or 3 chapters,
- conclusion = generalization.
Construction and content of introduction of a program work
The development of this course paper must start using the justification for the relevance for the topic, nonetheless it should not be too vulgar and verbose. Nevertheless, the key task let me reveal making it persuasive. You must specify why this issue you’ve chosen is entitled to be studied and exactly what outcomes it may bring.
Then we have to dwell regarding the description of this amount of growth of the subject within the systematic literature. Right Here it is important to offer the names associated with primary sources, to explain the present approaches and methods, to notice and assess the specific share towards the growth of the situation of various researchers. Nonetheless, it must be shown that there surely is nevertheless undeveloped in it, so that it is obvious what function you actually take because of it.
You will need to move to a rather difficult stage – formulating the goals and objectives of the work. This wording ought to be as clear and concise as you can. Its purpose is always to figure out the strategy and strategies of writing the job. An unconditional dependence on the written text associated with the program may be the correspondence associated with formulated goal together with achievement of tasks. Finally, it is important to deal with the methodology and research methods.
Few words in the content of other areas of paper
The majority of the program work is specialized in re solving the difficulties posed within the introduction of tasks. Frequently into the main component you can find at the least two or three chapters, all of which carries out its function within the basic logic of presentation. If you can find three elements of the primary human anatomy regarding the course work, their function can be as follows:
- First chapter – theoretical,
- Second chapter – practical,
- 3rd chapter – experimental.
In conclusion offers the link between the research carried out by the author. The next prospects for research may be used being a supplement for writing the following program documents, diploma works and theses.
The menu of utilized literary works should really be compiled according to the established requirements. If you will find applications in the work, they have been drawn through to separate sheets and so they must be numbered.
As opposed to the abstracts, reports and control, composing a training course work requires at the very least a general independency. This implies perhaps not the independency for the presentation, that is desirable in all the instances detailed, however the self-reliance of clinical thought – in terms of it admits the amount of professionalism regarding the pupil.
The student in their course work must demonstrate exactly how she or he mastered the initial skills of scientific thinking. To achieve this, it’s paper writers quite sufficient just to skillfully and competently place the problem. Problem statement has already been the first step in science.
from Patriot Prepper
Don't forget to visit the store and pick up some gear at The COR Outfitters. Are you ready for any situation?
#SurvivalFirestarter #SurvivalBugOutBackpack #PrepperSurvivalPack #SHTFGear #SHTFBag
10 ‘Must Knows’ To Survive A Gunshot Wound
In a time of social unrest and the general breaking down of society as a whole, the risks of getting shot are bound to increase. Is it possible to survive being shot? Sometimes yes and sometimes no. Whether or not you survive the shooting will be determined by a number of factors.
from Survivopedia
Don't forget to visit the store and pick up some gear at The COR Outfitters. How prepared are you for emergencies?
#SurvivalFirestarter #SurvivalBugOutBackpack #PrepperSurvivalPack #SHTFGear #SHTFBag
from Survivopedia
Don't forget to visit the store and pick up some gear at The COR Outfitters. How prepared are you for emergencies?
#SurvivalFirestarter #SurvivalBugOutBackpack #PrepperSurvivalPack #SHTFGear #SHTFBag
Home Security – One Preppers Experience
Written by Guest Contributor on The Prepper Journal.
Editors Note: A guest submission from Valknut79 to The Prepper Journal. The next Prepper Writing Contest Award is coming! As always, if you have information for Preppers that you would like to share and possibly receive a $25 cash award as well as being entered into the Prepper Writing Contest AND have a chance to win one of three Amazon Gift Cards with the top prize being a $300 card to purchase your own prepping supplies, then enter today!
Home security has become a major issue in my life. Last year, I detailed my experience of having a near break-in for this website , and since then, I’ve done quite a bit more learning about how to set up our suburban stronghold for emergency situations.
I’ve hired a consultant to meet with me, talked with friends in the military and made friends with a police officer to pick his brain, and this is what I’ve come to learn about the world of creating a safe stronghold for now, and for after the SHTF.
First, your home must be safe, but it also needs to be livable, and affordable. Livable in the sense that, yes, it would be safer to build a home with no windows, but it would also be impossible to sell when the time comes to move, and few people would be able to live happily in that kind of environment. It’s obviously better to build your home out of steel, with bullet resistant glass windows, cameras throughout, and traps set for any unknown bad guys, but that’s financially impossible for the vast majority of individuals.
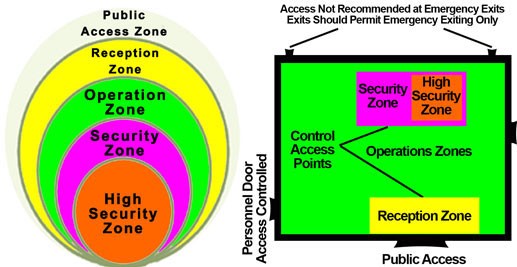
That said, I repeat, your home must be safe. The easiest way to make it safe while still making it livable is to create designated zones throughout your home and your property that have different levels of inherent safety. We’ll start from the highest security level and work down to the lowest, documenting some, if not all of the considerations that you’ll want to have.
Level 1: The Panic Room
Let’s say that a gang of well-armed thugs breaks in to your home, with the intention of not just stealing all of your stuff, but with the intention of harming you and your family. Where do you go? This area of your house is the “panic room” or the “dying room” – the place where you feel most prepared to defend the safety of your family, where the only way that your attacker is getting to you or them is over your dead body.
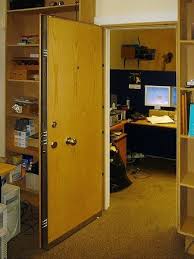

A panic room should be located centrally within your home, on the ground level, preferably in a location that has only one point of entrance – through the door you entered through – with no windows. Since this is a room that you’ll likely only use in dire emergency, you need to have a weapons cabinet, and some kind of furniture that you can use for cover. Minimal supplies are needed: some water and some first aid, maybe a snack. If you’re stuck in the panic room for long enough to require more than that, you’re probably not going to make it out at all.
Having some form of quick communication is important in this room. If you have a landline phone, make sure that this room is a part of your network. If you have nearby family members or neighbors you trust, you can set up a pair of walkies-talkies that would allow you to get the word out about your safety. Have a backup cell phone with battery pack for a final option, but that can be iffy – it’s true that any cell phone, even ones that are not current with a network, can call 911 for emergencies, but poor long-term battery storage and longer load times for starting up the phone, as well as limiting basement signal strength can be problematic.

The door is the most defining feature of this room. As all of my consultants and new friends pointed out, interior doors are not meant for anything other than being a screen for privacy. A quality exterior door, while it may look really out of place, takes up almost the same amount of space, and provides ten to fifteen times the amount of protection. To install this, you might need a handyman if you’ve never hung a door, and it may require some slight reconfiguration of the beams near the door to accommodate the slightly larger size, but the safety boost is substantial. Installing a quality lock will buy you precious minutes as you prepare for your final stand. There’s quite a bit more to doors in the next section, but suffice it to say that a standard interior door make of plastic and foam is not going to keep anyone out.

Our panic room is where we keep our safe, our weapons, our file cabinets of important paperwork, and some of our in-home water storage, but nothing else. This needs to be a place that is reserved for emergency, or it may fall into disrepair.
Level 2: Your Home
The remaining areas of your home are your second level of defense – an area where you are well-defended, and have some strong safety features, but where you can still conduct your daily life. Because the interior of your home is where you’re going to spend the majority of your time away from work, it must have substantially better security and defense features than your backyard and immediate outdoor surroundings (Level 3) or your wider outdoor area or neighborhood (Level 4).
As your home will be your primary defense from not only a human attack, but also from storms or other natural disasters, it is essential that you maintain your home’s structural integrity. Three tasks should be taken on with regularity: a formal inspection of your home’s siding and roofing, an energy audit, and thorough maintenance of trees and other obstructions.
The inspection will identify areas where your siding or roofing needs repair or replacement, and, if you get a very good inspector, he can assess the property for potential hazards like areas where flooding could occur. Fixes here are not cheap, but the fact is that very few people have their homes inspected after purchasing them, and as homes change over time, there is value in updating the knowledge of how well your home is doing, and how those repairs you’ve made are holding up.
The energy audit will help to identify cost-savings opportunities for installing power-saving features (new lightbulbs, insulation, windows or doors), but perhaps just as importantly, it can identify areas of leakage around your home – tiny holes that will likely go undiscovered by inspectors which can turn into major issues, such as allowing pests into your home, or where ventilation that is supposed to direct fumes away from your property instead deposit them back into your home in the attic or into your utility room. When we had our energy audit, we were able to identify that the dryer hoses that were supposed to point to the outdoors had slipped out of place, allowing our moist air that was supposed to discharge out to partially discharge in between our walls, causing water damage to the inside of our drywall. We were also able to finally plug the two mouse holes that were underneath our siding, allowing the vermin in.
Finally, the maintenance of trees or other outdoor obstructions future-proofs against a storm that could take out your trees and deposit them on your roof. Doing annual maintenance is significantly easier than replacing the bones of your house.
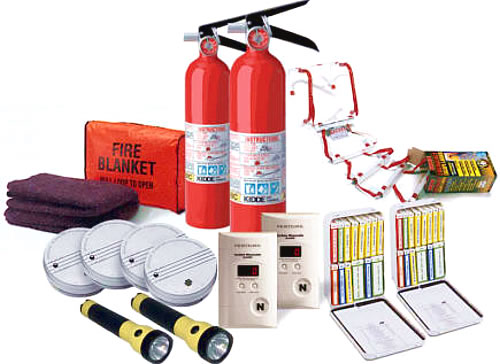
Smoke detectors, a carbon monoxide detector, and some fire extinguisher complete your basic disaster prep.
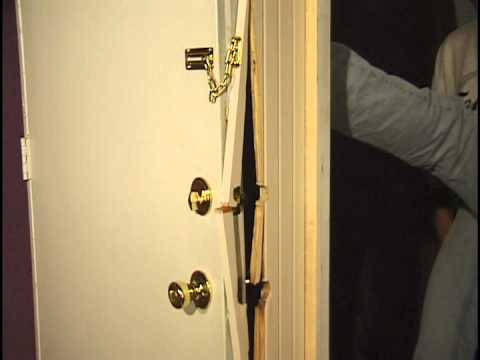
In addition to protecting from damage, you must also protect from the human element. The basic defense against intruders is a strong set of doors and windows. Your home is not a bank safe, and this is not a movie scene where the robbers will try to drill through the sides. Intruders will want to enter through the front or rear doors of your property, and will use windows if they want to be stealthy. They’re not going to drill through your home’s siding.
For your front door, make sure it is a solid wood, wood or fiberglass door, and ensure that it has a good lock, deadbolt and latch. Some of the latches your can purchase from stores are metal-coated, but platic on the inside, so getting something heavy is ideal, even if you have to pay more.
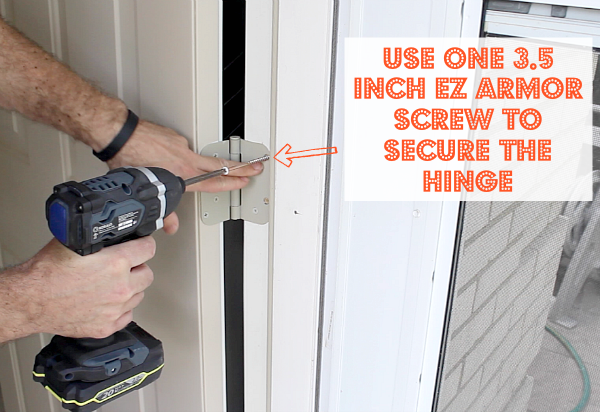
In addition to the locking mechanisms, you can purchase metal plating that you install on your doorframe that can help reduce an intruder’s ability to kick in your door. The wooden frame will break under stiff, sudden pressure, but a properly installed metal frame can make that nearly impossible.
It’s possible to purchase horizontal bars that you can install on the interior of your door that you can hide next to your door, and install in an emergency that would prevent the door from opening inwardly, although this may be better suited to use only in your panic room, as it looks a little out of place in a traditional home.
In addition to a solid locking system, I think that a large peephole is a must. There is a newer style of peephole available in which the apeture on the inside of your home is about two and a half inches wide, while the exterior peephole is obscured using mirrors. You can see everything more clearly, at a wide angle, so you can more easily identify who is outside at your door. Video doorbells are an option for today that certainly has a certain “cool factor,” but these are of no use in a grid-down situation, and they can be hacked. The advantage of using them for now is that potential intruders will not know if you’re home or not, as you can answer your door without opening it from any location using a phone app.
A sliding patio door is significantly less safe than a French door system, which would be ideal. It’s possible to get locks for the top and bottom of patio doors, as well as the much less secure handle lock. In addition, you may wish to get a thick wooden dowel rod that sits in the well of the opening door to prevent opening. It won’t stop someone from breaking through, but the noise that causes makes it a bad choice for most burglars.

All of the securty on your door is likely overkill, but makes your home a fortress. Once an intruder figures out that they can’t get in, then they’ll go for the next point of entry – your windows. These are significantly less easy to defend than your door, but you can get some basic security features that can go a long way. First, invest in good windows. Newer windows make it difficult to open them from the outside, often come with quality built-in locks, and multiple panes of glass that can make them slightly more difficult to break. This isn’t much defense, but it’s something. It’s also possible to install a shatterproofing film on your windows, and this is recommended for any ground floor windows. Again, it won’t make much of a difference if someone truly wants to break in and cause harm, but it should provide a little more defense, and outside of barricading or boarding up your windows, there’s not a lot more you can do to protect them.
If you live in a hurricane or tornado zone, you probably already have suitable window coverings that you can fit on in case of a storm. If you don’t live in those locations, fashioning these might be something to consider in an SHTF situation. If nothing else, blackout curtains that you can hang from your interior windows to mask the occupants does provide a substantial amount of privacy if you don’t want others to know if you’re home, how many people there are, or what you’re doing in your home. If you have backup power during an outage, for instance, these may allow you to enjoy a normal life without alerting the neighbors to the fact that you have electricity.
Once the basics are taken care of, invest in a security system.
Before purchasing a security system, do a basic assessment of your home. If you wanted to break in, where would you do it? Count the number of windows that are accessible from the ground level, and any in your backyard that can be reached from a ladder. Add one for every door to the outside, including your patio door. This is the number of sensors you’re going to need, along with an alarm.
Installing your own security system is a breeze. Mount your alarm in a central location. It’s just a matter of matching up your pieces and screwing them into the doorframe or windowsill. You connect them to a central monitoring system, whether it’s a smarthome setup or a specific device designed to control the setup. An app on your phone should take care of the rest.


Using a security system does require vigilance. It’s easy to forget that it’s there, and forget to arm it when you leave. Of course, it’s also possible to forget to disarm it when coming home, and be welcomed into your house with a loud blaring siren. If this happens too often, you may decide to avoid using the system all together. That said, the most important part of the security system is not the setup, but rather, the sign that comes with it. Yes, this is a blatant advertisement that you’ve installed something to lookout for when breaking into your home, but if you were a burgular, you’d likely avoid the homes that went through the effort and instead target the homes without a system at all. If you know that you’re not the type to follow through with the arming and disarming of the security system, then the sign at least is quite helpful.
Should you install a camera system? That is something that each reader will have to decide for themselves. First consider that installing cameras throughout your home that are wired to a central monitoring device is a much more substantial project than the security system. Of course, there are wireless cameras, though these can be hacked, and many transmit the images they take to the internet, which is something that I never feel safe with. Some systems have professional monitoring, in which someone is possibly looking in on what you’re doing inside your home. Aside from that, when I wrote a piece on having my home potentially burgularized earlier this year, I had a camera setup that caught a decent view of the perpetrators faces, and the police couldn’t do very much with those images – unless someone is murdered, it is unlikely that your local police will use facial recognition software or a criminal database to identify your attackers. That said, a camera mounted in a high spot along your roof could be a very strong deterrant for would-be burgulars, and you can use cameras very easily to identify any attackers who are breaking into your garage, shed or other outbuildings on your property.
Level 3: Your Immediate Area
The immediate area around your home is a space that is, by nature, difficult to define. For our family, in a suburban home that is fairly well spaced out, we’ve decided that this area is essentially our backyard. Other families may decide that this is too wide or a net, or too small, depending on what areas of your property you and your family decide to use.
Why choose the backyard? This is where the majority of our family’s long-term preps are held – our gardens (for growing new food), our garage (where camping supplies and bug-out bags are stored), our rain barrels (for extremely long-term water storage), our grill and firepit (for electricity-free cooking and heat), and our root cellar (for storing what we grow but cannot immediately eat). Other families may have some livestock areas that they wish to include, or outbuildings like a greenhouse, shed or guest house that they may wish to include in their Level 3 protection area.
Defining the Level 3 area is based on which areas of your property you could limit yourself and your families’ movements to in case of emergency. If we needed to stay home without leaving, we’d use the inside of our home and our backyard – there’s no need for us to go anywhere else in dealing with common emergencies, so long as we can stay at home. We could tend to our gardens, find water, cook food, have access to all of our essential supplies, and our daughter could play in a relatively safe environment.
What makes this environment safe?
We are meticulous about putting away tools. A screwdriver, knife or power tool left out could make a weapon for an intruder. A ladder that is forgotten and left outside could tempt an intruder to try a second or third floor window – one which you may not have protected with your security system, and which you can be less vigilant about locking, especially if you frequently open it to enjoy a breeze. If an intruder decides that they are going to try and break in from a level 3 area of protection, then they will not find what they need to make their job easier on my property.
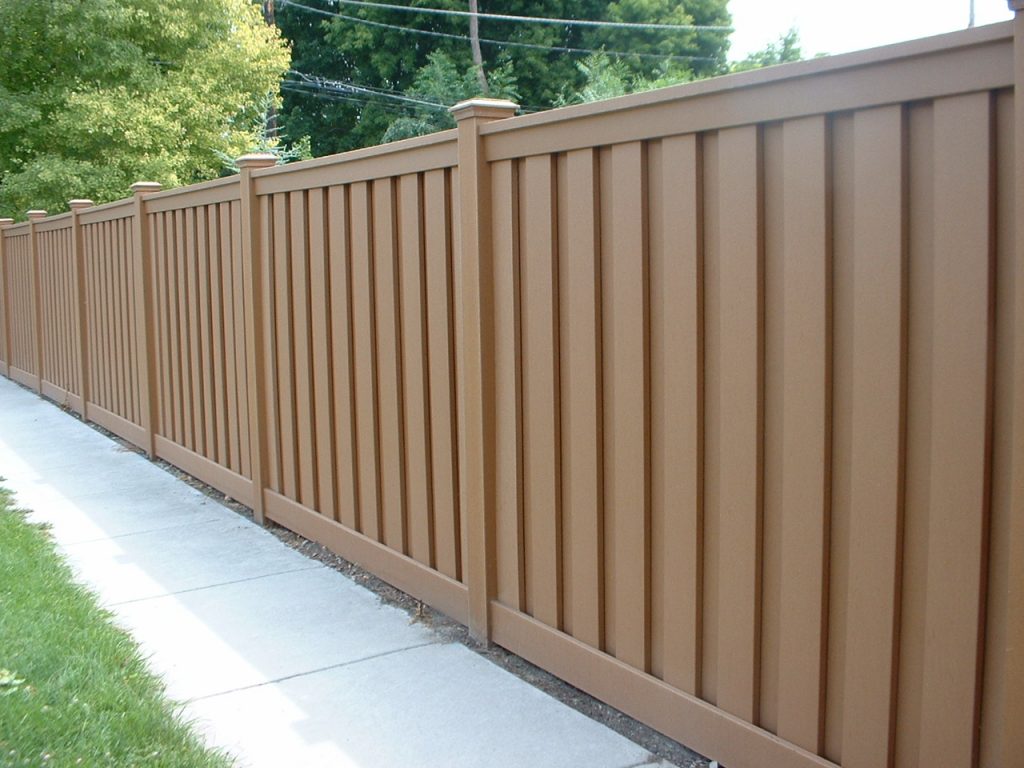
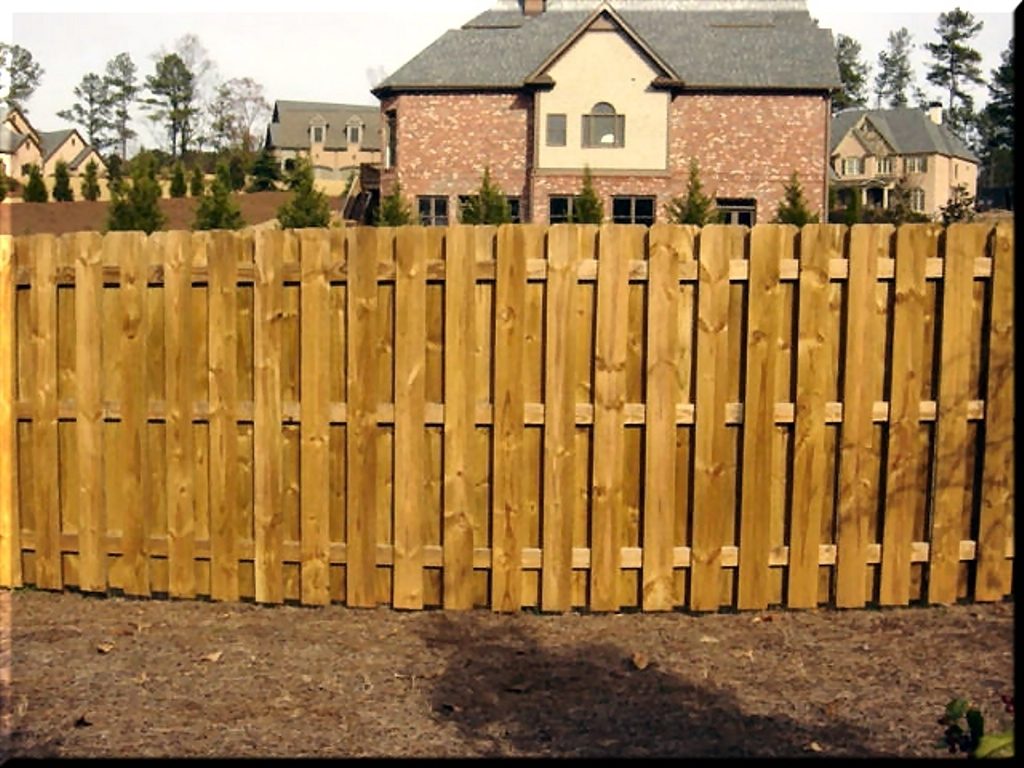

Secondly, we maintain our privacy with a solid composite wood fence. Our fence is made of six-foot-tall full panels, with no gaps showing in between, and has a decorative lattice on top which increases the height by a good 8 inches. Some security experts believe that having a fence is not the greatest idea on certain types of properties, particularly if you are attempting to hide your presence entirely, as it draws attention to an area where you may wish to maintain secrecy. For the majority of properties, however, a fence allows you to go about your business in relative secrecy. One of our neighbors kept a small chicken coop in her backyard against local regulations, and was not caught for many years because she was able to hide it behind a solid fence. You won’t need to worry about anyone spying on your children playing in the backyard, you won’t need to worry about neighbors noticing your orderly and prolific survival gardens, and intruders cannot be certain if you or your dogs are currently occupying the space without revealing their position. Privacy is an important weapon, as it introduces a “fear of the unknown” element to your property.

Chain link fencing provides no privacy, and can be easily climbed. Vinyl fences are basically just opaque sheets of plastic – they provide the privacy you’ll need, but they can be knocked over quite easily and wear out in just a few years. Wood fences are certainly high quality, but require annual maintenance. I think that the clear winner in terms of strength and the amount of maintenance they require over a lifetime is composite wood. It is as strong as wood, and doesn’t need to be painted or sealed to maintain it’s integrity. If someone wants to breach your fence, they’ll be able to, but you certainly wouldn’t want it to be easy.
Our fence has a gate to the side of the house and the driveway. On the panel right next to the fence, we hung two signs: “Beware of Dog” and “No Tresspassing.” We do have a dog (more on animals later), but even if we did not, we’d still have the sign, as it is another technique to deter would-be intruders who may not be comfortable dealing with an animal of unknown size and ferocity. The “No Tresspassing” sign functions similarly to the “Beware of Dog” while being more general, and is just a reinforcement against troublesome teens looking for a shortcut through our yard to get to the park, or too-eager salesmen who don’t respect privacy like they should.
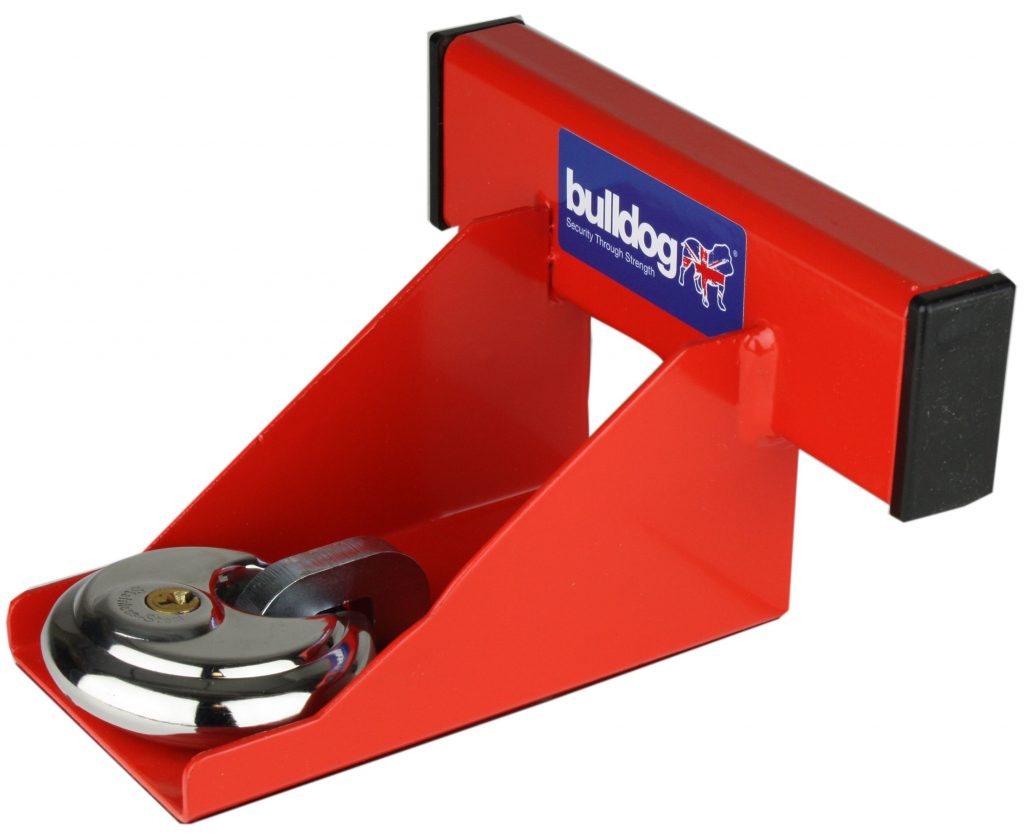
You’ll note that as we step down in security levels, we lose a lot of options – intruders can climb any fence, knock down any panels, and it’s not as difficult to break into gate locks. Storms can easily penetrate the area, but many of the basics from level two remain important in level three, and it is recommended that you put a padlock on your gate if you have one, and keep all doors that lead into your home or your outbuildings locked as well, despite the added safety that the fence can provide.
Level 4: Your Greater Area
For those with an urban or suburban property, your “greater area” probably just means your front yard. For those with a sprawling rural property, this includes all of your land, and often some of the surrounding countryside. If you live in a gated community, condominum or apartment, you may want to include your entire neighborhood.
Let’s talk about the rural areas first, as these are more difficult to deal with. If you raise livestock, or plant corn or wheat fields, then you need to use the land, and you need to put up some kind of fence in parts to help keep your livestock in. With crops, a fence is not strictly necessary, but may serve as a reminder that the crops are not free for the taking – they belong to someone who is willing to claim them. In these situations, a 6 foot tall composite fence is out of the question, and a simple ranch fence is going to suffice. If nothing else, a fence may serve as a reminder to potential passersby and squatters that the property has been claimed, and that someone may be living there.
Again, fencing your property in this way does cause some attention to be drawn to your home base, and it is certainly worth considering if you’d like to drop the concept in lieu of maintaining a secret compound. Signage, like a “Private Property” or “No Trespassing” signs, are also something to consider, and are by no means necessary, but are something that may be valuable if you live in an area with people coming by.
An alternative to fencing would be to set up a tripwire system, which would be particularly effective in a forested environment. The tripwires are simply taut wires low to the ground, between trees or rocks, connected to some kind of device, be it a trap or a loud, noisemaker. This will alert you to their presence, and probably scare them half to death, and it allows you to defend your property if they do decide to move forwards. Traps, if they catch people, can open you up to some significant liability, even if they are trespassing, so you may wish to investigate some local laws if you want to install anything truly dangerous.
For practical purposes, it is essential that people be allowed to approach your property. Whether it’s a friendly neighbor looking to borrow a cup of sugar, or a mailman delivering a package to your doorstep, or even an insurance adjuster, electrical company worker, or county tax analyst, it wouldn’t be wise to snare them or drop them into a pit during an everyday exchange prior to TEOTWAWKI. Because of this, you need to take a good look at the Level 4 area you wish to protect, and identify where it starts, where it ends, and how you want people to approach your compound.

Secrecy, such as an unmarked, well-hidden home, is certainly one form of dealing with people, but requires a very specific type of property – likely a homestead or a permanent bug-out shelter where you likely don’t live full-time, and probably something with a great deal of land surrounding it, and a good number of trees or other obstructions. For everyone else you need to define your area with various physical features.
Your fence is a good place to start, particularly if it is a ranch fence system, a chain link, or something that allows you great visibility. Almost no normal people will jump your fence to approach your property when they could simply walk around to the path you’ve built in your landscaping. If they decide to do this, you certainly can prepare for defense. Other good path blockers include a low row of bushes or flowers outlining the edge of your property, or a row of trees, although this latter option does limit your visibility.
The goal for an outline border should be to naturally funnel visitors, friendly or otherwise, to a specific, well-lit path towards your well-protected front door. Whatever you choose should be enough to deter people from walking across your lawn or, really, in any other area they want to, and to force them to approach from a direction of your choosing. The border you choose should be tall enough to be noticed, difficult to step over, well-kept enough that visitors don’t think it to be accidental, and low enough that it provides little cover – you want to be able to see you visitors coming, and not be surprised by someone crouching behind the rosebush.

Outside of lower-level windows, it is advisable to plant a bush directly in front of the window that would prevent interlopers from looking in and/or having a steady stance from which they could remove or enter the windows. Spiked bushes are a first choice, while dense, wooded bushes like a yew or arbrovitae would make a good second choice. These bushes should be trimmed low enough that you can get a full view of the front of your property from the inside window. Not only does this provide good securty, but it’s also a fairly common and well-liked look for most suburban homes, and it won’t hurt your property value.
Pathways are important feature as well. A smooth paved path from the sidewalk to the porch or front door landing is certainly an option, but a rougher, more natural path made with stone gravel forces people to walk more slowly to avoid the small tripping hazards that is “naturally” implied. A winding path, one that takes visitors across the path of your front window, will allow you to see visitors before they ring the doorbell, and will delay a visitors’ arrival at your doorstep by a few seconds. We remodeled our property to include a path with one long wind that runs from our driveway up to the front door, and we used one side of the path as a small flower and herb garden, and we noticed that neighbors and postal workers both lingered over the small garden and walked carefully to respect what we had planted, and it allowed us the added peace of mind of knowing that we have extra time to respond to potential threats knocking at our door.
Paths around the remainder of your property are less important than the one that approaches your home, and may even be something you wish to obscure as much as possible. Any time you step down in level, but particularly from Level 3 to Level 4, you are subjecting yourself to a greater lack of security. If your attackers know where you’re going, such as from a side gate from your backyard to a stream or river on your property, they can see the path just as well as you can, allowing them to plan a strike.
In order to see someone approaching your home at night, it is advisable to ensure that the areas you want to funnel guests to and from in your front yard are well-lit. Security lighting, which goes on during the night time whenver something passes in front of the sensor, is a powerful tool, as it provides visibility and has a certain scare effect for burgulars that may dissuade them. As these lights do turn off, it is in your interest to also have a decent amount of switch-operated lights if you do happen to see something you want to investigate further. In our home, outdoor lights are put on timed switches inside, so that they automatically come on at night, and we don’t need to think about making sure that we’ve set them on.
Other Security Considerations

When our home was almost broken into early this year, our locks were not the thing that kept the intruders outside, it was Golem, our 90 pound American Bulldog. He is a sweetheart, and had the intruders made it inside, he was as likely to nuzzle them as strike, but his large frame and powerful jaw make him an imposing force, as does his strong hearty bark. The would-be burgulars heard one warning bark from him, saw him sitting in the kitchen, and ran as fast as they could. Golem is not an attack dog, and he’s certainly not trained to fight. He doesn’t need to be. He’s big, he’s a little scary, and he is one of our home’s most important security features. Think of a dog as an “always on” monitor that can roam the house or the yard, and who is always fiercely loyal to those who treat him well. I believe that a dog’s effectiveness as a security measure is directly proportional to his size and his “scare factor”, so I do not consider smaller dogs nearly as good of an option.

Smart home devices are all the rage, and are more frequently being used for home security, including digital locks and door handles, security systems, and smart lighting systems that you can use outside. Smart homes, like wifi cameras, and any other devices which connect to the internet, can be hacked, and using the more popular ecosystems (Samsung Smartthings, Echo, Google Home) are probably more likely to be hacked. The only hack for a keyed deadbolt is to have the key, which makes it much more secure.
Have you changed the locks in your home since you bought it? When you purchase a new home, the former owners are supposed to turn over all old keys, but they may not have. If you purchased your home while the former owners were under duress, in a short sale or foreclosure situation for example, they may not particularly like you living in their home. In addition, if your former home’s owner gave an emergency key to a trusted neighbor, or hid an exterior key to the home hidden somewhere, like underneath a rock in the garden, then it’s possible that more keys exist that you don’t know about.
Traps or weaponry can also be used in an SHTF situation, deployed around your home and on your formerly welcoming pathway. Two nails bent and twisted around each other creates a weapon called a caltrop, which can be scattered around your property to catch in the boots and shoes of intruders, or to puncture tires. If you want to set up a snare or fall trap, then this is possible as well. Like other advice regarding traps, some jurisdictions will punish the property owner for harm done to anyone on that property, whether they’re supposed to be there or not. See this article for some legal clarification on intruders and your ability to set traps and defend your home.
Security, as defined above, is not simply a measure of how strong your defenses are, but how much smarter you are than an attacker. Concepts like privacy curtains, masking the number of people who are home at any given time, are just as important, if not more important, than having the most secure locks, the most indestructible fencing materials, or the best panic room. Certainly, having good locks on your doors is a boon, but if intruders have no intention of breaking into your home because of good signage, a threatening dog, or a security system sign on your front lawn, then that is just as good.
Follow The Prepper Journal on Facebook!
The post Home Security – One Preppers Experience appeared first on The Prepper Journal.
from The Prepper Journal
Don't forget to visit the store and pick up some gear at The COR Outfitters. How prepared are you for emergencies?
#SurvivalFirestarter #SurvivalBugOutBackpack #PrepperSurvivalPack #SHTFGear #SHTFBag
Thursday, March 15, 2018
EDC Pack Update 2018!
EDC Pack Update 2018!
via YouTube Video Don't forget to visit the store and pick up some gear at The COR Outfitters. How prepared are you for emergencies?
#SurvivalFirestarter #SurvivalBugOutBackpack #PrepperSurvivalPack #SHTFGear #SHTFBag
via YouTube Video Don't forget to visit the store and pick up some gear at The COR Outfitters. How prepared are you for emergencies?
#SurvivalFirestarter #SurvivalBugOutBackpack #PrepperSurvivalPack #SHTFGear #SHTFBag
Howto Speed Your Mac Immediately Up
Distinct Google Desktop Research Cache The Google Cache that is neighborhood includes whole traces of one’s surfing activity that is net. how to set turn imessage iphone Howto clear the Google Desktop Research Cache: Google Desktop Search permits you to delete individual items from Google Desktop research cache (index). You’ll also learn clean your footprints and how to eliminate the complete pc cache that is google. You’re only removing objects the present version remains in your pc, mail, or on its site. If you want to get gone the original, live model of them, from where it lives, just like web site, email, or any file that Google Desktop does not learn about you’ve to eliminate it. If you remove the initial, live type of web site, or a contact, report, and you’ll find clones of it within your Google Pc cache, these copies won’t be routinely removed. You’ll have to expressly eliminate them to have rid of the copies as well. They stay in it until you remove mac clean up disk space them, after goods come in your cache.

Fry s Residence
How to remove a note from your own Google Desktop search cache Press the email link that is Remove in the page’s upper-right corner. Remember, this simply removes https://cleanmacsafe.com/ the meaning in the Pc cache, not. In case you look at this concept again while Pc is jogging, it’ll return into your cache. You can find particular plan to pick a product from Google Toolbar research heritage record and delete it, to get rid of specific products from your search background of Toolbar. This can help Google Toolbar users to preserve keywords that are helpful ever checklist. You can also remove keywords that are embarrassing that you could have inserted inside the Google Toolbar. To eliminate every piece in the Desktop Search cache, you restart the software and can delete the google pc search directory. This may reset the Google desktop listing.
AppCleaner – critiques from SnapFiles and download
Phase 1. By clicking the dish symbol near GDS, and pick leave. Step 2. Start the directory: D:Documents and Options login Nearby Settingsapplication dataGoogleGoogle Desktopsome alphanumeric code (12 numbers) You’ll discover documents that are big with random extensions like ht1 wh that is cf1. Erase all files in this directory except the files that start with sidebar Step 3. Restart Desktop Search.
from Patriot Prepper
Don't forget to visit the store and pick up some gear at The COR Outfitters. Are you ready for any situation?
#SurvivalFirestarter #SurvivalBugOutBackpack #PrepperSurvivalPack #SHTFGear #SHTFBag
Not So United Nations
The United Nations has been problematic for us here in the USA since its inception in 1945. While its original purpose was predominantly that of maintaining international peace, it has become largely focused on promoting social progress, one of its secondary purposes.
from Survivopedia
Don't forget to visit the store and pick up some gear at The COR Outfitters. How prepared are you for emergencies?
#SurvivalFirestarter #SurvivalBugOutBackpack #PrepperSurvivalPack #SHTFGear #SHTFBag
from Survivopedia
Don't forget to visit the store and pick up some gear at The COR Outfitters. How prepared are you for emergencies?
#SurvivalFirestarter #SurvivalBugOutBackpack #PrepperSurvivalPack #SHTFGear #SHTFBag
The Survivorman Zones of Assessment: The Key To Your Survival When The Situation Seems Hopeless
Written for The SurvivalistBlog.net By Les Stroud aka Survivorman
 You can imagine almost any survival situation. Dumping a canoe in a set of rapids. Falling off the edge of a cliff. Or simply, you’re lost. So what next? What exactly do you do now? In reality, your next move could be the most important thing you ever do. It will be perhaps the most important decision you ever make. That next step may ensure your survival or doom you to a tragic end. At the very least, this decision may make things much more difficult than they need to be.
First and foremost, when faced with a survival or...
from TheSurvivalistBlog.net RSS Feed
Don't forget to visit the store and pick up some gear at The COR Outfitters. Are you ready for any situation?
#SurvivalFirestarter #SurvivalBugOutBackpack #PrepperSurvivalPack #SHTFGear #SHTFBag
Eating Healthy While Camping
Written by Guest Contributor on The Prepper Journal.
Editors Note: Another guest submission from Michael Everett to The Prepper Journal. Get ready – the next Prepper Writing Contest is coming! As always, if you have information for Preppers that you would like to share and possibly receive a $25 cash award as well as being entered into the Prepper Writing Contest AND have a chance to win one of three Amazon Gift Cards with the top prize being a $300 card to purchase your own prepping supplies, then enter today!
Camping allows you to exercise, re-energize and enjoy yourself away from your busy and stressful schedules. A psychical connection with nature helps to relax your mind and heal the body. Most campers will agree that you’ll have the best experience if you eat healthy. Are you ready for a camping adventure? You shouldn’t compromise your eating habits while at the campsite. You can be outdoors for a weekend or several days and still eat healthy. The basic advice is to plan well before leaving.
Planning ahead will ensure you eat healthy and maintain a healthy body. You don’t want to lose or gain unnecessary weight just because you were camping. Here we are giving you some simple ideas to make your camping easy and fun.
Create A Plan In Preparation For Camping

Planning before the actual camping will ensure you have everything in place on the camping day. First, consider the number of days you will outdoors. Next, consider the foods in your diet. Then write a menu. Some people might see this as unnecessary, but it’s actually quite necessary. When writing the menu, including all the foods that you require and those that can be carried outdoors. And exclude ALL the foods that tend to “not sit well with you” even when you are home and have access to multiple bathrooms.
Precook Your Meals

Take some time to precook your food at home before your travel. Precooking your meals will save you time when you are away. You’ll also have flexible time to enjoy the campsite rather than cooking. Remember you want to relax, stay cool and enjoy yourself away from home. In this case, you will realize that precooking your meals will make a very big difference.
Depending on the nature of the camping site, you may have limited access to utensils, cooking supplies and even a reliable heat source. Apart from saving you time and stress, precooking your meals will also help you to maximize on the nutrients. You can include nutrient-dense foods in your diet. Better foods will make getting that campfire smell out of your clothes and gear easier.
When precooking your meals, use can use the right recipes, create your own spin that’ll ensure you include enough nutrients in your meals. At home you will have sufficient and ample time in your kitchen, better equipped no doubt, than any forest or campsite. Try to include various foods from all food groups in each meal. These food groups include protein and dairy, fruits, grains and vegetables. Perishable foods can be included in your meals, but remember to use a dependable fridge or cooler. Alternatively, you can vacuum seal perishable foods, refrigerate them properly and consume them at your leisure. Your food can be kept in the tent safely to prevent damage by mice. However, if you are bear country, then food storage and preparation take on a new and significantly different meaning.
Carry Some Snacks

A camping trip includes fun activities that require you and other use more energy. Hiking, swimming, mountain climbing and outdoor activities all require extra fuels for the body. You can pack some snacks in preparation for the extra nutrition needed. You can shop for some nutritious snacks to include in the diet. Another idea is to make homemade snacks and carry them along. BTW, any trail mix that does NOT include M&M’s is a poser. Just the normal snacks that you prepare at home can be carried for the outdoor event. The common fruits like pineapples, watermelon, grapes, pears and apples can be sliced and packed ready for the camping adventure, and most come dried. You can also think of things like celery and carrots when making snacks. The idea is to make nutritious snacks that will give you enough energy during the camping adventure.
Make Sure To Include Fiber
Some of the foods that people tend to prepare and carry to the campsite have little fiber. Foods like processed meat, packaged snacks and campfire treats have low fiber. You should consider fiber in your meals to prevent constipation, especially when camping. When precooking your meals and making snacks, remember to include good sources of fiber such as whole grains, vegetables and fruits. If you want to avoid fresh fruits, you can pack dried fruits. Each serving should have enough volume of fiber to help you prevent constipation.
Manage Calories In Your Meals And Snacks

Some foods might have high-calorie content while others have low-calorie content. Very high-calorie content is usually not healthy because it might cause an unwanted spike in your blood sugar as well as that undesirable increase in body weight. On the other hand, very low calorie “rabbit food” might not give your body the needed nutrients. Dried fruits and nuts are good sources of both fat and protein. All the foods that have been suggested in this article are good for a healthy diet. But it is good to be aware of the calorie content in your packed meals. Your foods should have ideal nutritional value to make your camping adventure fruitful.
Remember To Stay Hydrated Throughout The Camping Adventure
Keeping your body hydrated is always good. During hot summer months you should hydrate your body sufficiently but don’t be fooled by colder temps, colder is drier in most places and fluid loss is always present. Staying hydrated will curb your hunger in between meals and promote all of your normal body functions. If the temperatures are very high, you will want to hydrate your body more. Water is the best source for body hydration. Other good sources to hydrate your body are electrolyte-rich sports drinks and juices. If possible carry sufficient water to the campsite and avoid high-sugar drinks because they will increase unnecessary calories in your diet.
Final Thought On Eating Healthy While Camping
When planning a camping trip, don’t just neglect your eating habits. Remember you need enough energy for the camping activities. As you may have noticed, there is a ton of nutritious meals as well as snacks that can make your camping enjoyable and healthy. Simply plan your meals in advance and consider the nutritional value of the foods you require to stay healthy throughout the camping season. Remember to rely on a campfire to stay warm while camping. Are you ready for camping? Prepare some healthy meals and make the event memorable.
Author’s Bio:
 Welcome to Rainy Camping. I am Michael Everett, a camping expert who loves to travel and explore the wilderness throughout the year. I aim to visit every campsite in the world and offer smart advice to the novice adventurers out there.
Follow The Prepper Journal on Facebook!
The post Eating Healthy While Camping appeared first on The Prepper Journal.
from The Prepper Journal
Don't forget to visit the store and pick up some gear at The COR Outfitters. How prepared are you for emergencies?
#SurvivalFirestarter #SurvivalBugOutBackpack #PrepperSurvivalPack #SHTFGear #SHTFBag
Wednesday, March 14, 2018
Survival Skills & DIY Preps – Fire Starters
Written by R. Ann Parris on The Prepper Journal.
One of the things that has made us a successful species is our ability to wield fire. Getting a fire started and variations to make them efficiently and specific to purpose have huge benefits in survival settings and off-grid, no- or low-power scenarios.
Some of the information out there gets used and passed along without a lot of consideration to the conditions, though. I think sometimes we’re just looking for a DIY or a “craft”, especially if we’re on a tight budget, and don’t really test or think it through before we go whole hog. Sometimes we’re overlooking something even more compact or versatile. Sometimes, having two parts to a whole still separated has a lot of value. And sometimes, I rarely even see the most effective helpers mentioned.

Candles v. Waxed Dryer Lint
One of the things I see constantly is using dryer lint (and makeup pads) for fire starting. It regularly makes me crazy. It’s just that it’s not the be-all fire starter – alone, or with the addition of wax – that it’s made out to be.
Hey, I have some. Bags, front seat of truck, grill kits. Plain lint can be enormously helpful for catching a spark … if you also have other tinder ready and waiting.
The lint (and cardboard) catch first. Lint is a smoldery or flare-up catch, depending on your laundry. The amount and type of cardboard used around the lint extends the burn time a little.
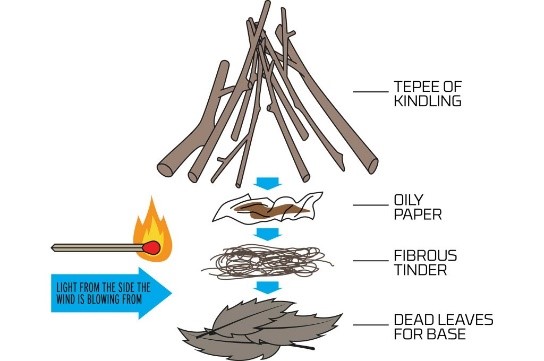
They don’t actually burn long enough to “catch” charcoal, arctic stove bricks, or most kindling sticks, especially in wet or windy weather. You still largely need a feather stick, twisted wads of paper or cardboard, dry grasses, or hen-of-the-woods innards – the same tinder sources you’d use to nurture a spark or match if you didn’t have any handy fire starters.

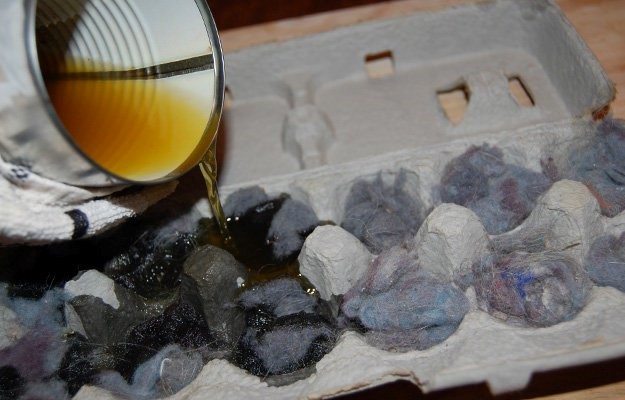
It’s largely a waste of wax and time to make the “better” versions – where you pack an egg carton or muffin cups with your dryer lint and then pour melted candles, paraffin, or beeswax over them. Those versions are actually even tougher to get started with strikers, paper matches, and Bics, too.
You’ll have a lot more success getting fire helpers like wax cakes and the wax-dipped makeup pads started if you scuff them up good before lighting, even if they’re in cupcake wrappers or egg cartons or combined with cotton strings trimmed from clothing or used garden twine that are supposed to be helping you there.
I guess if you used a big chunk of the egg carton, not just one lobe, it would catch kindling directly. That’s not exactly portable and it requires a big stash of egg cartons for your doomsday or autumn-spring wood stove.
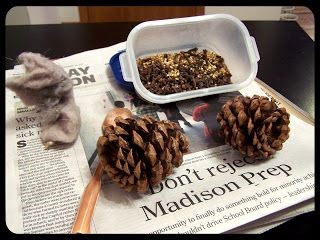
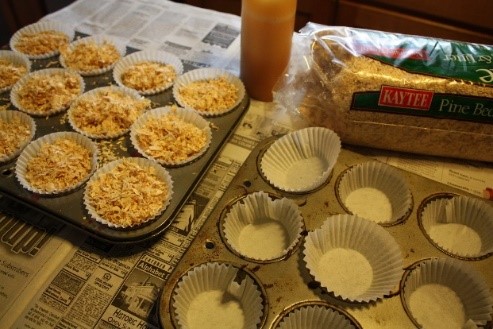
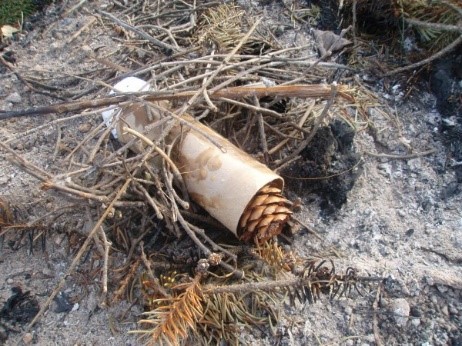
You can improve them – enormously, into something that will burn longer and hotter. Just add some wood shavings, fine chips, sawdust, or some pine cone bracts to the dryer lint. The thin wood is tinder, and dry pine cones are some of the best tinder-kindling to be had.
Even so, skip the wax. You don’t actually need it and it can get messy. Just smoosh it all into TP rolls or egg carton sections with your dryer lint, or snag small pine cones and wedge dryer lint into the gaps.
If you’re dead set on waxed versions, make doubly sure they’re in tight-sealing plastic baggies if they’re in your vehicle.

I carry un-waxed versions, but I also use tea lights and birthday candles a lot for campfires and bonfires. Those “gag” candles that don’t actually go out are a goldmine for a backpack and pill bottle kit.
My candles will typically burn long enough to dry out even damp tinders and kindling without issue. If it’s particularly damp and wet, if I’m particularly rushed to get a fire going, I’ll use both, a candle and a backup or emergency fire starter.

It’s just faster and easier. Plus, they’re a more versatile option.
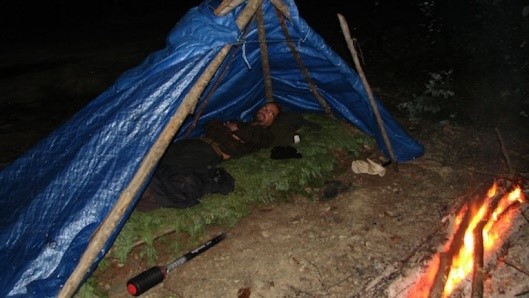
If I need to be under a quickie shelter, I can still use my candles inside a can or a jar – for cooking, to very effectively take the damp or chill off a small space, for light. I can also use a match to light a tea light or birthday candle, and then light others from that stronger flame.
You lose those options when you melt your candles or paraffin into disks of tinder helpers.
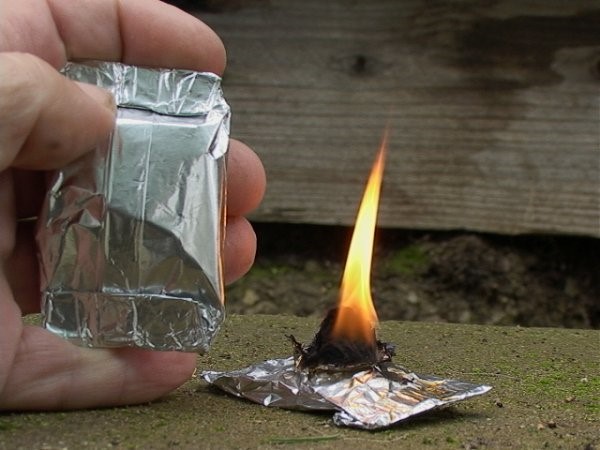
Cotton, Vaseline & Foil
I like “foil fire nuggets” a lot. Again, it has to do with versatility. The petroleum jelly dipped cotton doesn’t run in our heat, and it doesn’t evaporate as fast or as much as hand sanitizer or stove alcohol. You can control how big a hole you create, and how much you pinch out, which affects how big of a flame you have – which impacts how long each burns for.
The foil provides “handles” for moving them, and can be shaped to help protect them from a draft or to reflect light one way or another. The foil also gives you a somewhat “safe” zone around your “candle” that increases the times and places it can be used.
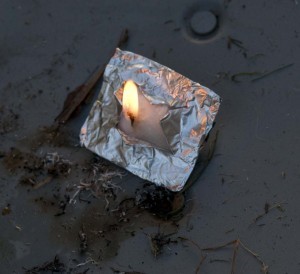
They’re nice for starting fires, and they’re also nice as “candles”. Because they’re small and contained, they’re suitable for times you’re in a small shelter without a lot of room. Stick them in a metal or glass bowl or cup, and you can have light for 3-5 minutes.
They’re not as effective as something like a votive or 4-6” emergency candle for burning off some of the damp and warming a tiny space, but if you make them with two or three balls instead of just one, or set up a couple more, they have applications for getting inside and set up or drying out tinder and kindling.
Now, if you’re inclined to soak them in hand sanitizer, I’d say hold off. You can carry the two parts separately and just combine when ready. I’m also not high on waxed versions of cotton balls or tampons – again, unnecessary steps (and mess), more costly ingredients, single-purpose items, and the scuffing-up step before you use them. Without the foil, they also burn too fast to dry or ignite many kindling.

Oddball Fire Starters
If you’re looking for something else to help your fires along, check out your kitchen cabinets and the packets available at fast food restaurants and hotels when you get coffee.
I by total accident discovered that grits are enormously flammable when I sneezed and spilled half a tub across a flat-top electric stove. The grits hit the still-hot stove, and while the little isolated and single-layer bits just glowed and cindered and extinguished super fast, the grits that landed in lines and lumps went up like I’d been scraping magnesium. Some of the dials were actually deformed from the heat
(The glass stovetop recovered from this misadventure like a champ.)


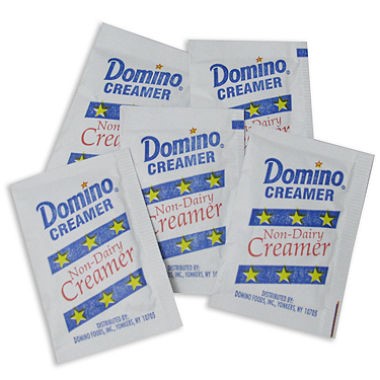
The other oddball I pretty much never see is powdered coffee creamer. It comes courtesy of Mythbusters.
The “B” (better) team were doing one of their tests of viral videos, seeing if you really could create an enormous mushroom cloud with a sawdust cannon, and tested other whoosh! options. Carrie (I believe) tested coffee creamer.
Wow.
Creamer has benefits. It’s also a little scary. (Test this after it rains, peeps.) Like the magnesium rods we can scrape to add oomph to our sparks, powdered creamer is a flare-up kind of helper.

To say that a little goes a long way is an understatement. You only need a little bit at a time to help you – like, fractions of teaspoons amounts, especially if this is getting added to the surface of dryer lint.
Upside: This means a little jug goes a very long way. You won’t need much in each various kit, which makes it suitable for even tiny pill bottle or Altoids kits. It’s even less-expensive than grits, and even more resistant to damp surfaces while you’re making fires.


I cannot overstate the need to not have this blowing around dry grassy/leafy areas, your bag and tent, your hair if you use alcohol-containing products, or if the air is swirling and this might end up back in your face. Also, add fire to your creamer; do not be the many morons on YouTube who light fires and then pour the creamer on.
If you’re inclined to make those drinking straw kits, please be very conscientious of the fact that you use fire to melt the straw ends closed.


Feather Stick
One skill absolutely worth mastering, that will save an enormous amount of time and effort in starting a fire – and reviving it if it falters – is a feather stick. By peeling up curls of wood, you create kindling and tinder with excellent “catchability” and oxygen flow. You can also benefit by exposing the inner wood, which can be much dryer than small kindling sources after days of rain or snow melt.
You can make them out of whole raw sticks and branches, batoned branches, split logs, or pieces of junk timber and dimensional lumber. They’re pretty easy. Just remember the general safety rule of cutting away from yourself.

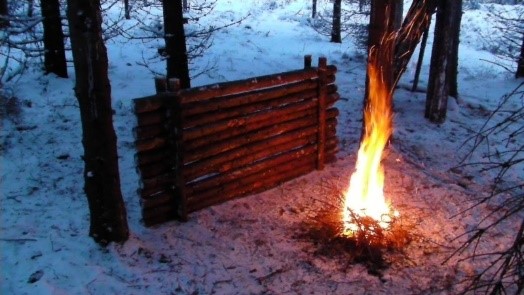
Parting Tip: Bring a Briquette
Keep 2-4 charcoal briquettes in your car kit, camping and kayaking kits, and your packs. Keep a tin of them handy for your rocket stove or fire pit. They weigh nearly nothing and they take up less space than those egg carton sections people love.
To use, stash one under your kindling with your tinder, inside your teepee or frame. You’ll need the tinder and kindling to get them going, but once you have, they generate a great deal of heat, and stay hot for a while.
Combined with a tin can, they can also help us carry fire from one location to another, or through part of a day. They can be used to help dry out kindling and smaller fuel wood, or to revive a fire without striking more sparks or matches. That’s especially useful if we’re out-out and we need that fire, when our hands are shaking (or mittened), in wet and windy conditions, and while we learn the nuances of banking a fire for the night.
Fire Starters
Getting a fire started can be a big advantage, but it’s really only the tip of the iceberg. How we build and feed that fire, where we position it, and what we combine it with impacts its effectiveness for heat, for cooking, and for signaling. Changes affect how long that fire will last, how much smoke it produces – and where that’s blowing – and how high the flames are reaching. In some situations, we’re also controlling how much light it gives off; looking for brightness, or limiting the visibility of the flames and-or the smoke.
Especially if we’re counting on fires when we take to the hills or for wilderness accidents, we need to know what is and isn’t actually going to work. So practice the whole process, dusk to dawn, not just sparking tinder.
Follow The Prepper Journal on Facebook!
The post Survival Skills & DIY Preps – Fire Starters appeared first on The Prepper Journal.
from The Prepper Journal
Don't forget to visit the store and pick up some gear at The COR Outfitters. How prepared are you for emergencies?
#SurvivalFirestarter #SurvivalBugOutBackpack #PrepperSurvivalPack #SHTFGear #SHTFBag
Subscribe to:
Posts (Atom)