
via Instagram https://www.instagram.com/p/BcOGGRtB90y/

On January 1, 2018, I’ll be giving away a new Mora Bushcraft survival knife to one lucky subscriber. Winner will be chosen by random drawing and will be notified by email as well as announced on this site. If you’ve not subscribed (if you’re not a subscriber then you can not win) yet, then you can subscribe here.
If you want to see photos of my area, my preps, and other random stuff then you can do that at my Instagram page and don’t forget to follow the page so that you never miss a new photo. You can also scroll down to the bottom of the sidebar to see my nine most recent...
Written by Guest Contributor on The Prepper Journal.
Editors Note: A guest contribution from Brian John at Enjoy The Wild to The Prepper Journal. Tips on what to do to keep Jack Frost at bay BEFORE you venture out. As always, if you have information for Preppers that you would like to share and possibly receive a $25 cash award as well as be entered into the Prepper Writing Contest with a chance to win one of three Amazon Gift Cards with the top prize being a $300 card to purchase your own prepping supplies, enter today.
Are you contemplating winter RV camping in the cold weather? Does it seem like a huge amount of work to you? Well, the cold weather should not prevent you from enjoying your camping activities. Winter RV camping is an excellent option for you if you want to still enjoy your camping activities during winter.
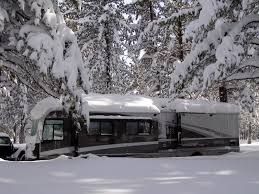
Although camping in very cold temperatures can be an experience that is very exhilarating, it can also be a challenging experience if you don’t have the right gear. This is because you don’t want to wake up with frozen feet as this will dampen your spirit of adventure.
To ensure that your winter camping is very safe and relaxing, you will need to prepare your RV to ensure that it is set for the cold weather. Here are tips that will help you to achieve that goal.
Tips for Preparing Your RV for Winter
Before you head out for camping during winter, it is very important that you ensure that your RV is in good condition to handle the cold weather. Here is how you can make your trailer to be very cozy.
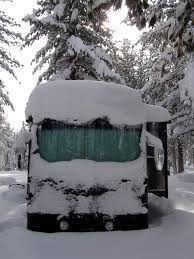
If you want to be cozy in your motorhome while camping in sub-zero temperatures, you will need to ensure that your RV’s exterior is in good condition. The first thing that you will need to do will be to check the window seals to confirm whether they are intact and in good shape. You will also need to examine the weather stripping on all the exterior doors of your trailer.
Particular areas that you will need to pay close attention to are the basement areas and access panels. You can also use insulating boards to fit around the base of your rig and between the frame of your RV and the ground. This will help to block out cold air from getting inside your RV.
In order for you to be warm and cozy in your RV during the cold weather, you will need to fit your windows with insulated RV windows. You can also add insulated curtains. During the night, you will have to keep your windows closed so that you can trap in warm air.
You can also install a window insulating film on your RV’s window to stop heat loss by reducing condensation.
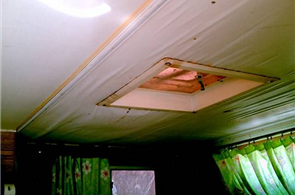

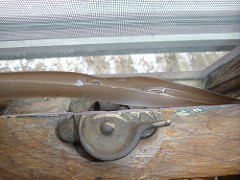
Most RVs are usually made with roof vents. These ceiling vents are the ideal places through which heat will leak out from your RV. However, you can seal off these places by installing RV vent cushions. You can get these vent cushions at home improvement stores.
Before you hit the road, it is important that you check out your furnace to see if it is working properly. You will need to clean your furnace to remove dust, insects and debris. You have the choice of using compressed air or even a soft brush to clean the surface area of your furnace.
You will also need an electric dehumidifier in order to remove dampness that can develop in your RV due to the condensation of moisture.
Most RVs usually use propane as fuel to provide heat. Therefore, before you set off on your camping trip, it is important that you check whether your tank is full or not so that the propane can last you the entire camping period, with a reserve, just in case. This is because your camping can become so uncomfortable and unbearable should you run out of fuel. You would be amazed how quickly your RV can turn into a sub-zero meat locker.

It is also necessary to have your RV checked out by a professional before you set out for your winter RV camping. This is to make sure that your RV is roadworthy and that all the systems in it are in good shape and can handle the cold winter temperatures.
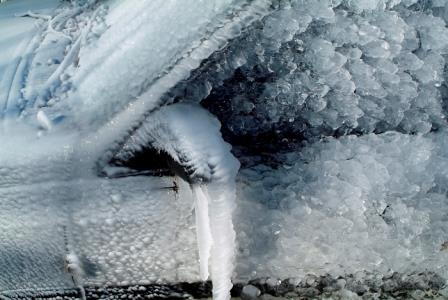
If you are going out on a winter RV camping trip, then you need to ensure that your water system can also withstand the cold winter temperatures. In order to prevent your water from freezing inside the pipes and lines, you will need to install insulating foam tubes over your plumbing pipes.

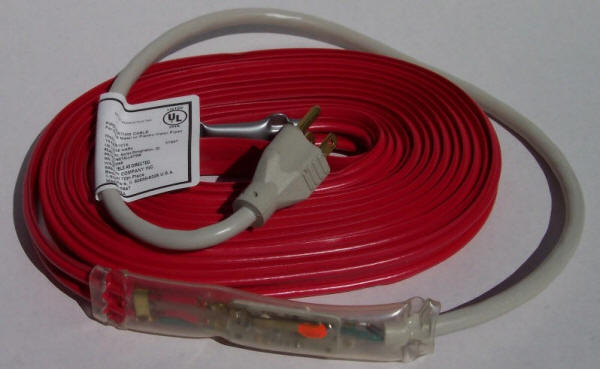
You will also need an electric heat strip that is covered with foam tubes to insulate your water hose. The most important part of your water hose that you should insulate is the part from the city water outlet to your RV.
Essential Items to Bring Along for Your Winter RV Camping
In order to have a fun, satisfying RV camping, there are essential items that you should never leave out of your packing list. They include:
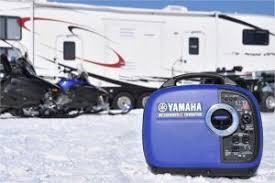
If you want to have the best time during your camping trip without having to worry about losing power along the way, you will need to bring a source of electrical power unless you are planning to dry camp. This is because RV generators are specifically designed to generate the power you need to run all your appliances.
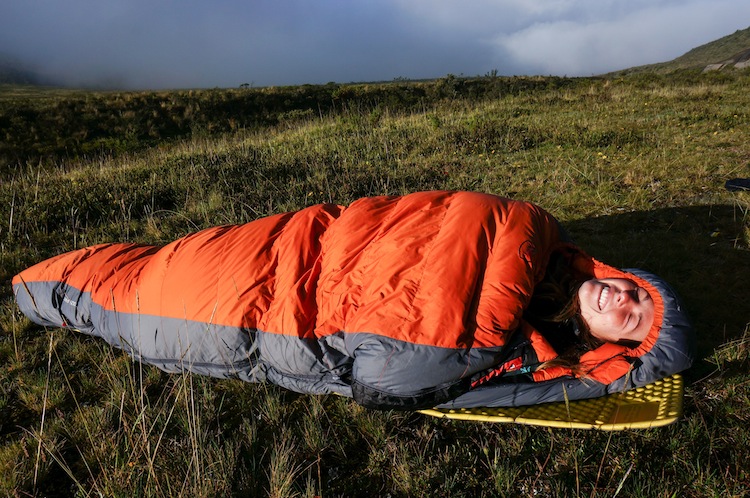
You can still sleep like a baby in your mother’s arms even during the coldest of winters. With a sleeping bag, you will not need to worry about the piercing cold. You should, therefore, include a sleeping bag in your packing list.
With a sleeping bag, you can be assured of comfortable sleep inside your trailer. You can even be more comfortable in your sleeping bag if you have a means of keeping the sleeping bag warm enough.
Enjoy Your Winter Camping in Your RV
Taking time and ensuring that your RV is in great shape will increase your chances of having an enjoyable camping trip during winter. You will, therefore, need to have your RV checked to confirm whether everything is working and in good condition.
Apart from checking your RV, you also need to ensure that you bring appropriate supplies and items like RV generators, winter hammocks and winter sleeping bags. After all, with the right items and a good RV, camping during winter can be an exhilarating experience that you will always remember!
Author Bio
I am Brian John, I am very passionate about camping and any other outdoor activities. I take pride in interacting with nature in more special ways like camping, hiking, and mountain climbing, among others. I love sharing my experiences in camping with other people, and I have no better way to do it other than by blogging. I am very passionate about my hobby and ready to interact with other people who share the same passion with me through Enjoy The Wild.
The post Winter RV Camping: Tips for Preparing for Your Winter Camping appeared first on The Prepper Journal.
by Angela Williams

Civilization and advancements in technology have reduced to the minimum manmade disasters. Even some natural disasters can be foreseen and adequately planned for. However, Mother Nature sometimes has its way and, leaves a catastrophic aftermath. In such a case, your level of preparedness is the single most important determinant of your survival. Such preparedness also comes in handy if you are in the wilderness.
To survive in the woods, you must possess some unique bushcraft skills the best preppers have perfected over the years. In this tutorial, we will provide you with 8...

Free Stuff
Attention: On January 1, 2018, I’ll be giving away a new Mora Bushcraft survival knife to one lucky subscriber. Winner will be chosen by random drawing and will be notified by email as well as announced on this site. If you’ve not subscribed (if you’re not a subscriber then you can not win) yet, then you can subscribe here.
Instagram Photos
If you want to see photos of my area, my preps, and other random stuff then you can do that at my Instagram page and don’t forget to follow the page so that you never miss a new photo. You can also scroll down to the bottom of the...
Written by Guest Contributor on The Prepper Journal.
Editors Note: While walking the John Muir Trail from the Whitney Portal to Tuolumne Meadows I encountered a couple hiking near Red’s Meadow/Rainbow Falls with a Golden Retriever wearing a saddle-bag back pack. I saw this beautiful dog get stuck twice trying to get between a couple of trees. While the trees were wide enough for her, she had no concept of her extra girth/width this saddle back pack added. She was frustrated and one can understand why. So when this article popped into my inbox I just had to post it as whether pleasure camping or at the EOTWAWKI, this family member is, after all, a family member. Written by a relaxed pleasure camper.
Spending some time camping with your dog is one of the most enjoyable things. Are you a dog lover? Do you love camping? If the answers to these questions are yes, then this article is for you. Maybe you have never thought of spending time together outdoors with your dog. Now there is a good reason to try it and guess what? It will be a very enjoyable experience. You only need a few tips and guide to make it happen.
Training Your Dog is a Great Starting Point

If she is trained, you will be ready. The most vital training you need for the dog is a dependable recall. Does your dog respond when you call? Your dog should respond even when there are distractions or other dogs. Trust your skills and train your dog on how to respond promptly when you call. You might need to seek the services of a professional dog trainer if you are not sure.
Some simple commands that you can use to train your dog are explained here.
You’ll want to train the dog to stay in the car until they are invited to come along. This training is important because you’ll enhance the safety of your dog. A dog can follow you when you aren’t aware and get into an accident. Through the training, you’ll get the dog to trust you and obey your commands. Remember the more command your dog knows and responds to, the better for you. The training is a just a process of creating a good relationship with the dog in preparation for camping.
Untrained or un-socialized dogs will draw negative attention almost immediately and may put both you and the dog in harms way.
Remember to Carry Enough Supplies
Water should be the first item on the supplies list. Set aside a plastic water bottle and water bowl for your dog when packing supplies. It’s good to carry separate water for you and the dog, just to ensure there’s enough. Because dogs don’t sweat, they tend to drink a lot of water to cool down. When you break to drink water, give your dog some water too. The other item on the supplies is food. Don’t be tempted to change the dog’s diet. If she feeds on homemade food, you can pack some. But you might want to decrease the portions.
Backpacks are a good choice to carry camping supplies. The choice will depend on the number of days you’ll be camping. You can rely on a dog backpack to carry some supplies because it’ll relieve you of some weight. A healthy dog can carry about 25% of their body weight. Make sure to strap the backpack on safely without hurting the dog or putting on too much excess weight. The best practice is to put most of the weight low and forward, over her front shoulders.
Don’t forget a good tent when planning. A pop up canopy tent is great, although you might want to carry hammock. Remember to consider tent stakes. The right equipment will make camping with your dog smooth and memorable.
A First Aid Kit is a Great Idea
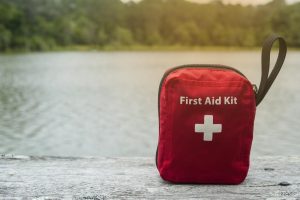
Your dog can be injured just like you. In fact, a dog can be at higher risk of being injured than you. A dog isn’t a good a judge of what they can do and might end up with injuries. Fearless dogs are more likely to be injured. Running and scrambling over rocks is fun and adventurous, but an invitation for injuries. The dog’s foot pads can be injured. Don’t assume that your dog’s thorn-proof! A pricking on foot can cause a lot of pain and even bleed. When it comes to the dog’s first aid kit, you’re the expert. Carry the drugs that have been prescribed by your veterinarian. Pain relievers are good to carry along as well.
When packing the first aid kit, consider the place where you’ll be camping. This way, you can prepare sufficiently. In almost any camp ground, there’s a threat of small and large animals. Some animals like moose and bears tend to avoid humans. They may however not avoid curious dogs. Your dog can be at risk of injury if the camping site has these animals. The dog can be kicked, bitten or even infected with a disease by interacting with these animals. Small animals can scratch the nose of your dog if they are curious.
In some places, ticks can be a problem. You’re spending time outdoors with the dog, and you should inspect the dog daily for any ticks. There might also be wood ticks in the camping site. You should consider immunizing the dog for Lyme. These tips will be sufficient to keep your dog safe. But at times, your dog might get a big injury that can’t be managed with the first aid kit. It’ll be a great idea to go back home and seek the help of your veterinarian if the injury is not life threatening. If it is, seek the closet professional help you can find. Fortunately, you can avoid all the worry by preparing well for the specific terrain and risks in the place where you will be camping.
Embrace Good Campsite Etiquette
While at the campsite practice good campsite etiquette. Be courteous to your friends and fellow campers. Use the commands that your dog has learned to keep the dog away from strangers. It’s your responsibility to properly dispose of the dog’s waste each and every time. To keep the dog safe, keep it close to you all times and don’t leave her unsupervised at the campsite. Even in the vehicle ensure your dog is safe. Knowing how to keep the dog safe and close to you will help to prevent unforeseen risks.
Finally, Enjoy with Your Dog

Now that you are camping with your dog enjoy to your fullest! Play with your dog, take some good photos and relax. Just stay cool. At night enjoy a campfire and let your dog enjoy too. Combine different tips that you have learned to make the experience memorable.
Author’s Bio:
 Welcome to Rainy Camping. I am Michael Everett, a camping expert who loves to travel and explore the wilderness throughout the year. I aim to visit every campsite in the world and offer smart advice to the novice adventurers out there.
The post Tips for Camping With Our 4-Legged Friends appeared first on The Prepper Journal.
Many people are wondering when a “perfect storm” of problems will cause massive food shortages.
From ISIS infiltrators poisoning our food to large scale weather disruptions in key crop areas to financial system collapse, there is no such thing as an assured food supply in the years to come. Outdoor gardens, farms, and other places where food can be obtained are likely to be looted by desperate people.
While it may seem like a stretch to try and grow all needed food indoors, it is entirely possible. Even if you focus on micro greens or sprout farms, you still need to bring enough plants to maturity and through the seeding stage to grow enough food over long periods of time.
This means that you’ll need indoor lighting so that your food bearing plants are as healthy and productive as possible.
Before discussing the best light colors (or wavelengths) for plants, it is important to understand the difference between the light color spectrum and the physical color spectrum.
The light color spectrum describes light in terms of the frequency of the wavelength emitted, while the physical color spectrum is often described by which frequencies are reflected by the material.
White light is the combination of all colors in the light spectrum while white objects repel or reflect all light frequencies black objects absorb all light. Since most plant leaves are green, they repel all light frequencies in the green range, while absorbing everything else.
The primary colors in the light color spectrum are Red, Green, and Blue; which is distinctly different from the physical primary colors: Red, Yellow, and Blue.
Since green is reflected by plant leaves, a full third of all sunlight is actually of no use to growing plants. The amount of light and intensity produced by the sun is still enough to avoid creating problems for plants, so long as they receive enough sunlight based on their specific needs.
Even though the amount of light produced by artificial lighting methods may seem incredibly bright to our eyes, at least one third or more will be discarded by plants depending on the actual light frequencies produced by the bulbs.
What appears to be “white” light from certain sources isn’t actually a full spectrum color and may have far too much green for good plant growth.
Incandescent and fluorescent bulbs not specifically designed with coatings that optimize the light frequencies emitted for good plant growth will be virtually useless no matter how many of them you pack into a specific area.
As an analogy, it can be said that using the wrong frequency for good plant growth is a bit like trying to address an illness like scurvy (caused by Vitamin C deficiency) by doubling or tripling carbohydrate intake.
Until the proper amount of Vitamin C is consumed, nothing else you eat will solve the problem. In a similar way, light is a form of food for plants, and must be delivered in the proper frequencies for optimal growth.
To get the most from artificial lights, focus your efforts on blue and red light, as well as the ratio of blue to red for specific phases of plant growth.
Since this amount may be different for each species of plant, you may have to do some experimenting to figure out which light frequency ratios work best for your plants, as well as how to shift those ratios over the growing season.
Just as an example, however, one study done on tomatoes found that:
Have you ever tried to grow miniature roses indoors and wondered why it never seems to work? As small as these plants are compared to wild and full sized strains, it does not change the fact that roses require far more light intensity than many other plant types on Earth.
Even if you get the right ratio of red to blue light for roses, it doesn’t mean the plant will grow properly indoors. If the intensity, (or amount of light packed into a specific area) isn’t enough, the rose bush will still fail to grow properly, and will more than likely die.
Our eyes can be as easily fooled into wrong estimations of light intensity just as they can the actual colors actually being emitted by a light source. In this case, once again, the intensity of light that seems incredibly bright to your eyes may seem almost non-existent to the plant in terms of its nutritional needs.
When it comes to plants, the light intensity for plants varies widely. For example, a miniature rose may shrivel up and die in just a month or two on a sunny windowsill while parsley, violets, and other plants better adapted to lower light intensities will thrive.
Information about the general optimal light intensity for many food bearing plants is much easier to obtain than information on optimal light color ratios. All you need to do is look up whether plants do better in full sun, partial sun, or shade.
To get started on experimenting with indoor food growing, all you have to do is pick plants that prefer shade. Once you get your lighting system set up, you may be able to start working with plants that do well in partial shade.
While you can use a light meter to help gauge light intensity, you may also need to find a more specialized photometer to make sure that the intensity for each light frequency is correct for each plant species.
This will also take a good bit of trial and error as there is still not much information freely available on this topic. As more people work with indoor hydroponics and growing food indoors, this lack of information may change.
Have you ever noticed that you feel crankier, more tired, or more stressed as the amount of daylight gets shorter? Aside from helping your body make Vitamin D, the amount of light you are exposed to each day also governs many other biological processes.

When you don’t have enough light, it can lead to illness and all sorts of other problems. While you may be able to cope with this readily enough when you are in your youth and middle ages, the later years of life may come with “sundown syndrome”, which may also get worse in the shift from fall to winter (decreasing light duration) versus the shift from spring to summer (increasing light duration).
If there is one area where humans and plants are similar, perhaps it can be said that optimal light duration is very important to both groups of organisms.
A plant will die in a matter of days if it receives no sunlight at all. Since plants also have many biological functions that are triggered by changes in light across the seasons, it is important to simulate this when trying to grow plants indoors.
Here are some things to keep in mind.
Many people that start off with indoor food gardening try to compensate for inadequate light intensity and color ratio by keeping the lights on 24/7. Consider this is about as useless as trying to work around the clock and expecting that having a light on at all times will help you stay awake.
As with your own body, plants also need a period of darkness each day in order to shift into different biological processes.
This may include making tissue repairs as well as management of cellular bioclocks that keep track of light duration as a means of determining when to trigger flower or fruit production. If you do not provide suitable dark hours for the plants, they will grow very poorly before dieing off.
Aside from having a major impact on the plant itself, light also has a major impact on other organisms that may attack the plants.
For example, a disbalance in red, green, and blue ratios can easily create the perfect conditions for mold, mildew, fungal, and algae growth. While your plants are suffering from a lack of the proper ratio, it may be perfect for these organisms.
Since your plants will also be in a less than optimal health condition, it will also increase the chance they cannot fight off infections.
Today, there is a good bit of research being done on how plants communicate among each other. Did you know that a tree that is chopped down actually transmits this information to surrounding trees and plants within a matter of seconds?
Even though there is very little information on plant communications with insects and other organisms, it is entirely possible that pathogenic species are drawn to sick plants that emit signal that indicate they are weak or stressed. Without a question, improper lighting conditions stress plants and make them weaker.
Since many plants have both subtle and not so subtle (thorns or toxins in the leaves, stems and roots) defenses to deter predators, it should come as no surprise that a weakened plant will draw both disease bearing organisms and insects that are predatory to the species in question.
As a prepper, you must also consider seed production and the health of the next generation of plants. Chances are, you already realize that a fetus developing in a starving mother will more than likely be weak and sickly.
Starvation during these critical development times can also lead to an increase in genetic disorders and other problems. In a similar fashion, when plants do not get enough light, there is no telling what condition any seeds produced will be in.
This, in turn, means that you must always carefully test any new batches of seeds and keep records to see if they are as hearty and productive as the original seeds that were used in the first generation.
While many other factors may impact seed viability and the next generation of plants, do not discount the lighting conditions experienced by the plant that produced the seeds in the first place.
Today, most indoor food production enthusiasts recognize the fact that LED lights can be very useful. Since there are many different kinds of LED lights on the market, however, it is important to understand the pros and cons of LEDs so that you have a better chance of picking the best ones for your needs.
LEDs are one of the cheapest and easiest ways to produce light with different color frequencies.
As such, you can purchase strips of red and blue LEDs that enable you to change the ratio of red to blue with very little effort. You can purchase lights with a pre-set ratio of LEDs, as well as look for strips of single colors so that you can adjust them manually over the duration of the growing season.
Even though you may need halogen bulbs or other high intensity lights for some plant species, these bulbs tend to produce a great deal of heat. Since light intensity also decreases rapidly with distance, there is a definite limitation for using CFLs, Halogens, and other light bulbs.
By contrast, LEDs produce far less heat, and can be placed much closer the plants. You can also place strips of LED bulbs closer together in order to increase light intensity.
In many cases, LED bulbs require as much as 80% less electricity for the same level of illumination.
If you thought problems associated with Mercury in CFLs was a problem, you may not realize that most LED bulbs contain Nickel and a range of other toxic metals. While one LED on your computer may not pose a health hazard, Nickel and other metals escaping from LEDs can increase problems with asthma and other breathing disorders.
Even if LEDs are rated for indoor use, there is no way to know if they are leaking metals into the air over time.
Needless to say, if you are planning to grow crops indoors in order to avoid ingesting pollutants, it will not be of much use to expose plants to toxic metal gases from LED bulbs sitting so close to them.
If you have ever tried to see the difference between certain shades of pink and orange, or other similar colors in low light conditions, then you may already understand how easy it is for LEDs to skew your visual perception.
In this case, the red and blue light emitted by the LEDs may make it harder for you to see fungal, bacterial, and other infections in their early stages.
Be sure to close the LEDs and examine the plants under a different lighting source in order to spot these problems as quickly as possible. Needless to say, if the infestation is related to lighting, you may also need to make adjustments in order to avoid future problems.
Overall, you will find that finding the best lighting for indoor crop production can be a bit challenging. Unless you plan on setting up a series of mirrors and prisms to channel sunlight into your growing room, and then break it down to optimal frequencies, you will have to rely on different light types on the market.
While LEDs are emerging as the industry leader for growing plants indoors, you should still look at the main factors that determine optimal lighting before committing to just one source of illumination.
No matter whether you choose one type or a combination of bulb types, the fundamentals of color frequency, light intensity and duration must still be optimized for each plant and its growth cycle.

This article has been written by Carmela Tyrell for Survivopedia.
References:
http://hortsci.ashspublications.org/content/49/4/448.full
https://www.mayoclinic.org/diseases-conditions/alzheimers-disease/expert-answers/sundowning/faq-20058511
https://www.scientificamerican.com/article/led-lightbulb-concerns/
By now everybody realizes that in cataclysmic SHTF event the number one ‘culture shock’ moment for unprepared crybabies will be no more electricity! At first it will be more expected than anything else.
Many of us have been through a power outage from a bad storm or equipment failure at one time or another in our lives. But what if the electricity didn’t come back on again as it usually does, in the nick of time, just at about when our flashlight batteries start to die?
Or what happens when it might be months before power is restored by the regular power companies, and maybe not for years?
Puerto Rico STILL is without power in most areas after this summer’s hurricane! We then come to the critical understanding that it might be time to have an off grid electrical power set up to fall back on if we ever want to recover from a caveman lifestyle in a SHTF event.
The problem is that there’s so much information out there now that a lot of us are still confused about exactly what we really need to be ‘off grid’ and how to go about doing this. To help clear things up, here’s a quick general intro to everything you really wanted to know about an off-grid system but were afraid to ask!
I know everybody has an idea of what going ‘off grid’ means. But someone answered that for me once by saying, ‘Oh, that’s like being a mountain man and living off the land with only your horse, a knife, and your gun,’ she answered.
Well, not exactly. Living off the land with only a couple tools can be called being ‘off grid’ I suppose, but to me that’s more like being in a very basic emergency survival mode, living each day just to maintain your miserable existence with only your bushcraft and survival skills. To me this is more like a temporary survival exercise until you can get back to civilization!
Having a little more than just a basic stomach filling meal and campfire to keep you from freezing at the end of the day will get worse than boring after a while.
Because I guarantee you, bare bones 18 century homesteading won’t be anything like you are used to, or ever fantasized it to be, when you were enjoying your favorite Grizzly Bear chasing the HD cable movie, on your nice flat screen TV with a bowl of hot buttered microwaved popcorn in your comfy thermostatically controlled modern habitat.
Going off-grid in prepping means that you are not going to be connected to one of these major public power company grids any longer so you also won’t be paying them outrageous monthly electric bills which also allows them to install smart meters on your house, and spy on your personal habits.
It doesn’t mean you will be without electricity for the electrical devices you need and want because it’s hard to do much without electricity except waste your entire day trying to feed yourself and keep warm.
But instead you simply are going to become your ‘own power company’ and you will be your only customer. Well that sounds interesting?
Obviously your personal power plant is going to have to be scaled down a bit. It won’t use a giant turbine steam engine and certainly won’t be nuclear. You don’t need miles long railroad cars loaded with tons of coal to feed the boilers for your power plant.
All you need are batteries—proportionally larger than your radio, flashlights, and cell phone equipment uses, but still similar in fundamental operational principle– and a way to keep them charged long term.
A word of caution at this point because there’s a cornucopia of appealing cool ideas on YouTube for providing off grid electricity to your place. Everything from zero point energy to perpetual flywheel motion, but most of it is so complicated and produces such limited power for practical use if it even barely proves the concept that these are really just experimental ideas and won’t really work for your survival purposes at this point in time.
The standard tried and true off grid power systems almost invariably use a combination of battery banks and solar/wind power. Even a scaled down battery and charging system for just your own personal house, won’t be ‘dirt’ cheap as most of advertisers seem to be implying.
A complete standard home electrical system converted to complete off grid power is averaging less in total cost than it was a few years ago but it still can be out of reach for most of us ‘Po Folks’ who can’t just casually lay out several thousands of ‘dead presidents’ (a.k.a. dollars) for a professional whole house commercial conversion.
But if you just intend to set up electricity for your smaller bug out location shelter which might be a tiny cabin, or travel trailer, or even a heavy duty tent like a yurt, with off grid electrical power, that’s a different and much more affordable, story.
All you need to do first is look up at the sky and find out how many days out of the week you are likely to average peak full sunlight hours. Because, again, the most common and least expensive way for small off grid applications is to use ‘ol sun to charge your batteries with solar panels.
This is so you can then start to plan how many batteries you might need, or if you might need additional battery chargers like a windmill or a small gas generator which is what many people use for a temporary outage anyway all by itself if they think ahead to store enough gas for it properly.
But if we’re talking long term survival and power needs at the BOL, we want something that lasts a long time without a lot of headaches. To put it simply your location has a lot to do with just how you balance and put together your system in terms of batteries and charging systems and solar panels.
And to keep the system cost effective, all these components become a trade-off depending upon your location and of course your power requirements.
First of all, you’ll save yourself a lot of labor money if you want to DIY and there’s all kinds of internet tutorials and books and quick guides out there.
You’ll also learn valuable useful knowledge about electricity and it’s really not hard even if you’ve never done it before. And then afterward, you can pay an electrician familiar with solar off grid set ups a one time relatively modest inspection fee to check it out for you.
So, here’s the bargain basement basics just to get you started.
It all starts with WATTS! Think of it as the resulting amount of vibrating microscopic atomic electrons which can be manipulated and transformed into the electrical current ‘juice’ that powers all the plug-in stuff.
Your electrical wiring in your house has to carry electrical power to feed these watts to feed all of your electrical stuff and when you plug in the particular device just takes/draws out the amount of watts it needs to operate.
This is the electric ‘currency’ on a power system. Everything you have that uses electrical measures that usage in Watts. You pay you’re your utility company for what they refer to as Kilowatt Hours used.
Every tag on the back of every appliance tells you how many Watts your gadget needs to do what it’s supposed to do. Microwaves from 600 to 1100 watts on average, lightbulbs 30 to 200 watts on average, refrigerators and appliances between 2 and 6 hundred, and so on.
Determining how you get the amount of Watt power you want for your needs and deliver them to your home through a combination of Amps and Volts are part of the common formula, Watts=Volts x Amps.
Because volts, which is the electrical energy potential measurement in representing the electrical ‘forces’ factor which provide ‘pressure’ to move the electrical energy around the circuits through conductors which are the common types of house wiring you see everywhere.
Voltage potential can be stored, like in batteries, or generated constantly by electrical generators which are basically magnets that generate vibrating atoms to cause their protons and electrons to ‘energize’ through movement and then ‘flow’ a distance to another point through conducting wires for power use on that end.
Then we have Amps in the formula.
Amperage has to do with the ‘rate’ of the electromagnetic ‘flow’ in an electrical conducting wire. This one’s pretty easy to do an analogy for, just like a skinny garden hose trying get enough water (electrons’) to take care of a large burning building is not going to work, neither is a thin electrical wire enough of a conduit to provide enough watts to power a huge office building.
You have to balance the capacity of the wires to handle electrical ‘loads’ for optimum utility.
The Watts= Volts X Amps math can be used to determine all combinations of batteries and wiring sizing you will need to give you your necessary watts.
Remember that batteries eventually run out of stored potential energy and then must be re-charged. So, the charging system and wiring components then make it a bit more complicated, but not insurmountable for the average handy person.
Okay, you decided that for now that you could survive comfortably in the middle of the wilderness in your survival shelter with around 1500 continuously available watts.
This means you can have on a couple 100 watt light bulbs, or a few 60 watt bulbs instead, a computer, TV, radio, and electric refrigerator, and even a microwave all on at about the same time before possibly overloading the system, and tripping the circuit breaker.
This would be only one 20 amp breaker on one main 12 gauge wire in your hard wired house system off the inverter, to split up between your mini-grid appliances and outlets, (unless you just temporarily ran a couple heavy extension cords directly off your inverter.)
So with this set up you’d be living about like they did in rural areas about 75 year ago with their electrical systems where ‘out houses’ were common and outside hand pumps into buckets brought the water in, until electric well pump motors were gaining popularity so indoor plumbing eventually became the norm.
But there were few, if any electrical washing machines and dryers or electric kitchen counter tops and heating was still virtually all done with fossil fuels.
So you want to figure out how many batteries you need for continuous 1500 hundred watts application for at least a couple days, but preferably a week of basic power before draining, and needing complete recharging if the sun or your solar panels don’t work to keep your batteries charged up. You want to keep them above 60 percent capacity during use to preserve their lifespans. Too many complete discharges/cycles are not good.
If you do live in an area where it gets so cloudy and dark that you often can go for many days without seeing the sun, then you will want to have a small wind generator to keep up the charge along with your solar panels, or a back-up portable gas generator.
There’s plenty of DIY projects on building wind turbines too, or you can get ready made commercial models. Here are some of them, to ease your research.
So having only one 12 volt deep cycle/marine battery which is not much bigger than a standard car battery but that lasts a bit longer between charging that on average says generates 675 amps and also says it gives you 100 amp hours at 20 hours, with different numbers here depending on the type/brand of battery, which is another confusing measurement of how long your battery lasts without charging before it goes dead, and is a little deceiving for practical purposes.
What you have to do is divide the 100 Amp/hour number by the other ‘@20 hour’ number to get 5 amps (to use in the equation for watts) of continuous amperage for the entire 20 hours before it drains and is discharged.
So now let’s solve for watts when watts = volts x amps. so 12 volts x 5 amps equals a whopping 60 watts. Yup, that doesn’t seem like much and sure is long way from 1500 continuous watts at one time? You can power maybe one 60 watt lightbulb for up to 20 hours. You can also power that lightbulb directly from a 60 watt solar panel on a sunny day.
Or a windmill that puts out the same wattage when it’s running at speed. All these work together on a system to cover all weather contingencies. But the ‘load’ is mostly on the batteries because they don’t care what the weather is as long as they stay charged.
However, for shorter time periods the battery can actually deliver more of the ‘cranking’ amps in its capacity and therefore more watts for a shorter time.
That’s how your single car battery starts your car’s powerful electric starter motor which needs a lot of watts and amps to crank over the gas car engine. 450 cranking amps X 12 volts is like around 7400 watts!
However, If you crank for more than a few minutes straight, you’ll usually wear down and kill the battery. And of course this energy/power trade-off is why if you accidentally leave your headlights on overnight you can’t start your car the next day because that usually pushes the 20 hour limit with only 5 amps per hour draw.
A single battery might work for a very short time for high energy needs up to a point, but not that well for extended off grid use.
The device that handles all these variables is called a power inverter. It changes 12 volt battery current to the AC (alternating current) that Tesla invented which is what is typically used in virtually all of our house and commercial electricity systems today.
You need this inverter off your 12 volt battery system because typical home wiring also uses 120/240 volts of power energy from the big power line service entrance to your house. So your TV, refrigerator, etc. is not set up for DC (direct current from the battery) and has to be ‘inverted’ to AC. The inverter changes the 12 volt battery mode to the 120 AC mode so you can just plug in your AC appliances right into the inverter with extension cords if you want. This makes the wiring for your off grid is not that complicated at all for basic purposes. It’s just like plugging into a wall outlet.
Video first seen on Power Inverters.
You find inverters at Home Depot, Amazon, and even Walmart. You can get a 1000 watt basic model for about 35 dollars or a better 2000 watt sine wave model with battery voltage gauge and charge controller for around $250.
If you just want something already to plug and play, there are quite a few portable off grid units that can be purchased ready to go, complete with folding solar panels and portable carrying case. Some of these, as expected, are a bit pricey.
But some are good deals if you have no inclination to put together your own system from components!
Separately an average new deep cycle 12v battery from Home Depot is around a hundred bucks. Solar panels are sold online for about a dollar a watt.
So you can still have your 1500 watt off grid power set up as long as you’re not burning up all 1500 watts continuously when there’s no wind or sun, which you never really would have to do when you think about it. You could get away with a basic setup of just maybe two or three batteries, a hundred watt solar panel to start with, and/or a small wind generator for charging and a cheap inverter, all for around a thousand dollars right off the commercial shelf.
If you are handy you can follow the instructions and build your own, and even your own wind turbine and solar panels for much less! This might sound a bit complicated at first, but after you get into it more, it’ll be no more difficult than changing the battery and cables on your car.
For preppers who just want their bug out location or even their main residence to have basic off grid power, it’s a lot easier and much cheaper than you think if you start by getting one of these step by step detailed guides like this one here:

And then you expand as your resources permit if you want. It’s not hard to find decent used junkyard car or golf cart batteries and refurbish them for just a few bucks each and simply keep adding them to your battery bank for longer duration power potential.
So the answer to the question of what is the best off grid power system for a wilderness application, the main qualification will be the least expensive and the simplest, which will be something along the lines of what was just described here.
Your bug out location, even in the wilderness, doesn’t have to be a sensory deprived punishment sentence with miserable primitive living conditions. You can still have a decent comfortable modern electrical power setup for a relative bargain.
And why not? It’ll be bad enough otherwise trying to survive a grim long term scenario.
Modern electrical ‘work’ assistance from electricity will help you concentrate more on other necessary things like security and supplies. Maybe even watch Zombie movies from your VCD library once in awhile…to relax!
This article was written by Mahatma Muhjesbude for Survivopedia.
Written by Guest Contributor on The Prepper Journal.
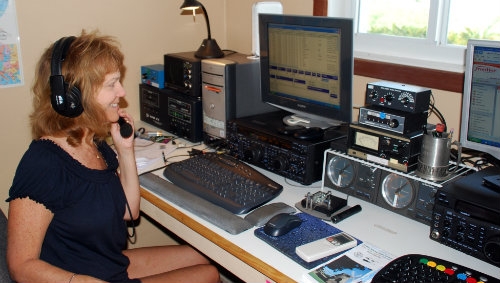
Editor’s Note: Another guest submission from Zac Martin. The subject of Ham communications has been touched upon in the past, once from Pat Henry – Should You Get a HAM Radio License or Hide from the Government? back in 2013 and once from R. Ann Parris – Radio Silence, Communications Without Electronics in March of this year. This article should help in your decision on which path to take, or not take.
To be more specific, this article will tell you how to pass the Technician license exam, which is where you’ll want to start if you’re a beginner. I just finished taking my exam and I passed on the first try. I figured this would be a good chance to expand on what it takes to pass the Tech exam and what do you need to know about it to avoid any surprises.

There are three classes of HAM radio licenses available to civilians: Technician, General, and Extra. Technician is going to be where you want to start, with the other licenses being good ideas a little down the road after a little bit more practice.
The Technician license exam will have 35 questions, you can miss 9. Miss any more than that and you’re going to end up having to take the exam again. However, with the right study tips, passing on the first attempt shouldn’t be a problem. I did quite a bit of researching and studying prior to the exam, and here are the tools that I found the most helpful:
1) Hamstudy.org Fashcards– I studied from several different HAM exam prep websites, but I found this one to be the best. Not only do the flash cards on this site cover all 426 questions from the question bank that your test will pull from, but they let you know the reasoning behind each correct answer as well.
As you miss questions in the flash cards, they’ll cycle back through the stack and you’ll find yourself being asked the same question multiple times throughout your studying to help ensure that you know the correct way to answer the questions that you missed.
The website even keeps a visible graph open for you at all times showing you what percentage of questions from each submodule that you’re getting correct. Should you notice that you’re scoring low on a particular submodule then you can specifically request to only be given flashcards from that specific section, allowing you to really hammer down on what it is that you’re missing.
Over time, the website will let you know what your overall grade is. By test day, my overall grade on the website was an 81%. I ended up with an 80% on the actual licensing exam, so I’d say that the website will give you a pretty clear view of where you stand on things.
2) Hamstudy.org Practice Tests – This is the other cool part of hamstudy.org, the practice tests look exactly like the actual test will. They have 35 questions, and they pull questions from all of the different sub modules that the exam will draw from. After you finish the test and submit it, your grade will appear and you will be able to go back and see what you missed, what the correct answer was, and why. I found it to be incredibly helpful, and it really helped me to know what to expect from the exam.
As a result, when the exam was placed in front of me I had absolutely zero test anxiety. I already knew what the thing was going to look like and I felt confident with my having studied over every potential question from the question bank that there was. A good chunk of this confidence came from having taken these practice tests multiple times.

3) Dan Romanchik’s Free Study Guide – Though it is a lot of pages (40+ to be exact), I printed off the entire free exam prep e-book and read it through multiple times prior to taking the exam. This thing is worth its weight in gold. I actually recommend taking this step first. It will help you to ensure that you are prepared for hamstudy.org’s practice questions.
This free e-book will also tell you the formulas that you are going to need to know for the exam. Fortunately, there’s really only two that you need to know from Ohm’s Law E=IR, and P=EI. If you know those two equations, you’ll be good for most of the math problems.
You can find the e-book at this link: https://www.kb6nu.com/wp-content/uploads/2015/03/2014-no-nonsense-tech-study-guide-v20.pdf
4) Memorize the different bands – I didn’t see these anywhere within the free study guide, but found that if you don’t know them, you’re going to miss quite a few questions on the exam. You just straight up have to memorize these. I just wrote them all down in a little notebook that I’m constantly carrying with me, and would occasionally glance at them while I was at work.
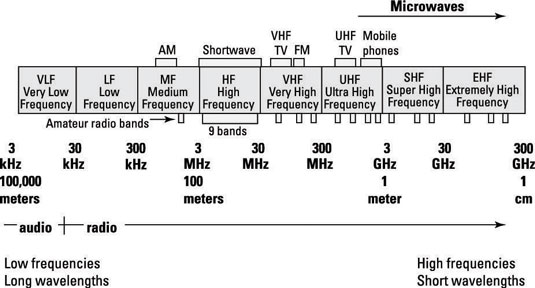
10 meters = 29.600MHz
6 meters = 52.525MHz
2 meters = 146.52MHz
1.25 meters = 223.50MHz
70cm = 446.00MHz
33cm = 906.50MHz
23cm = 1294.50MHz

5) Ask around to see if there are other HAMs in your area – Initially I had been looking all over online to see where the closest testing center would be to me. The closest one I found was several weeks in the future and about a two-hour drive from where I live. Not ideal, I wanted to quickly study the material and move on my merry way, but I planned to make a day trip out of it.
HAM radio came up in conversation while at work though, and by talking with people there I discovered that there was actually a local club in my town that was able to test me and within just a couple of days. That would mean I wouldn’t have to stress for multiple weeks before taking the exam. I was familiar with Parkinson’s Law, stating that work expands to take up the time that we give it, so I knew that if I set a deadline of two weeks that would give me plenty of time to prepare while simultaneously ensuring I don’t wait until the last minute.
Anyways, thanks to that conversation at work I discovered that there were actually several local testing centers that I could have taken the exam at that didn’t show up on the official American Radio Relay League, ARRL website. When I showed up to take my exam I notified the proctor that they weren’t popping up online, and they mentioned that they had been having trouble with that for quite some time. I suppose that’s a fairly common problem, because from what the proctor told me there were several other testing sites in my area that I could have gone to, and not a single one of those sites was popping up on the ARRL website either.
So, if you know a local HAM ask them where you can test at as it just may save you a good chunk of change in gas money.
So what did I do to Prepare?
I studied for two weeks for maybe 30 minutes every day or so. If engineering, physics, and electronics come easy to you, then you may be able to get by with less time. I’m terrible at and foreign to them, so that’s what it took me.


I spent the first week reading through the free e-book and highlighting what I thought was important. It was pretty content heavy, so just about the whole thing ended up yellow for me. You may say that’s not really productive, but it allowed me time to slowly think over what I had just read, and helped me to sift through a lot of word fluff when I would refer to the page later on.
I spent the second week taking hamstudy.org’s practice tests and flashcards. I started on Day 8. I sat my butt down for a solid 1.5 hours as I went through all 426 flash cards for the test. As mentioned before, the website keeps a tab running for you showing not only what percentage of the questions that you’ve seen, but what your grade is by that point as well. My score was abysmally low at this point. I was most definitely learning, but the knowledge was still marinating in my head and needed a bit more practice.

On days 9-14 I spent about 30 minutes every night going through flash cards and then taking 2 practice tests while my wife watched Hallmark Christmas movies. I was sitting by her on the couch and able to take a quick break if she had any questions, so this really didn’t force me to be present-yet-absent while I studied.
By the time test day came around, I showed up and paid my $15 cash in exact change (they may not have change otherwise) and sat down to a pencil and paper test. I ended up missing 6 and passing my exam about 20 minutes from when I started. Honestly, you could probably finish it even quicker than that if electronics is something that comes easily to you. I’m pretty terrible at that stuff, so if I can pass it, I know you can too.

After you pass the exam, the proctor will give you your licensing ticket. That doesn’t mean that you can go home and get on the radio that night though. You’ll have to wait several days for your name and call sign to finally be listed on the official website. Only then can you begin to broadcast over the radio using your call sign.
Mine hasn’t been posted yet, but I’ve been told it takes about a week or two. If you follow the above steps, I’m fairly confident that you’ll be able to pass this thing on the first try. As I mentioned before, I’m terrible with this type of material. It by no means come easily to me. But I do feel that I am good at studying, and by that, I mean I can sit down and force myself to go over flashcards for a confusing-to-me subject.
If I can do it, you can do it.
Follow the tips, peacefully take the test, and maybe someday we’ll talk over the radio together!
The post How to Pass the HAM Radio Exam appeared first on The Prepper Journal.

by Nisha
Did you know that more than two-thirds of the population are likely to experience traumatic events in their lifespan? Traumatic events or disasters can result in a wide range of physical and mental health consequences. Post Traumatic Stress Disorder, also known as PTSD, is a severe and potentially weakening condition that can happen to those who have experienced depressing, painful or life-threatening injuries.
It is not unusual for people facing traumatic stress to experience flashbacks, nightmares or even intrusive memories of something bad that has happened or happening. While...
 New segment – this is a new addition to the blog that will be featured here every Wednesday. My recommendations here will be products that I own and use and have found to be of good quality and that will help you prep better and be more prepared for what is coming. Let’s get started…
Books
...
On January 1, 2018, I’ll be giving away a new Mora Bushcraft survival knife to one lucky subscriber. Winner will be chosen by random drawing and will be notified by email as well as announced on this site. If you’ve not subscribed (if you’re not a subscriber then you can not win) yet, then you can subscribe here.
Guns and Second Amendment

