One of the big challenges for retiring today is being able to afford retirement. Many of us are in the difficult position of not having company retirement benefits to fall back on. What that means is that all we have to retire on is our Social Security benefits. That’s not all that much.
Having money in savings doesn’t help all that much either. It used to be that if you have a million dollars in the bank, you had it made for retirement. Your million would net you $50,000 per year at 5% interest; but with today’s interest rates, you need five times as much in savings, to net the same amount of income. That’s more than most of us make in our entire life.
So, how are you going to survive?
There are two basic ways that people try to deal with this situation; either downsizing to reduce costs or trying to find a retirement business which can augment their retirement income. Both of those possibilities are workable, although neither is easy.
There is another option; that of going off-grid somewhere and becoming self-sufficient. If you’re not sure what I mean by that, it refers to a self-sufficient lifestyle, where you are not dependent on public utilities, but rather have an autonomous home, generating your own electricity and pumping your own water. For some people, it even includes growing their own food.
Not everyone views living off-grid the same way.
For some, producing your own electricity means that you would have to produce as much electricity as you use now, powering air conditioners, computers and massive entertainment centers.
But for others, living off-grid means changing their lifestyle, simplifying it to the point where they don’t need to produce as much electricity as what most of us currently produce. Financially, at least, this option is much easier.
Living in such a way is extremely cheap, especially if you own the property you’re living on. While this would require a total change of lifestyle, retirement is a massive change anyway. Living off-grid would even give you something to do, tending your garden and feeing your chickens.
If you own a home now or have any savings, this is a real possibility. Selling your home would provide you with funds to buy property for an off-grid home and hopefully even to build the home. Whatever retirement savings you might have could be used for that as well, investing those funds in making it possible to retire in a comfortable, albeit different, way.
Basic Off-Grid Requirements
So, where are the best places to go, if you want to retire off-grid? That seems to be the question. Let’s lay out a few requirements for such a place, then we can discuss some likely locations.
- It needs to be a remote enough area that you can buy a few acres at a reasonable price.
- While being remote, it still needs to be accessible.
- It needs to be close enough to a population center to allow the easy purchase of supplies.
- It needs to have ample natural resources, especially water (which may require drilling a well).
- It needs to be someplace where the law allows living off-grid (some states do not allow this).
- It needs to be an area with a low cost of living.
Weather would probably be a factor as well for most people. Living in a hot climate, without air conditioning, may be fine for some, but others would really struggle with the heat. Likewise, living in a cold climate and heating with wood could cause serious problems for others. Ultimately, you have to find what works for you, not what works for someone else.
Weather can also affect your ability to produce your own electrical power. If you were to live in Washington State, you might have trouble with solar panels, as the constant rain would reduce the available sunlight. For that, you’d be better off in the Southwest, where it is dryer and there’s lots of sunlight.
Of course, there’s always a lot of tradeoffs when looking at different places. That location in the Southwest might give you ample sunlight, but it will also be a whole lot hotter. So, you’ll probably need more sunlight, so that your solar panels could produce enough electricity for your air conditioner.
Domestic Retirement Destinations
Most people will want to retire somewhere in the Continental United States, so that they can be close to family and friends. While this isn’t as cheap as living overseas, let’s face it, making a move that keeps you within the country is considerably easier than going outside the country.
Cumberland Mountains
The Beverly Hillbillies probably made one of the most expensive moves in history, moving from the Cumberland Mountains to Hollywood, California. Personally, I think that old Jed Clampett would have been better off building himself a nice house back home in Tennessee, but then, he wouldn’t have had his own television show if he had done that.
The Cumberland Mountains straddle Kentucky, Tennessee, and a bit of the western part of North Carolina and the Virginias. It’s beautiful mountain country, which really isn’t all that densely populated. That makes for rather low cost of living, as well as not a whole lot of government officials breathing down your neck about regulations.
But the real trick is to get yourself up in the backwoods, where nobody will be looking for you.
While I would personally prefer living in the Rocky Mountains myself, living in the Cumberlands would prove to be a whole lot cheaper. Land in the Rocky Mountains is high, pretty much anywhere you go.
Ozarks
Like the Cumberland Mountains, there are a lot of backwoods areas in the Ozarks, which includes the northern parts of Arkansas and the southern part of Missouri. There’s some beautiful hill country there, even though it really isn’t mountainous. People tend to be friendly and the cost of living is rather low.
One nice thing about this area is that the climate is rather temperate. You’ll have four full seasons, without winter coming so early that you can’t get a crop harvested from your vegetable garden. At the same time, you won’t have the really hot summers that are common in the Deep South.
The Northwest
I’m not sure that calling it the Northwest is the right term, but the area of Idaho, Montana, Wyoming and the Dakotas is one of the more sparsely populated parts of the country. As such, it’s a great place to go if you’re looking for a lot of wide open country. In fact, the state of Montana is nicknamed “Big Sky Country.”
These are fairly strong conservative states, so there’s not going to be as much government meddling in your life as there would be in the coastal areas.
That makes it much easier to establish an off-grid lifestyle, without having a bunch of bureaucrats telling you what’s wrong with that. It’s also great country for hunting, allowing you to augment your larder, without spending a fortune at the butcher shop.
Rio Grande Valley
The southern tip of Texas is known as the “Rio Grande Valley;” three lies for the price of one. That term was coined by real-estate developers who were trying to talk settlers from the east into buying farmland there. Invoking the image of a wide, green valley might have sold land, but it wasn’t very honest.
The problem with the Rio Grande Valley is that it’s hot and dry. If you like that, then it’s a great place for you. But I’ll warn you, hot there is really hot. They say that people who live there won’t have to go to hell, because they’ve already experienced the heat.
On the flip side of the coin, the Rio Grande Valley is one of the cheapest places there is in the country to live, with one of the lowest costs of living. Maybe that’s why it’s such a popular retirement destination, with mobile home parks all over the place, dedicated to retired people.
Land is also relatively cheap, allowing you to buy a couple of acres outside of town much lower than you can in many other parts of the country.
The hot temperature does provide one great advantage for those who live there; you can grow crops pretty much year round. So, if you’re planning on growing a lot of your own food as part of your off-grid strategy, the Rio Grande Valley is the destination for you.
Buy an Island
Ok, this one probably isn’t practical for most people, just because of the high price tag, but I like the idea anyway. That is, buy yourself a private island. Yes, there are islands for sale, mostly in the Northeast and Northwest.
While island living isn’t cheap, it’s a great way to get away from it all; and who is going to complain about you living off-grid, when there’s no easy way to get electricity and city water to you?
Islands, by their very nature, are easy to secure. So you probably wouldn’t have much of a problem with the neighborhood kids stealing your hubcaps. For that matter, you might not have any hubcaps anyway; more like a boat. Any car you owned would probably have to be stored on the mainland and would only be used for shopping trips.
Foreign Retirement Destinations
For those who are a little more adventurous, moving outside the United States can provide you with one major advantage, it’s cheap. As long as you stay out of Europe and places like Singapore, the cost of living in much of the world is much cheaper than it is here at home.
Nor is living off-grid considered to be strange. In fact, there are many millions of people in third-world and emerging countries who live off-grid, simply because they don’t have the option of living on-grid.
You can forget about the idea of laws that prevent you from living off-grid; even if you have electricity and water available, nobody is going to think anything of you, if you choose not to use them.
Mexico
Our immediate neighbor to the south is probably the easiest destination to move to. The cost of living in Mexico is considerably less than the United States, even though some things are pretty much the same. That is, the cost is low if you stay out of the tourist destinations.
I live close to Mexico, and I’ve found that Mexican doctors and dentists are excellent, as well as being dirt cheap by our standards. Mexican pharmaceuticals are much cheaper too. In fact, some retired Americans come to the border yearly, just to buy their medications.
There are a couple of potential problems with moving to Mexico though. First off, you really need to speak Spanish, at least enough to carry on a conversation. While there are some people in Mexico who speak English, you really can’t count on finding one when you need them.
Secondly, Mexican law doesn’t allow foreigners to buy property within 25 miles of the borders or large bodies of water. There is a way around this though, simply have a lawyer set up a trust and have the trust buy the land.
Belize
Speaking of Latin America, there’s an even better destination to think about than Mexico, that’s Belize. This small country, located just at the southern tip of Mexico, has a low population and not much else. But English is the predominant language there, making it much easier to move to Belize than to move to Mexico.
In fact, there are enough Americans moving to Belize to retire, that there are real estate companies which specialize in servicing them. But I’d avoid them if I were you, they make their money by selling Americans property for about three times what they pay. You’re much better off buying privately.
Bahamas and Caribbean Islands
While most of us think of the Bahamas and Caribbean Islands as nothing more than vacation destinations, someplace to go on a cruise, they’re actually wonderful retirement locations.
There are a number of the islands which are extremely cheap to live on, if you get away from the tourist traps, and most of the governments will be glad to leave you alone, thankful for the American Dollars you bring into their economy.
These islands also offer you the opportunity to establish a retirement business, serving other Americans who go there on vacation. If you really want to go off-grid, just buy yourself a sailboat and make the islands your home.
There are a lot of options to choose from! Whatever you do after retirement, plan it wisely and prepare for the worst!
This article has been written by Bill White for Survivopedia.
from Survivopedia
Don't forget to visit the store and pick up some gear at
The COR Outfitters. How prepared are you for emergencies?
#SurvivalFirestarter #SurvivalBugOutBackpack #PrepperSurvivalPack #SHTFGear #SHTFBag

 You may use a powerful
  Try going for a weekend without your smartphone, tablet or laptop. You will experience a refreshing sense of freedom that will linger for a long time. Going unplugged allows you to rely on your memory and improve your cognate ability instead of depending on Google for every single fact during a discussion with your friends and family. If you feel you will need your smartphone to take pictures, use a
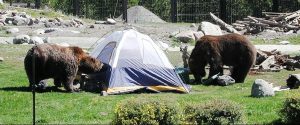
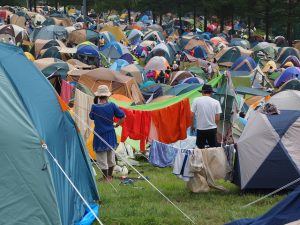
 Make it your responsibility to practice the principles of “leave no trace” any time you go camping. These principles have been set out to keep campsites tidy. So you can return back month after month, year after year and still have a clean, safe and hygienic place to set up your tent. With the ever increasing number of people going for camping each year, we need to take care of our trash and avoid leaving our poop buried in shallow pits. It is important to stick to trails when moving around and avoid putting soap, food or human waste in streams and lakes.
 Welcome to
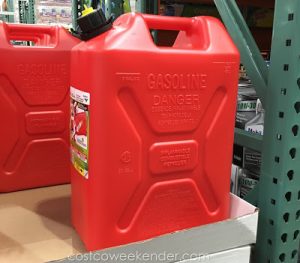 Fuel Storage Basics

 Kidding aside, the Jerry Can is NOT for water.
 vs
vs 


 So, the alternative to imposing on friends – even if they don’t feel that you’re imposing – and leaving your belongings unprotected is staying in your home.
 Black Diamond ATCs and Trango B-52s are excellent choices for rappelling devices.


 I have heard some people say they will not care how their food tastes only that they will be able to have food, but if you have ever had to do it you know it can wear on you. Especially since some basic herb and spice combinations can be created and kept to take any food and make it into a more interesting meal.


 OLD BAY AND OTHER READY MADE COMBINATIONS