Saturday, July 15, 2017

What Did You Do To Prep This Week?

Well folks, here we are again. I feel like crap this morning so I’m going to cut through the filler and get right to it.

What did you do to prep this week?


from TheSurvivalistBlog.net RSS Feed
Don't forget to visit the store and pick up some gear at The COR Outfitters. Are you ready for any situation?
#SurvivalFirestarter #SurvivalBugOutBackpack #PrepperSurvivalPack #SHTFGear #SHTFBag

Prep Blog Review: Prepping Tips For The Unknown Aftermath

Everybody has his own scenario about SHTF. Is it going to be dark and cold, or hot and suffocating? Is everybody going to become ill or turn into zombies? Or maybe it will be about nuclear fallout burning out any living organism.

We hope we will never find out, but we’ll keep prepping in between. That’s why we stumbled upon other survival websites, and chose a few hints to help your prepping efforts. Keep reading!

1. 50 Bartering Items for Post SHTF

“Once the SHTF, you will realize there are things you need that you don’t have on hand. Paper money may not hold any value at this time. Rather, you need to have items or skills on hand that you can use to barter with others for your essentials.”

Read more on Survival Sullivan.

2. 6 Things That Could Attract Dangerous People After SHTF

“First, the disaster will come. It will come like they always do. It may start slow and steady but eventually, it will reach a fever pitch. The destruction brought on by man or mother nature will ravage all that dares step in its path. The audible effects of the disaster will give way to visual awe when the damage is quantified.”

Read more on Urban Survival Site.

3. Who Will Be Your Biggest Threat when it All First Falls Apart?

“Hello, my friend and welcome back! When it all falls apart, there will be a lot of people who will not want to believe it, but as they do come to grips with what is happening, there is one group that will immediately present a clear and present danger to you when it comes to survival.”

Read more on American Preppers Online.

4. Planning For Success During And After The SHTF

“Success requires a plan, and that is true if you want to have success during and after the SHTF. You can have a great deal of knowledge and ideas but not have organized and applied any of this. Remember, only applied knowledge is power, and this is especially true of financial power.”

Read more on Survival Blog.

5. How Do People Really Behave When Disaster Strikes?

“There are a lot of reasons why people prep for disasters, but there’s one reason that’s far more popular than the others. What people fear most when they think about what would happen if society collapsed, isn’t hunger, disease, or exposure. They fear what other people might do to them when the chips are down.They worry that members of their community might hurt or kill them to survive.”

Read more on Ready Nutrition.

This article has been written by Gabrielle Ray for Survivopedia.


from Survivopedia
Don't forget to visit the store and pick up some gear at The COR Outfitters. How prepared are you for emergencies?
#SurvivalFirestarter #SurvivalBugOutBackpack #PrepperSurvivalPack #SHTFGear #SHTFBag

Friday, July 14, 2017

Are You A Modern Survivalist

Over the years the term “survivalist” has taken on different meanings depending on the decade and or who you were talking to at that moment in time. However, the official definition given for the term “survivalist” by Merriam-Webster is:

: A person who advocates or practices survivalism; especially: one who has prepared to survive in the anarchy of an anticipated breakdown of society.

And I’d say that is a reasonable but overly simplified definition of a survivalist because after all, we do “prepare to survive in the anarchy of an anticipated breakdown of...

Read the whole entry... »


from TheSurvivalistBlog.net RSS Feed
Don't forget to visit the store and pick up some gear at The COR Outfitters. Are you ready for any situation?
#SurvivalFirestarter #SurvivalBugOutBackpack #PrepperSurvivalPack #SHTFGear #SHTFBag

Things that ALWAYS Fail!

Written by Wild Bill on The Prepper Journal.

What is a flashlight? It is a storage container for dead batteries as are all other battery-operated devices. We all know this, after all who hasn’t gone to “the dark side” when chasing down that one 9-v that has failed in a smoke detector in the middle of the night?

The question we want to answer here is are rechargeable batteries a better option? In our opinion they are the only option. NiMH (nickel Metal Hydride) batteries can be recharged upwards of 500-1000 times (http://batterysavers.com/rechargeable-battery-life-questions-and-answers/). This, of course, assumes a “source” of power to recharge them – a vehicle battery, working wall plug or a generator. In our opinion they are the only option as Alkaline, non-rechargeable batteries (https://en.wikipedia.org/wiki/Alkaline_battery) become dead weight quickly, sometimes right out of the package and rechargeable Alkaline batteries do not have the (http://www.greenbatteries.com/battery-myths-vs-battery-facts-1/) storage capacity, efficiency or longevity of the NiMH rechargeable batteries.

Another consideration when buying batteries, or any other “powered or fueled” piece of gear is “diversity”. In this case, less diversity is a good thing (try posting that sentence on Facebook!) You will of course have your cell phone (so the government can track you) so one “unique” battery in 2017 and beyond is a given.

However, having to carry chargers for AA, AAA, C, D and 9-v batteries is not smart. Factoring in the chargers you need along with the rechargeable batteries themselves can become a source of weight and confusion, but, like doing your taxes, you must do it! It is worth the investment in time and brainpower. Resign yourself to the fact that you will, most likely, not be able to get away with just one. Make it simple, do your homework, select your cadre of battery operated devices and then compromise on what you can to make sure you have the fewest number of chargers and rechargeable batteries to carry. Reduced weight and increased efficiency are what every prepper should consider in the selection of every component, especially if you plan involves moving from base, or the situation forces you to change plans and abandon a base.

Another consideration is a portable energy storage system which is a science of its own (and the subject of an upcoming post.) These offer some interesting options that will support your rechargeable battery selection and they can be found reasonably priced.

BTW, when a smoke detector does go full-on PSYCHO replace the batteries in them all because they are like lemmings! R.I.P.

The post Things that ALWAYS Fail! appeared first on The Prepper Journal.


from The Prepper Journal
Don't forget to visit the store and pick up some gear at The COR Outfitters. How prepared are you for emergencies?
#SurvivalFirestarter #SurvivalBugOutBackpack #PrepperSurvivalPack #SHTFGear #SHTFBag

Preparing For Short Term Power Outages

by Lorenzo Poe

Survival seems to be the current hot topic. Everywhere you look self-proclaimed experts are willing to tell you all you need to survive the upcoming apocalypse of whatever scenario they can imagine. Most of their tips are tied to more and better equipment.

I do think that it is important to prepare for the future, but knowing what to prepare for and how to start are always tricky. I am no fortune teller just an old country boy who has been around several blocks in my day. I grew up in an area often hit by hurricanes and lived through one of the most active periods on record....

Read the whole entry... »


from TheSurvivalistBlog.net RSS Feed
Don't forget to visit the store and pick up some gear at The COR Outfitters. Are you ready for any situation?
#SurvivalFirestarter #SurvivalBugOutBackpack #PrepperSurvivalPack #SHTFGear #SHTFBag

Pioneer Tips for Delicious Baked Goods

If there’s one thing that I absolutely take pride in, it’s my baking. I was raised eating biscuits. Baking and cooking skills were a source of pride, and insulting somebody’s pie crust was akin to fighting words.

It was scandalous if you showed up to a gathering with a store-bought pie or cookies; I’ll even go so far as to say that a girl would be bake-shamed if she had the nerve to do that.

So I admit that I was socially conditioned to keep my kitchen skills honed, but it’s always been way more than that for me. I love it when somebody groans when they bite into my apple pie, or ask for the recipe to my key lime-pie cupcakes. It’s just what I do.

I was blessed enough to be raised by women who had mad kitchen skills, and I’ve honed my own over the years, picking up lots of tips and tricks of my own along the way. Now I want to share them with you!

If the article you’re reading provides less than you need about this old skill, grab my book – Forgotten Lessons of Yesterday – for more!

Flour Substitutes

First, you need to understand the difference in flours and how to make substitutions. If you have all-purpose flour, you can seriously make anything that calls for bread flour, self-rising flour, or cake flour. It’s just a matter of taking a few extra steps.

  • 1 cup self-rising flour = 1 cup all-purpose flour + 1 ½ tsp. baking powder + ¼ tsp. salt
  • Cake flour = 1 cup all-purpose flour minus 2 tbsp. + 2 tbsp. corn starch. Sift them together well
  • Bread flour = 1 cup all-purpose flour + 1 tsp. vital gluten

Let me tell you, though, I’ve never used bread flour in my life. I’ve found that it’s expensive and, for the results, not worth it. I mean, you do get a lighter bread, but not by much. I’ve lived 40 years without it, so I probably won’t start now. If you’d like, though, go right ahead.

Common Substitutions

How often have you been half-way through pulling out everything to make cookies or a cake just to find out that you didn’t have any baking powder, cornstarch, or even eggs? Well, the next time that happens to you, pull up this article, or just print it out now and put it in your kitchen!

  • 1 tsp. baking powder = ¼ tsp. baking soda + ½ tsp. cream of tartar + ¼ tsp cornstarch
  • 1/2 tsp. baking soda = 2 tsp. baking powder
  • Buttermilk = 1 cup milk + 1 tbsp. lemon juice or white vinegar. Let it stand for 5 minutes
  • Buttermilk = 1 cup plain unsweetened yogurt
  • 1 oz. chocolate = 3 tbsp. cocoa powder + 1 tbsp. butter, veg oil, or Crisco
  • 1 egg = ¼ cup applesauce (not exact, recipe will be a bit crumbly)
  • 1 egg – 1 tbsp. flaxseed + 3 tbsp. water
  • 1 cup sour cream = 1 cup plain yogurt
  • 1 tsp pumpkin pie spice = ½ tsp. cinnamon + ¼ tsp. ground ginger + 1/8 tsp. ground allspice + 1/8 tsp. nutmeg
  • 1 vanilla bean = 2 ½ tsp. vanilla extract
  • 1 cup vegetable oil = 1 cup applesauce
  • 1 cup margarine … wait, what’s margarine? Butter. Always butter. Seriously though, margarine usually responds more like oil than butter in baking.

Remember that when you’re baking, it’s not like when you’re cooking – measurements matter. Let’s break down the science of what goes into things.

  • Eggs add structure. They’re the glue of the recipe.
  • Baking soda and baking powder are leavening agents. They increase the bubbles present in the batter or dough.
  • Oils and butters give baked goods their texture and moisture.
  • Oil adds moisture, but not flavor, so expect a soft cookie or a light brownie or cake
  • Butter adds flavor but is denser, so expect a crispy cookie, a fudgy brownie, and a dense but buttery cake
  • Shortening is all hydrogenated fat and has a higher melting point. Suitable for use in cookies and pie crusts. Cookies won’t spread and will be softer instead of flatter and crispy.
  • Yeast makes bread rise by infusing air via consuming sugar and excreting carbon dioxide and alcohol.
  • Fruits will always add baking time to any product, whether it’s fruit juice, puree, or whole fruit pieces.
  • Chilling dough made with butter will make it spread less and will add more buttery flavor.

OK, now that you understand the basic physics, let’s get down to some tips.

Pie Crusts

There are a couple of secrets to making a crispy, flakey crust. First, use SUPER cold water. Second, add a teaspoon of apple cider vinegar per crust to inhibit the formation of gluten; gluten makes your crust tough. Finally, use butter. Shortening will make it crispy and it’ll hold form a bit better, but it won’t be nearly as flakey.

Cakes

To add an exotic flavor to white or yellow cakes, use almond extract instead of vanilla. It was always the secret ingredient in my wedding cakes and people just went nuts for it.

Let your batter sit for 5 minutes or so before you pour it in the pan and it’ll be lighter. It’s kind of like a pre-rise. With cakes, the more you whip them, the lighter they’ll be.

Cookies

As we’ve already discussed, butter makes them crispy, margarine or shortening makes them cakier. Don’t ever use oil. Chill the dough if you don’t want the cookies to spread as much.

Always cream together the butter and eggs. It makes the texture smooth and easier to incorporate with the flour, and it adds air to make your cookies lighter.

Biscuits vs Bread

Use cold butter and cut it into your flour until you have pea-sized crumbles. Don’t add the liquid until last and don’t mix it any more than you have to in order to make a dough.

The more you mix biscuits, the tougher they get. The same thing goes for cornbread. Bread, on the other hand, should be kneaded for a while, until the dough is glossy and elastic. Kneading makes bread lighter.

Use lard or butter in your biscuits, or shortening is fine, but adds less flavor, so using at least a little butter is a must. Vinegar is a must in them, too.

Baking is one of my greatest pleasures, and I really hope that these tips were helpful to you. If you have any tips to share, please do so in the comments section below – it’s great learning new things!

If you’ve enjoyed these tips and would like to learn more of the skills that were passed down to me from my ancestors, get my book, Forgotten Lessons of Yesterday.

It comes with a ton of handy, useful skills that I break down in easy-to-follow steps and it comes with five free manuals that are incredible all on their own!

This article has been written by Theresa Crouse for Survivopedia. 


from Survivopedia
Don't forget to visit the store and pick up some gear at The COR Outfitters. How prepared are you for emergencies?
#SurvivalFirestarter #SurvivalBugOutBackpack #PrepperSurvivalPack #SHTFGear #SHTFBag

Thursday, July 13, 2017

Paracord – NEVER leave home Without it!

Written by Wild Bill on The Prepper Journal.

NEVER! If there is one “miracle” survival product it is paracord. It can handle so many jobs, it can be packed efficiently, it can be used, reused, re-purposed, reconfigured, and depended upon in almost any situation, it is the friend-zone of materials – always there, always ready, expects (and gets) nothing in return.

No matter how many ways one lists to use paracord they will be as far short of all its uses as a politician is of getting something, anything done.

If you see a bug-out bag without paracord in it walk away, disown or unfriend the bags owner, and put some distance between you and them. At some point, they will be the comic-relief in the horror movie who surly gets eaten and you do not want to be in their “collateral damage” zone. You could try and correct their ways but this might take hundreds of years and cost millions of dollars, though, seeing that light bulb light up in their brain, realizing you may have, perhaps for the first time, made two of their contiguous brain cells work together, could be rewarding. Your call.

Cinching together lean-to or shelter materials, securing a Mylar blanket to a shelter to reflect back campfire heat and light and not depending on dumb luck and no wind to not bring things crashing down. And don’t get me started on “making stuff” – a belt, a bullwhip, a lanyard, a rifle sling, a monkey fist (ouch!), snowshoes, hammock, trap ring/snare (varmints roasting on an open fire), bow sling, bottle harness, knife handle, dog collar, survival donut (we LOVE efficiency), grab handles (for a vehicle, for bags, for water jugs, for panicking people), the list is endless.

Learn how to cut and cap it off properly with a lighter. As a sailor I like to also duct tape (aka combat tape, safety tape, field-medical tape, keep-grandma-in camp tape, and all its other names) the end but it really isn’t necessary for paracord, while it is for larger nylon ropes. If you do “duct tape” go for dull as opposed to shiny, though with the variety of colors available in both paracord and duct tape, one could get creative.

Is color important? Bright orange can easily be seen. A plus when taking down a camp, a negative if you don’t want to draw attention to yourself. Black, or any of its variant, great for camouflage, not so great for taking down tree branches and such lashed together and used for a shelter, in the rain, in the dark, at midnight.

For the purist, I always recommend the Mil-Spec (C-5040H) for the tough jobs as you usually don’t need a lot, the price difference isn’t that big, and you know what you are getting, if you read the spec. Also, the 4 simple visual tests to verify Mil-Spec are easy to perform. Cut off an end, and push back the sheath and count 7, 8, or 9 inner strands. Good. Less than 7, not Mil-Spec. On the inner strands unravel one, if it is NOT 3 strands wound together it is not Mil-Spec. If the inner strand is NOT even twisted strands then again, not Mil-Spec. Finally, if one of the inner strands is not colored, it is not Mil-Spec. These colored ID strands, called “Manufacturer’s ID Strand” are required and a registered marker of compliance.

Just one more point, I said I was a purist, but I am also rational to a fault, so, to be clear, 550 Type III Commercial Nylon Paracord, not Mil-Spec, is an excellent product. It is excellent for building all the things mentioned above, and readily available from multiple sources and it will meet all your needs. This is rated with a tensile strength of 550 pounds, so unless you are trying to air-lift Michael Moore out of Krispy Kreme, you are good!

The post Paracord – NEVER leave home Without it! appeared first on The Prepper Journal.


from The Prepper Journal
Don't forget to visit the store and pick up some gear at The COR Outfitters. How prepared are you for emergencies?
#SurvivalFirestarter #SurvivalBugOutBackpack #PrepperSurvivalPack #SHTFGear #SHTFBag

Wolf Pack Pantry Challenge (Week 11)

Week 11 “Plus 5” Ingredients

• Bacon
• Tomatoes
• Parmesan cheese
• Peaches
• Cream

cooking for survivalThis week’s main protein is bacon from the pig you shot two weeks ago. You have tomatoes from your garden and you have scavenged for parmesan cheese. You have traded another survival group for a bushel of peaches and some fresh cream. What would you make for supper?

You have too many peaches to use in your dish. So how would you preserve the fresh peaches?

Scenario: We are in a grid down situation. We are already several months into the situation. There is no running water, no...

Read the whole entry... »


from TheSurvivalistBlog.net RSS Feed
Don't forget to visit the store and pick up some gear at The COR Outfitters. Are you ready for any situation?
#SurvivalFirestarter #SurvivalBugOutBackpack #PrepperSurvivalPack #SHTFGear #SHTFBag

Prepper News Brief: Thursday, July 13, 2017

  1. Up Poop Creek Without a Paddle

When you look at how much debt and future obligations are clinging to our financial system, it’s difficult to comprehend how it has lasted this long without imploding. Unfortunately, the inevitable collapse can’t be avoided for much longer, and it might be coming sooner than you think. Via SHTF Plan: They Won’t Be Able To Pay You: “Anybody With A Pension, IRA, 401k… Any Wealth Held Inside Of The System” Will Get Creamed.

  1. Global Famine Ahead

In an effort...

Read the whole entry... »


from TheSurvivalistBlog.net RSS Feed
Don't forget to visit the store and pick up some gear at The COR Outfitters. Are you ready for any situation?
#SurvivalFirestarter #SurvivalBugOutBackpack #PrepperSurvivalPack #SHTFGear #SHTFBag

Trump Sends in the Gun Confiscation Cops

Reprinted here by permission from Ron Paul Institute.

DONALD TRUMP ON GUN CONTROLChicago police are keeping busy confiscating “illegal guns.” Last year through the summer, the confiscations were occurring at a rate of one every 59 minutes according to Chicago Police Department figures related by Mark Berman in an October 2016 Washington Post article. This summer, the Chicago police will have some assistance from the United States government in racking up impressive gun confiscation numbers.

Following through on a plan that began its development during the Obama administration, the Trump administration and Chicago...

Read the whole entry... »


from TheSurvivalistBlog.net RSS Feed
Don't forget to visit the store and pick up some gear at The COR Outfitters. Are you ready for any situation?
#SurvivalFirestarter #SurvivalBugOutBackpack #PrepperSurvivalPack #SHTFGear #SHTFBag

Survival Defense: How To Keep These Weak Spots Safe

Fighting off an attacker isn’t just about hitting your opponent hard enough to make them stop trying to hurt you. It is also about making sure that any blows sent your way don’t harm important parts of your body.

When you are in this kind of fight, some of your efforts will aim defending vital body parts even if you’re also trying to strike your opponent. Staying safe comes first!

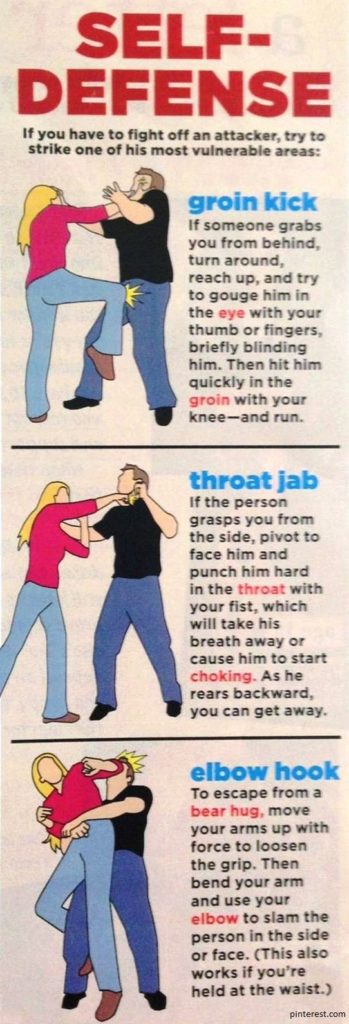
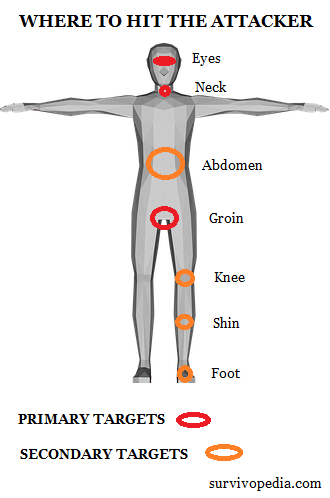
Here are five body parts that you must defend regardless of the nature of the attack. While not using other body parts will spell trouble, harming these five parts can cause permanent injury or loss of life. Keep reading!

But before going any further, there’s a DISCLAIMER that we should insist on.

Reading this article, or others, or watching videos is not enough to prepare you for an attack. You must practice these moves constantly so that you don’t panic or suffer from other adrenalin response related issues. Practice will also help you build speed, precision, and power behind each move.

In a fight, you may have, at most, 1 to 2 seconds (and that includes situations where you maintained good and accurate situation awareness and/or didn’t stray into a dangerous location) to make a good move and neutralize your opponent enough to stop them long enough to escape or prevent further attack if you decide to remain on the scene.

Watch Your Head

Aside from avoiding damage to your eyes, ears, and nose, protecting your head also helps you avoid loss of consciousness.

Pay attention to how the attacker moves. Usually, if someone is going to punch or use a small knife, their arm will move inward.

If the person moves towards the center of your body, move in the opposite direction instead of trying to “escape” by moving in the same direction or “away”. Even though this may feel like you are putting your head in line with being struck, it may throw off the attacker’s aim.

Remember, the attacker will expect you to startle and move your head away, and may already be compensating for that move so that they hit as squarely as possible.

If the blow cannot be avoided, try to move so that your forehead takes the blow instead of your nose, jaws, or eyes. This may be as simple as suddenly squatting down or using some other means to reduce the height of your head as quickly as possible.

You can also turn this move into the prelude to striking at the attacker’s legs by rolling into them, or smashing into their groin, knees, or other stable or sensitive areas. Clench your neck so that if a blow does land, it will not knock your head back and cause further damage to your neck.

In some cases, an attacker might throw a rock or something else heavy to your head or face. If you can’t move out of the way fast enough, cover your eyes and nose with your arms. Or, if you are already on the ground, tuck your head between your knees, and then cover the back of your neck with your arms.

Click here to get your guide to a layered survival defense!

Protect Your Neck

While your neck is a relatively small target, it is also a key one that many assailants will aim for first, so strengthen this part of your body as much as possible. Neck exercises won’t prevent you from choking, but additional strength in this area makes it easier to defend against any head and jaw blows that reach you.

If an attack is coming, keep your chin tucked in so that it is harder to reach your throat. Throughout the encounter, do not arc your head back, as it gives the attacker a perfect chance to grab your neck.

Make it a point to keep your arms and hands close enough to your head and neck so that you can block incoming blows easily, and also attack sensitive nerve junctions in the attacker’s arms.

Having your hands and arms ready to defend this region can also give you fast access to any other targets that open up on the attacker’s body as they try to strike. Remember, to land blows to your head, neck, and jaw, the attacker must reach in towards you.

There are many maneuvers to destabilize the attacker and send them flying past you as well as ones that can be used to attack in a more direct fashion. Remain calm and you will see the openings that will help you stave off the attack with as little injury as possible.

It may also help to keep your body in a position where one shoulder or the other is pointed towards the attacker. To make it work, however, you have to attack without revealing your intentions by rotating into an optimal position.

Once someone grabs ahold of your neck, it is still possible to escape, however you will need to use these maneuvers in a matter of seconds:

  • If the attacker is trying to choke you from the front, he/she will more than likely be looking to crush your throat.
  • To get out of this attack, put your hands together as if in prayer, and bring them up hard and fast between your attacker’s arms.
  • As your arms contact the inner arm area of your attacker, you can try gouging your elbows into the pressure points in the bicep and also midway up the forearm.

From there, you can use different pressure points to inflict maximum pain to the attacker, however they may not be enough to enable you to escape. Here are just a few options:

  • Continue the motion until your hands grasp the side of the attacker’s head. Next, lock your hands, and gouge your thumbs into the attacker’s eyes as hard as you can. If you cannot reach the side of attacker’s head, then just poke your fingers into their eyes.
  • You can also try sticking your thumbs hard into the mandibular nerve just below the ear, twist your thumbs, and pull forward. If you do this maneuver right, it will cause immense pain and cause the attacker to gag. It can also dislocate the attacker’s jaw if you pull forward hard enough.
  • The area just under the nose is also a trigger point for immense pain if you hit it just right. Needless to say, you can always aim for the attacker’s nose and try to break it. These maneuvers may not work as well because your attacker may try to bite you.
  • When working with nerve points, no matter where they are on the body, do not give up if the first blow or attempt doesn’t neutralize the attacker. In many cases, hitting a second time will neutralize the attacker because the nerve was weakened by the first blow, and may give in completely with the second one. If all else fails, try again; although if you practice diligently, two should be enough because you will know where to hit and have a well honed technique to work with.

Once you have inflicted some pain to the attacker, knee male attacker’s in the groin, perform a headbutt, or use other methods to break the attacker’s hold.

If you are a woman wearing high heels, you can also place the outside of your foot against the attacker’s inner leg, and stamp down hard. Practice this maneuver so that you have a good idea of how to jam your heel into the attacker’s ankle bone.

Don’t aim for the attacker’s foot, as they may be wearing steel toed boots, or something else that will make your heel less effective. On the other hand, even an ankle covered in a boot can be impacted with this method.

Don’t Drop Your Jaw!

A blow that lands squarely on your jaw can render you unconscious and lead to permanent injury.

While tucking your jaw into your neck can protect both vital areas, there are some additional things you must do to prevent damage to your jaw.

As simple as it sounds, keep your jaw as tightly clenched as possible. If a blow does land on your jaw, this will reduce the risk of breaking your jaw, and also help reduce damage to your teeth. A clenched jaw also moves less, which means that there is less chance of being knocked unconscious.

Warming up your jaw with a few exercises can also help reduce injury. But if you are caught unawares, you will not have time to prepare your jaw muscles.

On the other hand, if you have a good level of situation awareness, you will probably have one minute or two needed for these exercises. Individuals that have experience with gaining control of adrenalin responses may also use these exercises as a trigger that will help them prepare mentally and emotionally for conflict.

Solar Plexus and Abdomen

This is one part of your body where some of your defense can be grounded in exercises done before you ever get into a fight. Strong, non-bloated, abdominal muscles will be able to take a blow with less injury and pain.

There are many exercises and methods you can use to build up this core area of your body. Aside from improving the chance of recovering faster from a blow to this part of the body, any move you make will have more power behind it.

If you need to defend against a knife attack or some other weapon other than hands and fists, you will need to use more offensive moves than you would for breaking an attack to your neck.

Here are a few things you can try. Instead of dropping your arms and hands from their defensive position near your head and neck, use your feet and legs instead. Among other things, you can continue pivoting and moving so that your side remains facing the attacker.

If the attacker gets too close, you can pivot slightly towards them and use your knees or feet to attack their shin, groin, or knees. As with blows to the face, someone with a knife may expect you to continue pivoting away rather than take a chance of being stabbed or struck with a weapon.

The opposite move may throw your attacker off for a fraction of a second as long as you don’t give away what you are about to do. Needless to say, if you can kick the knife away or disable their arms first, you will be in a better position.

As you pivot, look for an opening where you can grab the attackers outstretched arm and pull them forward. If at all possible, try to combine this with stamping on the foot, or using your knee to kick behind their knee in order to drop them to the ground.

These actions must be taken very quickly, as they will leave your head and neck unprotected. If you practice enough different kicks and rolls, you can use different maneuvers that still keep your hands free for defending your head and neck.

Back/Spine

Unlike other vital parts of your body, you can harm your back or spine more with improper technique than your attacker can with primary blows. A as a general guide, you better keep your back away from your attacker. If you are facing multiple attackers, put your back against a wall so that none of them can get behind you.

It is crucial to practice falling, rolling, and other techniques used during an attack scenario. No matter how much you practice, or how hard you train, you can expect to find yourself on the ground. To protect your back, knowing how to break a fall and roll will:

  • protect your back and neck much better than simply landing where ever and how ever the fight sends you
  • can also move you away from the attacker
  • can be used to set yourself in a position where you can attack your adversary.

Once on the ground, do not expect to get up immediately, and do not expect your attacker to simply stand around and wait for you to get back up. It may be necessary to kick, or roll out of the way to get into a better position or avoid other blows.

When you watch a skilled martial artist or other fighter, everything they do seems effortless. On the other side of the equation, each move they make is based on careful analysis that happens very quickly because they have the strength, muscle memory, and experience to carry out these moves as efficiently as possible.

Learning about different moves that can protect vital parts of your body will definitely help you face an attacker, but you must also take the next step and find a qualified trainer and a safe place to practice.

Survival defense is one of the skills that you just can’t miss if you want to keep yourself and your family alive. Click the banner for more!

This article has been written by Carmela Tyrell for Survivopedia.

References:

http://www.policemag.com/channel/patrol/articles/2016/04/gaining-compliance-with-targeted-pressure.aspx


from Survivopedia
Don't forget to visit the store and pick up some gear at The COR Outfitters. How prepared are you for emergencies?
#SurvivalFirestarter #SurvivalBugOutBackpack #PrepperSurvivalPack #SHTFGear #SHTFBag

Wednesday, July 12, 2017

Medical Things Expire!

Written by Wild Bill on The Prepper Journal.

The importance of an on-going, always under review survival plan, can’t be over-stressed. Every plan needs constant, consistent and through review. While plans may change at a moment’s notice, some things, the things we can control, we should strive to control.

Medical supplies expire. Any good medical kit, IFAK (Individual first-aid kit) or MFAK (Multiple-injury first-aid kit) will have a variety of components with expiration dates that always vary across the kit. So, you must check each component and make a schedule to be followed to keep the kit ready. This is relatively easy as not only are all the components available individually, there are also refill kits available. Additionally, unless an item is compromised physically – damaged, seal broken on sterile supplies – it should be placed in a secondary/fallback kit as the ‘expiration date” is not always absolute, but a result of testing by the manufacturer. Whether these were set under more adverse conditions generally than your supplies may endure, or the result of legal review, they are estimates and we recommend following them. Of course, if you leave the bag in a vehicle in Arizona for the summer all bets are off! The point here is no EMT is ever going to complain that they have too many chest seals, too much gauze, or too many hemostatic agents unless they have to carry them all themselves!


A physical review every three month is recommended since this involves rechecking expiration dates as well as the integrity of the packaging. Do this and you will not only be up-to-date and ready but you will know where every component is should an emergency present itself.

One more VERY important thing to do on medical kits – get trained on the use of the components! These classes, usually a day in duration, available everywhere, are just as valuable as the components, because improper use can do more harm than good. As you know everyone knows how to use a band aide and has seen a tourniquet used incorrectly on TV or in the movies. You need to be able to recognize this. Do you know the difference in application between a Sof-T, a SWAT-T, a CAT (Combat Application Tourniquet), or a TK-4L? How about a combat dressing like an OLAES Modular Bandage or Israeli bandage? Do you understand why chest seals ALWAYS come two (2) to a pack and that you better be sure if you don’t use them both (one for the entrance wound and one for the exit wound)? In the real world, this is what you need to know in order to “do no harm” while providing first aid. You don’t need to know each one, though that would not be useless information, but you do need to know the one or ones you chose to carry. The adage of “what you don’t know can kill you” or yours applies here.

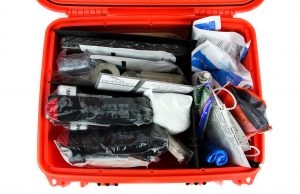
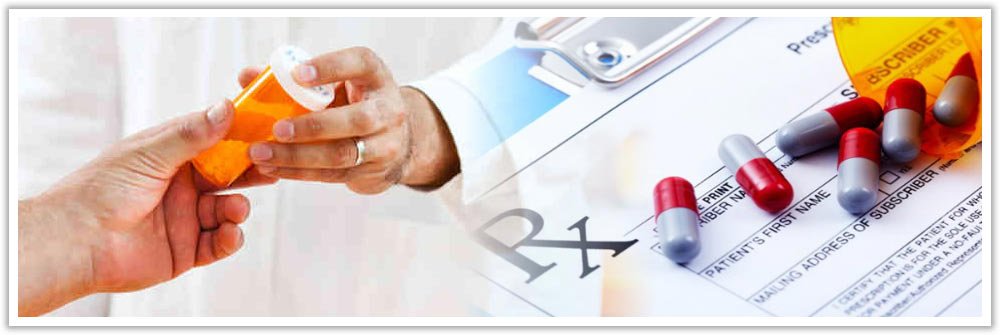
Prescriptions, if you or a family member are on a prescription that requires a dosage regimen, daily, weekly, when a condition arises, this is something you must prepare for as most insurance/prescription plans limit your access to a 30-day supply. You need to know what your plan allows, if your doctor will work with your insurer to get authorization for higher quantities, and the proper storage and expiration of these medication. If you are limited by these controls talk to your doctor about alternatives to the prescribed medications such as supplements, or other homeopathic alternatives. For over the counter medications – allergies, headaches, etc. you should just keep track of your consumption over a period of time (a year would be good) and break that down (more allergy meds during spring, more cold meds during winter, etc.) and stockpile accordingly. Remember to factor in your possible changed environment as you may not be spending nights in your bed, air-conditioner or heater on, protected by a structure and remember these medicines have expiration dates as well and should be reviewed on your schedule.


This is indeed the “devil is in the details” work BUT what could be more important? Prepared is always a good thing and the status and use of medical supplies is something the entire family should be a part of because, as the head of household, you may be the one that needs to be administered to because of events.  Leaving as little to chance as you possibly can is just smart planning. Think of it as “re-purposing” those brain cells currently being used to remember when you last updated your Facebook profile.


The post Medical Things Expire! appeared first on The Prepper Journal.


from The Prepper Journal
Don't forget to visit the store and pick up some gear at The COR Outfitters. How prepared are you for emergencies?
#SurvivalFirestarter #SurvivalBugOutBackpack #PrepperSurvivalPack #SHTFGear #SHTFBag

How to Stay Clean in the Wild 

Do you know that saying, “cleanliness is next to godliness?” Well, it may be true, but how about staying clean in the wild? That’s a pretty interesting concept, especially for modern-day potential survivalists who never get their hands dirty in any real sense of the word.

Today’s article is about funk removal or camp sanitation practices or whatever you want to call it.

It’s all about health and less about the aesthetics of the wilderness. The name of the game is about keeping away viruses, bacteria and other nasties (like foul odors which may attract wild beasts), as efficiently and as humanly possible in a given situation.

Let’s take cats for example: those lovely critters who keep themselves squeaky clean by licking only. Other wild animals also have their own methods of staying clean in the absence of modern-day utilities or running water that’s right there at the flick of a wrist.

Deer, bears, and wolves have automated cleaning systems at their disposal, i.e. they shed skin and fur regularly via a natural process, thus eliminating insects that feed on their blood and skin.

Also, wild animals like to rub up against rocks or trees to scratch themselves, thus removing extra fur and skin and eliminating the dirt and the parasites. And it’s worth mentioning that wild animals take an occasional bath when they cross a lake or a river, too.

Now, think about medieval Europe, especially King Louis 4th of France’s court, when people only bathed maybe once a year. Instead, they used something along the lines of dry cleaning; i.e. they wiped themselves with pieces of cloth impregnated in perfume, vinegar, and mixtures that eliminated of covered odor, plus they changed their clothes relatively often.

When you think of that, our modern-day obsession for cleanliness and sterile food and clothes may seem like an obsessive/compulsive disorder.

However, staying clean as a whistle at all times comes with its own advantages, like vibrant health and a general sense of well-being. So, how can one reconcile the problem of going camping or being stranded in the wild with the need for cleanliness, as the two are basically opposite situations?

The very act of going on an outdoors adventure means you’re getting yourself out of our concrete-made world. You’re going off-grid for real, to dance with the wolves and howl at the moon.

3 Second SEAL Test Will Tell You IF You Would Survive a SHTF Situation

You’re subjecting yourself to the elements with no running water, nor a sanitary way to wash yourself. No plumbing, no toilet to speak of, and reliant on DIY cooking, sleeping and eating on the ground, and so forth and so on.

Even though a rustic camp-out is a must-master experience for any respectable prepper, staying clean throughout the entire endeavor will keep you occupied, provided you care about your physical/mental health and peace of mind.

Everything revolves around quality of life, whether you’re living in a modern city, surrounded by all the gadgets and amenities our 21st century lifestyle affords us, or living somewhere off the grid, with a tin foil hat on your head while reading subversive literature somewhere in a log-cabin in the woods.

I’m only kidding, of course, but in both situations, cleanliness is essential for preventing disease and infections. In a survival situation, things are even worse for folks with poor hygiene, as poor hygiene will reduce the chances of survival.

Now, some of my regular readers, if I have even one, may argue that it’s only natural to smell like a bucket of rotten eggs left out in the sun in 120-degree weather for two days, because after all, when in the woods, you do what the bear does, i.e. you stink; that’s the way it is.

The Sponge Bath

Well, the answer to that is: why don’t you take a sponge bath?

This is one of the main actions you can take in order to stay clean in an outdoors (survival) scenario. Yes, I wasn’t kidding; it’s very important to take a bath (well, sort of) each day, even when out in the wild. Remember my Louis 4th reference in the preamble of the article?

The thing is, you can use a camp towel and some water to wash your pits, your feet and groin properly. These are the main areas that will begin to stink up the place on an outdoors trip, and are also areas that are particularly susceptible to many harmful microbes, or even heat rash, jungle rot, or fungal infection.

Boil you water beforehand to kill all germs, if you’re obsessed with that kind of stuff, or depending on the nature of your water supply.

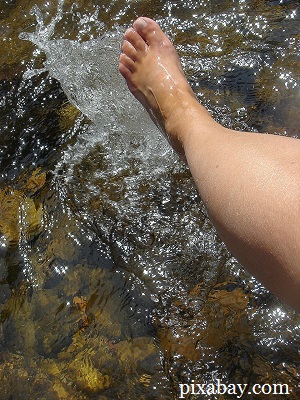
If you don’t have a towel, which would be weird, you can use a bandanna or something similar as an improvised sponge.

Whenever possible, don’t forget to dip your feet in running water.

If you’ll be able to do that at least twice a day for 5 minutes, then let them dry before you put your shoes back on and move on it will work wonders for mitigating potential blisters and eliminating bacteria and fungus.

This Is How To Survive When All Hell Breaks Lose

And while you’re at it, if you camp near a source of water, which is nearly always the ideal case with well-trained outdoors survivalists, wash your socks and let them to dry near the fire overnight on a daily basis.

The Air Bath

If water is scarce, you can take an “air” bath by removing all your clothes and exposing your naked body to the sun (read germ-killing UV light) and air for at least sixty minutes.

If you don’t have soap, you can use sand or ashes instead, for cleaning yourself thoroughly, provided you have a good water source nearby. Don’t do this if you don’t have a way to rinse thoroughly because the grit will cause irritation and sores that can lead to infection, or at least discomfort.

And don’t worry; you can always improvise soap from wood ashes and animal fat, provided you have the means.

To make “natural” soap, you’ll require some animal fat cut into small pieces then cooked in a pot for extracting the grease. You’ll have to add enough water to the pot to prevent the fat from sticking.

Remember to stir the mix frequently and cook the fat slowly until the fat is rendered. Then, the resulting grease must be poured in a separate container to harden.

The wood ashes (preferably from hardwood if you want your soap to harden) will be put in another container that has a spout near the bottom. Then, as you pour water over the ashes, you’ll collect the liquid dripping from the spout in another container.

That stuff is called lye or potash. Another method for collecting the lye is to pour the combo of ash and water through a filter made from a piece of cloth.

Both of these methods take a bit longer than if you just boil the ash in a bit of soft water – rainwater is best – for 30 minutes or so. Let the ash settle then skim the lye off the top and follow the directions below. Be careful because lye is caustic.

In the next step, mix 2 parts grease with 1 part lye and place the combo over a fire. Allow it to boil slowly until it thickens. After the (now liquid soap) cools, you pour it into a pan and allow it to harden, then cut it into soap bars and there you have it, DIY soap for emergencies.

You can now use a cloth and soapy water to wash your armpits, feet, and crotch daily now, not to mention being capable of washing your hands after going to the “bathroom” in the woods or before cooking food and all that.

Don’t Forget the Teeth!

Keeping your mouth clean is also very important. If you don’t have a toothbrush, you can DIY a chewing stick from a 4-inch-long/1-inch-wide twig. You’ll have to chew up at one end of the twig until you separate the fibers then brush your teeth with the resulting gizmo resembling a toothbrush.

Another method is to use a clean strip of cloth wrapped around your fingers for rubbing your teeth, thus wiping away food particles.

Willow bark tea makes for an excellent mouth wash, together with salt water. You can floss your teeth using fibers or a piece of string.

The campsite must also be kept clean at all times, i.e. do not soil the camp site area with feces or urine. Try to dig cat holes several yards away from the camp and cover the waste for best results.

We’re used to take everything for granted in our modern world, but only some of us would be able to face a major shift in our society. Interacting with nature and using its resources will provide you the means of survival.

Would you make it? Click the banner below for more!


I hope the article helped. If you have other ideas or comments, feel free to use the dedicated section below.

This article has been written by Chris Black for Survivopedia. 


from Survivopedia
Don't forget to visit the store and pick up some gear at The COR Outfitters. How prepared are you for emergencies?
#SurvivalFirestarter #SurvivalBugOutBackpack #PrepperSurvivalPack #SHTFGear #SHTFBag

Tuesday, July 11, 2017

How to NOT have to Rub Sticks Together to Start a Fire!

Written by Wild Bill on The Prepper Journal.

A google of “how to start a fire with sticks” produced 26,800,000 results a few days ago. Don’t know that I believe the stats, 26,800,001 might have convinced me, but I do believe if you are at the point of rubbing two sticks together to start a fire in 2017 you are not very high on the food chain. In fact, I would suggest this activity is better suited as an alternative to when you can’t find a sitter so you can go to the gym as opposed to a position to put yourself in when the lack of heat may kill you.


The ability to start a fire in the wild is one of the most important skills one can learn. Not just for warmth, but for light, and cooking, and signaling your location and, in some cases, keeping the creatures of the night at bay. Every emergency kit or bug-out bag should have at least five (5) fire-starting methods, because you may face a variety of different conditions from weather and terrain and available fuels.

Instead of sticks and endless upper body strength, as a prepper, you need redundancy. News Flash: Sometimes some things fail, eventually all things fail. Backups and alternatives are a good thing, and, other than a fully functioning flame thrower (which will eventually fail), fire starters do not take up much room and do not add much weight. The right approach to having redundancy is to make a kit that goes from easy to more challenging. And easy can be a disposable lighter, more than one, matches, safety “and risky” as well if you can find them, down through survival specific gear (Spark Force, SE FS374 All Weather 2-in-1). I suggest you have butane stick lighters, road flares, steel wool and a 9-v battery, more matches, magnesium fire starters, calcium carbide and a welder’s striker, and magnesium ribbon, to name just a few.


And, although there are a lot of commercially available kindling substitutes, they can be expensive and can be cumbersome, and there packaging is usually not designed to last years. One such product I tested here in mid-sentence that stated “stays lit in fierce weather” I lit it with an open flame (Bic lighter) but I could blow it out from a distance of 2 feet. I may use the leftovers in my fire pit just to dispose of them.

I really like things you can make and prove for yourself that they work and you can test them under the conditions you may face. I have found that properly stored dryer-lint mixed with dry sawdust never fails. It isn’t pretty and it needs help to stay put in a wind but over time you can have a bag big enough to use as a pillow and it only takes a spark to get it going, and you only need a small amount each time. There are a lot of other alternatives for the more cautious and conscious, like mixing rifle powder with Acetone. I have used this one often, but I have a lot of chemistry in my background and I know “black powder” is not “rifle powder” as black power is fast burning and therefore more explosive than rifle powder which is slower burning due to the shape and composition of the granules – just one of the differences between making a useful fire-starter verses obtaining a bad reputation at your local emergency room.

I do this is a plastic bowl, OUTSIDE, with the Acetone slowly added to the bowl of rifle powder and stirred with a wooden stick – a popsicle stick or a paint stir, depending on the quantity you want. Wood on plastic as opposed to any metal for spark suppression during the mixing process. A sticky paste is the consistency I want and it should be stored in an airtight container. Decades ago the old 35mm film canisters were great for this, now I would recommend a trip to the Dollar Store and a search in the kitchen section for small inexpensive plastic spice containers. Old prescription bottles work well as do over the counter pain pill bottles if you can deal with the child-proof aspect of each. Be creative, LABEL correctly!

To ignite this compound just rub some of the paste on one end of some steel wool and touch the other end of the steel wool with a charged 9-v battery. Yes, the downside is this requires a lot of moving parts as opposed to the lighters we have become accustomed to, the upside is it works and does not depend on the quality of an item perhaps produced overseas (which I have in my bag as backups).  It produces an intense flame that will get your kindling going and can burn for up to three minutes, and that is important. If it hardens, it will over time, it will burn faster, but it will not explode.

Another good homemade fire-starter is sawdust soaked in a fuel, kerosene over gasoline please, again slower burning which is what one wants to start a fire. Simply soak sawdust, fine chips work but the rough chips from a chainsaw cutting wood work better. Store as above, in a sealed container. This can be lit with a match. Don’t spread the compound as the flame from the small mound of material will produce a longer burning concentrated flame. FYI, sawdust is a component in some road flares.

Returning from the dark arts, dry storage is the key with any fire-starter equipment and materials and the food storage bags you can buy at the grocery store are poor, at best, for keeping moisture out. The right solution is Mylar resealable bags. Caution should be exercised when opening these bags in areas with high humidity, or during a cloudburst, and you should close them immediately and you should always double bag them “to be sure”. The bags will perform almost forever and after just a few days “out there” it may seem like forever. AND, if steel wool and the 9-v battery are a part of your redundancy kit, PLEASE store the 9-v battery separate from EVERYTHING else. Please store any batteries separately.

Finally, a little aside on “matches”. Many years ago, OSHA “regulated” the old matches almost out of existence. Strike anywhere matches were deemed too “unstable” even though they first appeared in 577AD in China, and were first made in America in 1825. The government made them disappear in America twenty some years ago, BUT they are making a comeback. The Diamond Strike Anywhere Matches, in Eco-friendly green tip, are available at a campground store or camping supply retailer and most grocery stores and they can be purchased from Amazon as well. “Survival matches” like the UCO Survival Matches come with “2 strikers” as opposed to claiming they are strike anywhere wind & waterproof matches. And they state “up to a 12 second burn” which is good for a match and the reason why I make my own fire-starter in the first place.

Starting a fire is something that the whole family should practice. Understanding the challenges of wet tinder, winds, and materials, and the structure of going from small to big gradually are things better understood when practiced. It will also teach them respect for the process, the results of the process, the dangers and benefits of those results and the things that made it happen. Rubbing two sticks together should be used as a punishment in 2017.

The post How to NOT have to Rub Sticks Together to Start a Fire! appeared first on The Prepper Journal.


from The Prepper Journal
Don't forget to visit the store and pick up some gear at The COR Outfitters. How prepared are you for emergencies?
#SurvivalFirestarter #SurvivalBugOutBackpack #PrepperSurvivalPack #SHTFGear #SHTFBag

Today Is Amazon Prime Day

Today is Amazon Prime Day – it the one day each year that Amazon offers exclusive deals on a huge number of items. You can use my Amazon Affiliate Link to go to Amazon and check out those deals – maybe they are offering a deal on something that you’ve been wanting – now you can get it and save money too.

By using my affiliate link it will cost you nothing extra when you order but I’ll get a small commission that will help to keep this site free for you and other readers.


from TheSurvivalistBlog.net RSS Feed
Don't forget to visit the store and pick up some gear at The COR Outfitters. Are you ready for any situation?
#SurvivalFirestarter #SurvivalBugOutBackpack #PrepperSurvivalPack #SHTFGear #SHTFBag

Prepper Tools That I Use And Recommend

Occasionally I mention tools and prepper gear that I use and/or recommend in my posts here and there, but this page includes an easy-to-access list of what I use and recommend. I hope it’s helpful!

prepper tools and gear

Some of the links in this post are affiliate links, meaning, at no additional cost to you, I will earn a commission if you choose to make a purchase. I am very grateful for your support of this site in this way. Thank you.

Hard To Store Food Items

Augason Farms – Some foods like powdered milk, dry margarine, butter powder, buttermilk powder, cheese powder, shortening, and powdered eggs are...

Read the whole entry... »


from TheSurvivalistBlog.net RSS Feed
Don't forget to visit the store and pick up some gear at The COR Outfitters. Are you ready for any situation?
#SurvivalFirestarter #SurvivalBugOutBackpack #PrepperSurvivalPack #SHTFGear #SHTFBag

North Korea’s Nuclear War Machine Ramping Up

North Korea’s antics and activities have filled the news for months now, having accelerated since Donald Trump was sworn in as president.

While their pursuit of nuclear weapons and missile technology is nothing new, the hermit kingdom of Kin Jong-un seems to be making strides in that direction.

Their latest missile test is a prime example of this. Scheduled on our Independence Day, this missile was a “present” to the United States, according to North Korea’s dictator.

This missile, the Hwasong-14, was the first truly intercontinental missile that the North Korean’s have developed, and its maiden flight went off flawlessly. After the failures of their most recent missile tests, the success of this new model has suddenly made the threat from North Korea much more real.

According to the South Korean Joint Chiefs of Staff, the Hwasong-14 missile flew over 900 miles, all of it under power. It splashed into the ocean within Japan’s exclusive economic zone, making it a real threat to the Japanese as well, another country that the North Korean government hates almost as much as it hates the United States.

But Japan is a long way from the United States, isn’t it? Yes it is, but the missile didn’t fly its full designed range, probably so that North Korea’s engineers could watch the descent and splashdown as well.

According to experts, the 37 minute flight time of the missile would have given it the ability to reach a maximum altitude of 2,800 km. That would give it a total range of 8,000 km or more, exactly what the government in Pyongyang has stated it would do.

What this means is that the North Koreans finally have a missile that has the potential of reaching the United States. Alaska, Seattle, Washington and Hawaii are all within its range, making Kim Jong-un’s oft-repeated threat of unleashing nuclear hell on the United States a real possibility for the first time.

The fact that this missile, the first of its type, performed so well on its maiden voyage is especially troubling, as it shows how much North Korea’s engineers have been learning from the failures of their recent launches. While those were not of the Hwasong-14, the lessons learned from those less-capable missile launches were obviously applied to the design and manufacture of this new one.

Essentially, this missile is an improvement on the Hwasong-12, with a second stage added. While the first three launches of the Hwasong-12 were failures, the fourth attempt, in May of this year, was a success, with the missile’s apogee 2,111.5 km above the ground and landing 787 km away in the Sea of Japan.

This leads me to think that the Hwasong-14 may actually be able to surpass the 2,800 hm altitude necessary to reach the West Coast of the United States.

What’s Next on the Battlefield?

Does this mean that thermonuclear war is going to come in the next few weeks? Probably not. But it does clearly show us that we are one step closer.

How many of these new missiles they have in production right now is a big question that remains unanswered, as well as whether their nuclear program has reached the point where their bombs are small enough to be installed on top of one of these missiles.

But it is clear that at the rate in which North Korea is improving their missile technology that it won’t be long before they are a true threat to the mainland United States. This new missile, if launched close enough to the United States, could easily carry a nuclear bomb high enough to generate an EMP that would blanket all 48 contiguous states.

Since the missile launches off a mobile launcher, rather than from a silo, this is a very real possibility. It is too large to fit into North Korea’s ballistic missile subs, but it is not too large to be ship-launched.

While too long to fit into a standard shipping container, a special container could be manufactured for it, with the launcher built in. Shipped on a North Korean freighter, this would not be noticeable by the international community.

Such a ship, armed with the Hwasong-14 and a team of technicians, could launch from the middle of the ocean, conducting an effective EMP strike. Being in the middle of the ocean would make detection and interdiction of the responsible ship difficult, but not impossible.

Even so, I am sure that Kim Jong-un would be happy to trade the lives of that crew for the destruction of the United States’ electrical grid.

GREEN ENERGY – Click Here to find out how you can build your own energy generator.

In addition, North Korea has as many as six ballistic missile submarines. While they are actually obsolete technology, their existence can’t be ignored. Each of those subs can carry up to two Pukkuksong-1 nuclear missiles.

While the range of that missile is limited to 500 km, the submarine could sneak in close to the shore, launching their missiles to take the heart out of any city within about 300 miles of the coast. Used in conjunction with the Hwasong-14, in a coordinated attack, these could add a considerable amount of punch to the attack.

Recently, I was discussing this with a friend in the military, who dismissed the North Korean’s submarine fleet as obsolete. While I have to agree with him to some extent, there is one glaring statistic which is of supreme importance in any discussion of North Korea’s submarine capabilities. That is, they have a lot of them.

Current estimates put their submarine fleet near 70, which means it would take every submarine the United States Navy owns, including our ballistic submarines to shadow them all.

What this means is that the North Koreans could swarm their submarines to sea and we would not be able to follow them all. Properly executed, there is a chance that their ballistic submarines would escape detection and therefore would not be shadowed. Should that happen, they would have a potent weapon pointed at our country.

Of course, a lot depends on what sort of attack the North Korean military would choose to hurl at the United States. While Kim Jong-un has made it clear that his intent is to attack us with nuclear arms, there are many forms that attack could take. Most specifically, it could be an EMP or a more conventional nuclear attack.

Video first seen on PBS NewsHour .

Our best chances would be if he launched a conventional nuclear attack against us. While that would probably mean the destruction of a number of our most important cities, as a nation we would survive.

But an EMP attack would take out our electrical grid, our communications and just about everything else in the country. Chances are, 90 percent of our population would die.

Currently, we have three aircraft carriers and their battle groups steaming off the Korean Peninsula, ready for anything that North Korea might do. While this constitutes a major naval force, projecting more power than any other nation’s military can project.

But it is of little use against a nuclear threat, except in the case of a disarming first strike. Should the president decide that such a strike was necessary, the combined air power of the three aircraft carriers doesn’t come close to the number of fighters available to North Korea.

Of course, our Navy’s F-16s are more advanced than the North Korean’s fighter jets, even their F-21s, of which they have about 200. Nevertheless, sheer numbers are on the side of the North Koreans, if it is decided that it is necessary to do a preemptive strike against them. Between 458 fighter aircraft and 572 attack aircraft, our 180 Navy aircraft will have a busy time of it.

Then there’s the risk of North Korea attacking our aircraft carriers with their submarine fleet, if we launch a preemptive strike. While our naval fleets always work with submarines in attendance and our nuclear-powered fast-attack boats are technologically far superior to their diesel-electric ones, the sheer numbers of submarines that the North Korean’s have available to them would make things interesting for the submarines working to defend our carrier fleets.

But the real trump card that the North Koreans hold, is the fact that their missiles are mobile. Unlike fixed locations, the missile carriers themselves would have to be located, before any attack could be made. While I’m sure that the NRO is hard at work at this task, hunting for something as small as a missile launcher, in the vastness of any country, even one as small as North Korea, is not easy.

Looking at all this together, it is clear that the threat of a nuclear-armed North Korea is a real threat. It is clear that we would win any exchange with the North Koreans. If they chose to use a nuclear-tipped missile against us, our long-standing policy would be to retaliate in kind.

While I would hate to have the responsibility to give that order, someone in the Pentagon has to be thinking about it.

Who’s Paying the Price?

Turning North Korea into a parking lot, in retaliation for destroying our country or even one of our major cities, is not an equitable bargain. We might win the war, but it would be at a terrible price in both military and civilian lives. That’s a price that we as a nation, can’t afford to pay.

So, while chances of a non-military solution are looking thinner and thinner by the day, we need to be praying and hoping for just that. The last Korean war cost approximately 1.9 million total casualties, this next one could cost many times more.

You and I need to be prepared for such an eventuality, regardless of whether it means a conventional nuclear exchange or suffering an EMP attack.

If you live in or near a major city, especially on the West Coast, I would recommend that it’s time to move. Find yourself some greener pastures elsewhere, where you would not be living in the midst of a target. If you can make that move be to a small town, where you wouldn’t have to content with the massive number of people trying to survive after an EMP, so much the better.

Either way, we have apparently just entered another Cold War, and this one seems like we are facing off against an enemy who is much less stable than the old Soviet Union was.

Chances of an actual nuclear attack are clearly much greater than they have ever been. Take the right steps to survival and prepare to face the blackout with your own energy bank! Click the banner for more!

This article has been written by Bill White for Survivopedia.

References:

http://nationalinterest.org/blog/the-buzz/north-koreas-submarine-fleet-big-threat-or-big-joke-20300


from Survivopedia
Don't forget to visit the store and pick up some gear at The COR Outfitters. How prepared are you for emergencies?
#SurvivalFirestarter #SurvivalBugOutBackpack #PrepperSurvivalPack #SHTFGear #SHTFBag