Saturday, June 10, 2017

Survival Fishing With Just a Hook, Line and Sinker

Written by Guest Contributor on The Prepper Journal.

Editor’s Note: This post was contributed by Ben Ayad. If you have information for Preppers that you would like to share and possibly win a $300 Amazon Gift Card to purchase your own prepping supplies, enter the Prepper Writing Contest today.


When people plan for survival scenarios they often times gather supplies in large quantities in hopes to wait out any chaotic breakdown of civil order. The truth is in a real SHTF scenario chances are you will be bugging out and not hunkering down in some urban or suburban area. That means you will be travelling light because you will be in a hurry to get away from large population centers. It also means you will only be carrying the absolute essentials on your back and one of those better be a means to fish.

Why be prepared to fish? That is because chances are, it will be one of the most abundant and nutritious food sources available wherever you go. Fish can be found anywhere from mountains, to coasts to flat plains. So it’s best to be prepared to catch them. You and your family’s health may be wholly dependent on survival fishing at times.

Another big advantage you get when you catch fish is that you can safely dry them and store this dried fish for long periods of time too. Think of fish as the survival gift that keeps on giving.

Types of Survival Fishing

A hook, line and sinker kit can be packed so that it is smaller than a miniature travel medical kit. This kit will be virtually weightless too.

A hook, line and sinker kit can be packed so that it is smaller than a miniature travel medical kit. This kit will be virtually weightless too.

Here are some of the main ways to fish when you are in a survival situation and available fishing gear is most likely limited:

  • Simple hook, line and sinker setup – Our preferred choice as we will discuss throughout this article.
  • Fish trapsFish traps can be made using such things as plastic bottles (see catching minnows under bait below), using net traps and even just configuring rocks in a way where fish can swim in but not swim out. Some of these methods have been used successfully for centuries.
  • Spearing – If the fish are there in the shallows and you have some good hand/eye coordination this is never a bad way to go.
  • Netting – If you have a big enough net it can be strategically placed to catch fish or moved along in body of water by two people to simply net the fish swimming in there.
  • Noodling – This is when you gently put a large fish in a hypnotic state and then simply catch it by hand. It may not catch you any fish but it most assuredly will be good for some laughs and breaking up the stress in a SHTF scenario.

The ability to catch fish is definitely one of the essential survival skills that you need to know.

Why Chose A Hook, Line and Sinker Over the Others?

If you have a big enough net it can be strategically placed to catch fish or moved along in body of water

If you have a big enough net it can be strategically placed to catch fish or moved along in body of water

So why are we high on using hooks, line and sinkers to catch fish in our survival scenario? The answers are not all as obvious as you might think. Take a look at a few of the main reasons why we would fish using this method.

  • Easy to pack/space-saving/Lightweight – A hook, line and sinker kit can be packed so that it is smaller than a miniature travel medical kit. This kit will be virtually weightless too.
  • Other uses – We will go ‘Rambo’ here and tell you that a fish-hook and fishing line can come in very handy to stitch up a deep cut in a pinch. Not to mention that fishing line itself can be used in hundreds of different ways when trying to survive.
  • Its versatile – Fishing setups with a hook line and sinker can be successfully used in so many different types of bodies of water.
  • Easy to use –  In just minutes you can have a hook, line and sinker rig in the water so you can try to catch fish.

How to Effectively Fish With Hooks, Line and Sinkers

It’s important to remember when you set up your fishing rigs that you are not out to pass the time on a sunny afternoon and relax. You are trying to survive so traditional fishing tactics and methods just won’t cut it. You have to be creative and maximize your chances for success. Get as many lines as you can in the water to increase your chances of success.

When fishing with crude hook, line and sinker setups, experimentation is the key. Just like when you are recreational fishing you don’t know what the fish will be hitting on at the time or where they will be at. That is why you need to rig your lines to do such things as float the bait on the surface, weigh the bait down towards the bottom or drift the bait in the flow of water.

Move your lines around to different spots in the body of water you are fishing. For instance, if you are fishing in a stream look for areas where overhead branches provide shade during the day and hang a few fishing setups off those branches. Remember fish usually go down deeper during the day to stay cool but move closer to the surface at night.
Most fish do not hang out in swift currents either. So look for places in a steam that have deep pockets of water with very little current. In larger bodies of water try weed beds, rock outcroppings and docks where fish can find plenty of food sources nearby.

Again the key to successful survival fishing with a hook, line and sinker setup is to experiment until you find what works on a regular basis for you.

Maybe you don’t think it can be done successfully? Check out this YouTube video and see just how fast this gentleman catches a fish using just a hook, line and sinker setup.

Suggestions for Bait to use

Many people worry about packing bait in a survival scenario to help than catch fish. Sure some small bait can be packed and fish luring scents used on a regular day, but once again we are talking about a possible survival situation where you bring the essentials and get the rest from the land. That is exactly the way you should approach finding bait. Please don’t waste your time packing those annoying rubber worms in your survival kit either.

  • Dig for worms – You can’t be too picky about the type of fish you are catch when you are trying to survive. Worms can be easily found by digging in most places and many different fish are attracted to them.
  • Catch craw-fish, crabs and frogs along the banks – These are favorite foods for many types of larger fish and can be cut up to attract smaller fish too.
  • Food scraps – Just about ant meal you eat will have some scraps left over that can be used for bait. Leftover fish guts and other animal guts make great baits for your hook, line and sinker setups.

Make a minnow trap

Most anywhere in the world you go during a survival situation you can find a plastic bottle lying around. These can easily be made into a trap to catch minnows. This YouTube video will show you how.

Make Sure You Have a Hook, Line and Sinker Packed in Your Survival Kit

Sure it would be nice to have your several hundred-dollar fishing rod and reel setup with you in a survival situation but it’s just not practical. So when you have to travel light and move fast in a SHTF situation make sure one of the essentials you have packed is a fishing kit that consists of hooks, lines and sinkers. It can mean the difference between having healthy food to eat every day or having to forage for scraps and greens that may not keep you and your family healthy enough.

About the author: Ben Ayad is the owner of a new blog, outdoorstime.com 

The post Survival Fishing With Just a Hook, Line and Sinker appeared first on The Prepper Journal.


from The Prepper Journal
Don't forget to visit the store and pick up some gear at The COR Outfitters. How prepared are you for emergencies?
#SurvivalFirestarter #SurvivalBugOutBackpack #PrepperSurvivalPack #SHTFGear #SHTFBag

What did you do to prep this week?

I hope everyone is enjoying my new blog MDCreekmore.com, it’s been up and running for only a few days and already has over 550 subscribers (subscribe here), 20,000+ page views, and over 100 comments. So, I’d say, that it’s off to a great start and I’d like to thank you all for that support.

Also, if you have breaking news alerts feel free to post those on our breaking news alerts page and if you have prayer requests then please post those on the prayer requests page. And don’t forget to check my photos page every Friday for new photos that I’ve taken.

...

Read the whole entry... »


from TheSurvivalistBlog.net RSS Feed
Don't forget to visit the store and pick up some gear at The COR Outfitters. Are you ready for any situation?
#SurvivalFirestarter #SurvivalBugOutBackpack #PrepperSurvivalPack #SHTFGear #SHTFBag

Prep Blog Review: 7+ Reasons To Grow A Medicinal Garden

In last week’s Prep Blog review I’ve told you about some good to have plants in your summer garden what led me to the topic of this week’s Prep Blog Review – reasons to grow a medicinal garden.

Knowing and growing your own medicinal herbs has many benefits. Using medicinal plants for healing purposes is as old as mankind itself. In search for cures for their ailments, our ancestors looked up for drugs in nature. Why not return to our roots?

And don’t worry if you don’t have enough space in your garden, you can easily grow medicinal herbs indoors, in small containers, so that you can enjoy the amazing benefits of fresh herbs no matter the season.

  1. 7 Reasons Why You Should Have A Medicinal Garden

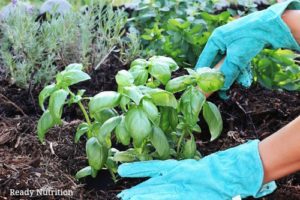
“Growing medicinal plants are a great way to ensure garden sustainability and more notably, have access to natural medicine when you need it most. When I introduced more herbs in my garden, I noticed it had a profound impact on the vegetables and fruits I was growing. It also encouraged beneficial insects and birds to visit my garden and this helped cut down on plants being eaten.

Because of this observation, I changed my focus from solely growing to eat and, instead, worked to create a welcoming growing environment. Not only were my plants healthier, but I had access to natural herbs to use for making extracts and poultices. The following are reasons I feel gardeners should adopt adding medicinal herbs to the garden.”

Read more on Ready Nutrition.

  1. Growing a Medicinal Herb Garden

“Save time and money by stocking your backyard or windowsill gardens with five basic medicinal herbs. These superstars will treat common ailments such as colds and flu, inflammation, minor cuts, infections, pain, muscle spasms, anxiety, poor digestion and insomnia.

Growing medicinal herbs may seem difficult, and preparing teas or tinctures from them might appear complicated and time-consuming. But the truth is you don’t have to be a skilled gardener to grow a few basic medicinal herbs successfully or be a trained pharmacist to easily prepare them for use. In the process, you may save some money and enjoy yourself.”

Read more on Mother Earth Living.

  1. 12 Healing Herbs You Need To Grow In Your Medicinal Garden

“Medicinal plants grown in your own gardens can reduce your dependence on drugs, if not completely eliminate them. But growing random herbs with medicinal properties doesn’t help.

It is a common myth that all herbal preparations are safe by virtue of being natural. This is far from true. A typical example is foxglove or Digitalis purpurea. It has a positive effect on heart function, with the cardiac drug digitalin extracted from the plant. However, ingesting any part of the plant can induce nausea and vomiting, and can even lead to total collapse from digitalis intoxication and death.”

Read more on Mr. Healthy Planet.

  1. How to Start a Medicinal Herb Garden

“Herbal medicine has always been with us; in fact, humanity has survived for thousands and thousands of years — even prior to the advent of modern technologies and conventional medicine — because of it.

Today, the art and science of learning to heal with the use of plants is definitely gaining in popularity in large part due to it’s ease of use and affordability.

It’s no wonder that we all are eager to learn about these healing plants!”

Read more on Frugally Sustainable.

This article has been written by Drew Stratton for Survivopedia.


from Survivopedia
Don't forget to visit the store and pick up some gear at The COR Outfitters. How prepared are you for emergencies?
#SurvivalFirestarter #SurvivalBugOutBackpack #PrepperSurvivalPack #SHTFGear #SHTFBag

Friday, June 9, 2017

Trail Foods from History – Food Preservation Ideas

Written by R. Ann Parris on The Prepper Journal.

If you have information for Preppers that you would like to share and possibly win a $300 Amazon Gift Card to purchase your own prepping supplies, enter the Prepper Journal’s Writing Contest today.


One of the challenges that regularly comes up when we talk about bug-outs is food for our bug out packs, and even food to stash in caches along the way. Food preservation can be a complicated issue, comparing water needs, calories and nutrients, camping meals or supermarket granola bars, and even if we actually need trail food for a journey of 3-5 days.

Then it expands past a bug-out or initial evac kit, to ways to make or stock foods that can be used for overnight and three-day trips after a disaster has struck. In some cases that proposed trip is following a 3-6-12-18 month shelter-in-place scenario, waiting for a die-off or for calmer times. In other cases, it’s looking at the fact that humanity has always made trips – to the coast, to hunting grounds, to and from winter and summer camps, away from danger, for fishing, for trading, even to visit family.

Happily, those journeys of the past, in peacetime and in war, can help us solve our travel food challenges. In some cases, they’re also methods we can use to just preserve foods, and let us preserve the convenience of dropping something in water to create a meal.

Pemmican

Pemmican is a great travel food that will store well for months in just paper, a full year if kept cool.

Pemmican is a great travel food that will store well for months in just paper, a full year if kept cool.

Pemmican is one of those well-known long-storage travel foods. The proteins and fats, and the precious calories from those fats, were hugely important to people who were in some ways very nomadic, and to those who might be largely sedentary, but whose opportunities for fats and meats came in very short bursts through the year.

By first separating very lean meats from fats, then processing those into the separate entities of dry beef and suet, they can be recombined into a travel food that will store well for months in just paper, a full year if kept cool. That food can then be eaten as-is, or used to make a soup.

Many, many modern pemmican recipes include “wet” dry fruits like raisins, craisins and currants  – that’s going to significantly shorten the shelf life. A lot of the recipes I see floating around also include a lot of dried fruit, even though some of it is the dry-dry “leather” or “plastic” level of fruits. In some, there’s almost equal ratio of fruit to meat or fats.

That’s not actually how I learned to make it. What I learned is a bit more like this.

My only ties to natives are from the upper East Coast and the Deep South Cherokees who were moved west. So maybe there are tribes out there that really do use as much fruit as meat, and it’s distinctly possible that something got lost in translation in Oklahoma and Wyoming or as tribes merged and disappeared.

I learned to make it at a ratio of about 3-4 parts dried meat, 1-2 parts suet or rendered fat, and at most 0.5-1 part dried vegetation – dried to the point when they, too, can be pounded into a powder.

Undoubtedly, the inclusion of a little bearberry or strawberry leaves would have boosted the Vitamin C, which would have been a huge aid to staying healthy in deep cold and deep snows, and while on the move. There’s also probably to-taste twitches that were used by individuals and groups to improve the palatability.

Some tribes and individuals probably used fruits, or a higher ratio of fruit.

Some tribes and individuals probably used fruits, or a higher ratio of fruit.

However, once mixed into pemmican, the application of dried fruits, leaves, and roots would have become limited: to food, and to a specific type of food. It no longer would have been possible to doctor them into the drinks, sweets, and herbal remedies that natives regularly used.

So I’m inclined to think that probably the truth from history lies somewhere in the middle (where it usually does), if not leaning just a little towards the “less fruit” side of the house. Some tribes and individuals probably used fruits, or a higher ratio of fruit. Some tribes and individuals probably used a minimum of fruit or none at all, packing more of the preserved harvest of spring and summer separately.

Natives wouldn’t be the last to separate their meat and vegetables for long trips and long storage, if so.

Instant Soup in the Old Days

Portable soup tends to vary from a veggie-based medley to a meat version

Portable soup tends to vary from a veggie-based medley to a meat version

Also called pocket soup, portable soup was made back in the days of the colonists and explorers of old. It was the equivalent of the broth base we can get in cubes and powders today – fast and easy, and with the potential to be not only flavorful, but to boost nutrients the way a bone broth can.

The descriptions given for pocket or portable soup tends to vary from a veggie-based medley to a meat version, such as the one demonstrated by James Townsend.

Lewis and Clark’s expedition wasn’t overly fond of theirs, which to me sounds similar to desiccated vegetables, but during the American Revolution, others took a more kindly view.

Either recipe gives us a way to produce our own instant soups and broths for convenience at home, and have something hearty in our pockets to dissolve into a warming drink or meal, now and in a potential future where supply chains are disrupted.

Desiccated Vegetables

Mmm, sounds yummy, right? We’re not just talking dehydrated/dried veggies here. Desiccated vegetables are a combination of starchy veg and leafy root veggies, either minced and mixed up or layered, that are pressed under high pressure to remove moisture.

Most of the references to its use are from the Civil War here in the U.S. , with citation back to the Crimean War about fifty years earlier. It was highly recommended by the author of “Prairie Traveler” in the 1940s. There are sometimes mentions of it or similar-sounding ship’s food in naval journals from the same general pre-Antebellum period, where the cakes or planks of desiccated vegetables served the same purpose – providing much-needed vegetables to prevent scurvy in forces that were largely eating hardtack or similar foods for long periods of time.

Some recipes list the inclusion of beans or peas, most likely lentils and the starchier peas once grown far more widely. In all likelihood, these were collected green or were pre-soaked or cooked to soften, as opposed to pressed in as hard and dry legumes. It’s possible, though, that they were pre-ground separately.

The mash that resulted was indented or separated into disks before drying, to allow for apportioning either on an individual basis, or by some accounts, into servings for four or five or eight souls. It wasn’t always a preferred food, but it definitely did its job of keeping folks healthier.

Long Live Desiccated Veggies!

You can make leather or chips or thin cakes out of darn near anything.

You can make leather or chips or thin cakes out of darn near anything.

We might not go for a monster press to create a handful of cakes for our backpacks or caches, but we can apply some of the ease of a full-meal drop-in if we want, cooking and then dehydrating molds of mixed veggies made using our ice-cube trays.

Some of us already dehydrate mini black bean patties and cooked slices of sweet potato to make serving-sized portions. There’s also a common backpacking trick of dehydrating everything http://www.backpackingchef.com/dehydrating-food.html from fat-free refried beans to spaghetti sauce, applesauce to mashed potatoes, turning it into thin, flexible leathers or hard chips.

Spin it through a blender (with some water if necessary) and spread it thin on waxed paper or butcher’s paper, and you can make leather or chips or thin cakes out of darn near anything. They typically don’t store as long as those 1800’s lumps, though. For many, we’re looking at a handful of months, especially if we aren’t super careful about the inclusion of fats.

There are commercial alternatives, if we’re not interested in making our own.

Pocket Soup Still Going Strong

Erbswurst is compact rolls of five or six disks that dissolve into a pretty tasty and surprisingly textured lentil soup

Erbswurst is compact rolls of five or six disks that dissolve into a pretty tasty and surprisingly textured lentil soup

I ran into Erbswurst while deployed in a multi-national force. They’re compact rolls of five or six disks that dissolve into a pretty tasty and surprisingly textured lentil soup (never add as much water as a soup manufacturer calls for). It does better if you bash it a couple of times to increase surface area, or you can stick it in some water and over a fire, and usually about the same time it starts simmering, it’s started to dissolve.

It’s tougher to find in the U.S. but as the internet shrinks our world, we can pay the shipping for it, or, we can look at similar soup options.

It might not be quite as compact, but we can absolutely portion out things like Bear Creek’s split pea soup when we’re ready to roll or from the get-go. Dr. McDougall has some of those instant cups and packets of split pea and barley that we can store for a good while or repackage for longer shelf life.

So, why am I name dropping those specifically, and sticking to split pea and lentil soups?

Because they have no dairy or meats in them to go rancid early in storage or due to temperature fluctuations. Lentils aren’t calorie powerhouses, but compare a lentil or pea soup to the same serving size of non-dairy instant veggie-based soups. You’ll find that there’s a pretty significant difference there. There’s a whole lot more calorie – and nutrients – than ramen, and it’s in a far more compact form than noodles. They cook faster than the just-add-water offerings that have beans and lentils in them, and even rice in a lot of cases. Those particular options are also satisfying; textured, as opposed to others that are just broth or some of the other pureed and creamed soups on the market.

We can absolutely make our own dry mixes, and we have ways of making especially flaked beans cook faster, or we can prepare something, blitz it in the blender, and dehydrate it in cubes or patties. If we’re going to buy, though, we might as well make sure we’re buying something that checks as many blocks as possible.

Calories, protein, vitamins, fiber, and lasting satiety from food is something I tend to consider, whether I’m sticking it in a backpack for a fun weekend, packing it away so there’s something available on a trail later, or sticking it in my pantries to make fast and easy meals, now or later.

Trail Foods from History

Whoa, whoa, whoa, cowboy; you can’t sum up yet, you missed hardtack. – I skipped hardtack. I gave my opinion about hardtack in an article about bread options for disaster cooking. I don’t really consider fully dried hardtack much of a trail food (although we could carry peanut butter jars to soak it in daily).

And that’s what we’re talking: Trail food.

There are a lot of reasons we might hit the trail and live out of a bag or off caches in the coming years. Pleasure packing, exploration, intelligence gathering, evacuations, hunting trips, relocation, travel for family reunions – they were done in all of the preceding centuries of recorded history, and they’ll continue to be done for the foreseeable future, no matter what it’s course. Happily, history provides a number of to keep us well-fed during our travels, things we can make at home now or later, and in some cases, readily available commercial options for the less DIY crowd.

In some cases, foods that were traditionally for the trail can also just give us a faster, easier meals – as we’re accustomed to – compared to preparing everything from scratch.

Historic trail foods also have another major benefit: They largely use heat at some point, but otherwise, there are few or no preservatives, and there is no need for fresh canning jar lids. That means if we’re running short of salt, sugar, vinegar, or pectin, or a pressure canner goes down, we still have viable means to get our foods from one harvest season to the next, just as some native tribes and northern explorers once did.

The post Trail Foods from History – Food Preservation Ideas appeared first on The Prepper Journal.


from The Prepper Journal
Don't forget to visit the store and pick up some gear at The COR Outfitters. How prepared are you for emergencies?
#SurvivalFirestarter #SurvivalBugOutBackpack #PrepperSurvivalPack #SHTFGear #SHTFBag

Paper Cuts Will Kill You!

by Grandma

The other day, a friend of mine posted pictures of her husband’s trip to the emergency room of our local hospital. The picture showed his hand with that tell-tale sign of blood poisoning the blue line traveling up his arm from wrist to elbow. He had been cutting wood the day before and got a splinter in his finger, but because he pulled it out right away, and it didn’t hurt when he went to bed that night, he didn’t even mention it to his wife.

The next morning, however, it was obvious that something drastic needed to be done. A trip to the hospital resulted in 3 days in the...

Read the whole entry... »


from TheSurvivalistBlog.net RSS Feed
Don't forget to visit the store and pick up some gear at The COR Outfitters. Are you ready for any situation?
#SurvivalFirestarter #SurvivalBugOutBackpack #PrepperSurvivalPack #SHTFGear #SHTFBag

EASY SMALL BATCH SAUERKRAUT

by Glennis G

  • 1 bag Angel Shred Coleslaw Cabbage
  • 1 ½ Teaspoons Kosher Salt

Empty bag of cabbage into a large glass or stainless steel bowl. Sprinkle the salt over the cabbage. Massage the cabbage by squeezing it all over with your hands for 5 to 10 minutes. It will become limp with some liquid. Firmly pack some in the bottom of a clean pint mason jar. Place more cabbage into the jar and firmly pack down each layer. You should be able to get all of the cabbage into the jar. Fill the jar up to the shoulder with any leftover liquid. If you don’t have enough liquid to cover...

Read the whole entry... »


from TheSurvivalistBlog.net RSS Feed
Don't forget to visit the store and pick up some gear at The COR Outfitters. Are you ready for any situation?
#SurvivalFirestarter #SurvivalBugOutBackpack #PrepperSurvivalPack #SHTFGear #SHTFBag

Forgotten Lessons Of Yesterday: Who’s Behind The Book

Want to avoid the premium store prices and horrible, toxic food chemicals that can make you sick?

Start by reading a homesteader handbook that will help you become food independent. My choice would be a book called “Forgotten Lessons of Yesterday“, written by Theresa Crouse. I was surprised at the wide array of topics that she covered.

I’ve collaborated with Theresa Crouse via Survivopedia for several years now and, though we’ve emailed back and forth hundreds of times, we’d never met in person.

I finally met her and found out her story from zero to hero. Now I’m sharing her story it with you!

The interesting thing about Theresa is that she’s not your typical prepper. She lives a lifestyle that’s a motley collection of modern homesteading, common sense, and resiliency – exactly what her writing reflects.

She regularly covers topics ranging from growing medicinal plants to tanning hides. She is, indeed, resilient and independent, and the topics that she covered in the book reflected her diverse collection of skills.

We both agreed that, since I was going to be in the her state for a business conference, it would be a great time to finally meet in person.

Instead of meeting somewhere for lunch, Theresa invited me to meet her at her home so that I could meet her husband and see in person the gardening and homesteading techniques that she proudly shares with her readers.

Because her favorite articles tend to revolve around farming, I expected her to live on a farm, or at least a couple of acres. I was surprised to find that she currently resides in a suburb of Orlando, or, more correctly, a suburb of a suburb of Orlando.

When I pulled up, it looked like any other house on any other residential street, though I do have to say that the neighborhood had more trees than average and her yard had an abundance of tastefully arranged ornamental plants. When we went around to her enclosed backyard, however, it was as if we’d stepped right into the country. Well, as much as you can when you can still see rooftops.

She had several citrus trees and vertical gardens were arranged around nearly her entire fence line. Even the ornamental plants on the patio turned out to be edibles – chili peppers, squash, kale, and strawberries. There were four 10×10 raised beds with a path that wandered through them to a barbeque area, complete with a brick oven, that husband had built. As I expected, she and her husband were both relaxed and welcoming.

I didn’t go there for an interview, but after a great lunch on her patio – including a salad made with lettuce and vegetables from her garden and a fresh salsa that she’d just made that morning, it seemed that it would be a great time to ask her some questions about her book and her way of life in general to share with you.

Me: Looking at your book, “Forgotten Lessons of Yesterday“, it seems like you’re encouraging people to turn back to the days when people were healthier, by making our own food or living close to nature. In recent times, and in your writings, it’s like the pioneers are coming back to life and calling themselves homesteaders. Do you consider yourself a modern pioneer?

Theresa: I don’t know if I believe that “modern pioneer” is exactly what I’d call myself. I think I’m just a person who likes to live simply and be as independent as I can be. I guess, since most people have gotten away from living that way, you could call me a modern pioneer for encouraging it. I believe that, as our ancestors proved, the land will give us everything that we need, but we need to start taking care of it.

Me: Learning the old lessons of homesteading may seem pretty hard for somebody coming from an urban civilization. How hard is it to get the knowledge? How is that to you?

Theresa (laughing): It’s not hard, but there will be some bumps and lots of learning experiences. It’s funny you should mention that because we recently tried growing sweet potatoes – a crop we’d never grown before. Suffice it to say that there’s more to it than just sticking it in the ground. But now we know, and it was fun. I even wrote an article about it afterwards!

Seriously, though, the main thing is that you’re willing to learn. Just like anything else that you’re new at, there will be some mistakes, but you’ll learn from them. Trial and error. And you’ll always mistakes, just like you do in everything else.

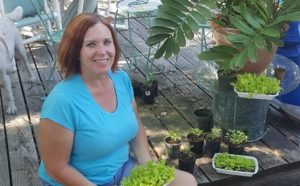
For instance, see all of those tomato and pepper plants over there? I made the mistake of assuming that because I bought seeds from the Dollar Store – 50 cents each – that I’d be lucky if a quarter of them grew, so I planted them ALL.

Now we have 70 tomato plants and 40 pepper plants! I’ll never plant unknown seeds without sample germinating again! But, the upside is that we’re selling most of them, which will cover our gardening and canning costs for the entire year. Not all of my mistakes have been so cheap, though!

 Me: Would it be possible for a person like you to change how he or she lives – to go back to being a consumerist? And could you?

Theresa:  You know, I actually did for several years, though it never felt right to me. It was convenient to just buy everything from the store, but it didn’t take us long to realize that that just wasn’t the life for us.

As you know, I was raised on a farm, so I was used to eating everything – meat, veggies, milk, butter – fresh, without any chemicals. Once I started buying everything from the store, I noticed that the food just didn’t taste as good. The most noticeable things for me were tomatoes and milk. The tomatoes always seem to be mealy and flavorless, and the milk tastes like chemicals. Plus, there’s just nothing like fresh cream in your coffee. But still, it was convenient, so I pushed on.

Then John and I both started feeling just … yuck. We both gained weight (me more than him, of course!) and we had some other problems. I had brain fog and my skin was rough and splotchy. I was sick to my stomach a lot. Even though John was in the military and has always been pretty fit, his cholesterol shot up.

I started paying attention to what we were actually putting in our bodies, and knew that we had to get away from all of that garbage and start eating chemical free, taste-good food again. And once we did, we never looked back.

It was like slipping on a favorite pair of slippers – I was just comfortable again. And our health problems went away. I guess you can take the girl off the farm, but you can’t take the farm out of the girl. It’s a core part of who I am and I can’t just NOT think and live that way.

 Me: Reading your book feels very much like a journey that the reader takes along with you, in a very personal area of knowledge. Why is this book so personal?

Theresa: The easiest answer is that it’s personal because I’m sharing a core part of myself. In my heart, this is who I am. It’s not just how I was raised.

The more complicated reason that it probably feels more personal is that writing it brought back a lot of memories. I mean, I know how to do all of the things in my book, and so I just do them without investing much thought into it. When I actually sat down and explained how to do it, it made me think back to canning with my mom, or hunting with my grandfather. I realized that I’m not just teaching methods, I’m sharing my heritage.

Me: What would you tell to somebody who would like to turn to self-sufficiency but he or she doesn’t have the courage or doesn’t know where to start?

Theresa: I’d tell them that you start at the same spot that you start any new task – at the beginning. Start small. Don’t plan to be completely self-sufficient by next fall! Pick something that you’d like to do – for me, a big part of being self-reliant is growing my own food. If that’s the case, then maybe start out with some herbs, or if you’ve already grown herbs, start some vegetable seeds.

Buy books for beginners – for instance, mine breaks every task into small steps because I was writing on the assumption that the reader has never done it before. Find books like that. Do searches on the internet. Go through websites – Survivopedia is great, and that’s not just because I’m biased. There are several other sites out there, too. Just suck up the knowledge. There’s nothing like hands-on experience, but if you read about it, you’re already a step ahead because you’re not going in blind.

Me: I know we’ve been talking for a while now, and I need to get back, but for my last question, let’s address those folks who don’t live on a farm, or even in a single-family house. I’m looking around your yard and see that you’ve been really creative with a relatively small amount of space. What would you say to other people who want to be self-sufficient but don’t have much space?

Theresa: I’d say what my grandmother used to say – can’t never could. In other words, don’t find reasons why you can’t become self-sufficient; find ways that you can. Everybody has room on a counter for some herbs. That will save you quite a few bucks right there. You don’t need a ton of space to become at least partially resilient. You just have to find them.

There are other ways to go about it than just growing food, too. I didn’t write about this in the book, but it’s something that mirrors how I was raised – yard sales. They’re a great way to find good deals, get away from the big stores, learn how to barter, and how to upcycle/reuse just about anything. I watch Flea Market Flip and was hooked from the first episode. I’ve been trying my hand at that, in addition to finding cool clothes and stuff that I need. It’s fun!

Being self-sufficient shouldn’t be painful – don’t t make it something that you do because you have to. There’s a real sense of pride that accompanies eating food that you’ve grown or setting your glass on a coffee table that you’ve made or repurposed with your own hands.

Find the joy in being able to take care of yourself, even if it’s in small ways. Because, trust me, once you start, you won’t want to stop!

This interview has been taken by Alec Deacon for Survivopedia.


from Survivopedia
Don't forget to visit the store and pick up some gear at The COR Outfitters. How prepared are you for emergencies?
#SurvivalFirestarter #SurvivalBugOutBackpack #PrepperSurvivalPack #SHTFGear #SHTFBag

Thursday, June 8, 2017

Will You Survive If You Have to Bug out to the Forest?

Written by John D on The Prepper Journal.

Editor’s Note: This post is another entry in the Prepper Writing Contest from John D. If you have information for Preppers that you would like to share and possibly win a $300 Amazon Gift Card to purchase your own prepping supplies, enter today.


In a SHTF situation where you can’t stay in your own home, and moving in with a friend or relative is not an option, what will you do? If bugging out to the wilderness suddenly becomes your only option, will you survive? Probably not for very long, if you believe the experts. Nevertheless, if your survival plan doesn’t include a bug out to the forest option, it should, but coming up with a good plan might be more difficult that you think.

For starters, do you have a reliable bug out vehicle? If your bug out plan has you escaping the city or suburbs in a modern vehicle, you may be in for an unpleasant surprise. Most modern vehicles won’t survive a strong EMP event. You may find yourself traveling on foot, away from a major metropolitan area, in search of food and water. But at least you won’t be alone. When food and water run out, millions of others will be traveling, mostly on foot, away from large centers of population. Even if you have a working vehicle, it may be useless, due to the gridlock created by people and disabled vehicles, all on the same escape routes. You may avoid some of that if you get away quickly, but will you? How much time will pass before you’re packed, and ready to go? Will the roads already be jammed by the time you depart? As time passes, the situation will get worse. Can you imagine what starving, desperate, people are capable of doing? I’m thinking “zombie apocalypse”.

My Bug-out Plan

Understanding the predicament, I don’t have to look any farther than my garage for a solution. My bug out plan doesn’t depend on a full-size vehicle, but I won’t be bugging out on foot either. I suspect that I wouldn’t last very long, with just the items I can carry on my back. Instead, I’ve decided to use my garden tractor (riding lawn mower), pulling a small trailer. Don’t laugh, it’s more practical than it may seem.

  • It would probably survive an EMP event.
  • It can travel off-road, avoiding traffic jams and bypassing bottlenecks.
  • It can pull a small trailer, loaded with essential supplies.
  • I can avoid people who may want to harm me, or take what I have.
  • I’ll have a 360 degree view, helpful for situational awareness, and if I have to use a firearm.
  • I’ll be able to travel to places inaccessible by car, which in theory will make me more secure.
  • My getaway will be at a whopping 6 miles per hour, maximum, but it beats walking.
It’s not how fast you bug out, it’s how well you bug out fast

It’s not how fast you bug out, it’s how well you bug out fast

There are drawbacks, of course. I’ll have no shelter from the elements, as I would in a car or truck. My traveling companion will have to ride in the trailer, or walk along side. Perhaps the biggest drawback is that I won’t be able to outrun anyone. For that reason, it’s important to pack and leave quickly, before things get out of hand.

The bug out location I’ve selected is far from the densely populated area where I now live, and is an area that provides opportunities for hunting, fishing, growing crops, and is near a fresh water source. I know what some of you are thinking… A city boy, living in the wilderness, wouldn’t last long. You might be right, but what choice do I have? Since I don’t own a wilderness cabin, or even a camper, how can I best prepare for a situation that forces me to abandon my home? For starters, I’ve compiled a virtual library of information that will be helpful in such a situation. I’ve also purchased some basic survival equipment and supplies. I practice the skills I’ve learned, and I’m a pretty good gardener.

While living in the wild will be a challenge, I first have to arrive there safely. Traveling with a fully loaded trailer screams “Hey look at me! I have food, water, and survival gear!” How do I get to my destination without being robbed or killed? I see two main problems:

  1. Starving, thirsty, desperate people won’t hesitate to attack me and take what I have.
  2. Those already settled in, near my bug out location, won’t appreciate the competition for limited resources.

To make matters worse, the noise of the tractor will announce my presence. In either case, one bullet could ruin my day.

Bugging out is risky, but I’m thinking of a scenario where I have no choice. I’ll improve my odds somewhat by getting away quickly, before anarchy is commonplace. To do that, all of my things need to be organized, and ready to toss into the trailer. This includes items that are protected from EMP’s. The list that I’ve already prepared helps to make sure that I don’t forget anything.

As I travel, I expect to cross paths with others who are also bugging out. The majority of the people I encounter will be just like me, trying to survive. Many of them will be traveling on-foot, with very limited supplies. My survival odds will improve if I join a like-minded group of travelers, or convince others to travel with me. I’ll bring extra food to share. Travelling with a well-fed and motivated group should help to keep the criminal element away. I’m not trying to be a group leader, or a macho tough-guy, but just one of the many people fleeing an area that has become unsafe. Being armed, and avoiding likely trouble spots, will also help.

With luck, I’ll make it to my bug out spot, probably with a number of other people who’ll soon become my neighbors. As I settle in, I’ll begin to implement a plan that might be described as “Living in the Wilderness, but Not Wilderness Living”. After food and water, my top priority will be the construction of a substantial shelter. As Pat Henry put it “your tent offers zero protection from a sharp stick, much less bullets.” I’ll use modern tools and technology to deal with challenges that come with living in the wild. I’ll have lights when and where I need them, and I’ll use sensors to alert me to intruders, and garden pests. Some of the pests that would otherwise be a threat to my garden, will become food, if I can kill or capture them. My garden tractor-trailer combination will continue to be an asset, as long as gasoline is available. I’ll be able to haul whatever useful items I can find, including building materials, firewood, and water. It’s likely that some of my traveling companions will become the nucleus of a survival group, and the benefits of belonging to a group are many. One could be hunting or fishing, while another guards the supplies and equipment. One could be on the lookout for intruders, while another prepares food, or tends to a garden. One could sleep, while another stands guard. Portable two-way radio equipment, as well as low-tech devices, such as whistles, may be used to alert group members to emerging threats.

Plano 1919 Sportsman’s Trunk

My trailer is approximately 48” by 30”. If stacked 30” high, I’ll have about 25 square feet of cargo space. My supplies will be covered with a tarp, protected from rain and wind. My supplies will be similar to those mentioned in a recent TPJ article by Pat Henry. Pat suggests using 3 plastic containers. One is for food, another for shelter, and the third for cooking, cleaning, hygiene, health, and miscellaneous supplies. Those containers account for about 15 square feet, and mine will be similar, leaving me with at least 10 additional square feet. Because I’m thinking long-term survival, I’ll pack clothes and bedding for all weather conditions. I’ll use the additional space for items that will help me survive in the long-run. Included will be the components of a small solar electric system that can be easily reassembled at my destination. I’ll have lights, and a variety of electrical devices that can be powered by the solar electric system. Sensitive electrical items are pre-packed, wrapped in aluminum foil and insulated from each other, which is the equivalent of a Faraday Cage. The ability to use power tools will make construction of a shelter much easier.

Because of the trailer’s small size, I look for ways to conserve precious space. I won’t bring bulky items, like table lamps. Instead, I’ve assembled small and simple light fixtures. I won’t bring a pedestal fan, or even a tabletop fan. Instead, I’ll use small muffin fans, similar to those you find in computers. I’ll mount them on frames, made from pvc tubing, that can be disassembled, saving space when packing. I’ll make good use of paracord, rope, and plastic sheeting. I need not carry books, and volumes of survival literature, because all of those things have been scanned, and stored on a KindleFire. Likewise, carrying a large quantity of water is not practical. I don’t have space for large containers. Instead, I’ll pack several collapsible water containers. I won’t bring a propane stove, or even a charcoal grill, but I will bring a grill top. I’ll assemble a fire pit with stones that I’ll find at my bug out location, and finish it off with the grill top. I’ll pack my cast iron Dutch oven, overlooking my concern for weight, just this one time. Once settled in, my tractor-trailer’s ability to haul things contributes to my bartering opportunities.

The bug out location I’ve selected will be a 7 to 8 hour trip by garden tractor. I have to make sure I have enough gasoline, but my preliminary estimates indicate that I can make it with just the capacity of a full tank, and a full 2 ½ gallon container. I’ll also carry a tube for siphoning, in the event I’ll need to do that. I’ll be carrying a shovel and an axe, helpful if I get stuck or need to clear a path, and very useful when I’ve settled in at my bug out location.

I’ll have the ability to collect and store rainwater. I’ll be prepared to filter water, and boil it, making it safe for drinking. My bug out supplies will include heirloom and hybrid seeds for food crops. Traveling light is an important consideration, and for that reason I’ve created a separate list of items to acquire, once I’m settled in at my bug out location. For the most part, those additional items will make life more comfortable, but are not essential for survival.

Once I’ve settled in at my bug out destination, my first priority will be a sustainable source of food. I’ll start a garden of course, but I’ll need to have other food while I’m waiting for my crops to mature. My bug out supplies include a live trap for small animals, but it is safe to assume that others will quickly decimate local population of rabbits, squirrels, and other edible creatures. My bug out location is near a large lake, and I suspect that I’ll be able to catch fish.

I’ve used Pat Henry’s food list as a starting point, but modified it to reflect my own tastes and preferences. In an effort to avoid bland meals, I’ll pack items such as olive oil, spices, sauces, flour, and corn meal. My list for shelter is similar to Pat’s, but I’ve added an air mattress for additional comfort. I’ll have construction tools, and plan to make tent-living a very temporary arrangement. My list for cooking, cleaning, and hygiene is different from Pat’s list, because I put more emphasis on long-term survival. While I will pack items such as soap and dish detergent, I’ll place a high priority on reusable items, such as wash cloths and towels. Instead of a propane stove, I’ll pack a rocket-stove, and reusable cooking supplies. I’ll have a solar-heated camp shower, wash basins, and collapsible containers for water. I’ll have a good first-aid kit, a variety of medicine, alcohol, bug spray, toilet paper, and other items for health and hygiene. One container, perhaps a backpack, will be for items that need to be easily and quickly accessible. Items in this container will include a flashlight, weapons, maps, a compass, binoculars, cash, a lighter, a KindleFire, snacks, a pocket knife, basic tools, and a rain parka.

My “electronics” box will include all of the components for a small solar electric system, except the solar panels and batteries. It will include test equipment, extension cords, power strips, lights and light fixtures, fans, portable alarms, an AM/FM radio, and a GPS device.

Items that will be packed separately include tools, solar panels (mounted on a hinged aluminum framework), batteries (for the solar electric system), weapons and ammo, live trap, gasoline container, tackle box with fishing supplies, shovel, ax, rake, grill top, and a jump starter (includes tire pump and light). I’ll have the tools and supplies needed to make repairs to the tractor and trailer tires.

After I’ve set up camp I’ll be on the lookout for anything that might be useful, such as a propane stove with a full propane tank, table and chairs, buckets, tools, food and water. If I can find them, I’ll increase my stockpile of disposable items, such as paper towels, zip-lock bags, trash bags, aluminum foil, toilet paper, soap, dish detergent, laundry detergent, insect repellent, toothpaste, shaving cream, alcohol, and other items for health and hygiene. I’ll also stock up on firewood and tinder.

Perhaps the most important item I hope to acquire after I’ve settled in, is an energy-efficient chest freezer. In the event that I have success hunting, fishing, trapping, or growing crops, the freezer will provide an easy way to preserve food. Not needing to find and process food everyday will give me opportunities to rest, and attend to other aspects of survival. The smallest of the chest freezers on the market today are very energy-efficient, meaning that they can be powered by a small off-grid solar electric system. According to the energy-guide tag, 600 watt-hours per day is required for a 5 cubic foot chest freezer. I can get that much power with just 2- 100 watt solar panels, and 2 – 100ah batteries. My system will be a little larger than that, to accommodate the other things needing power, and for extended periods of cloud cover.

Cold Weather Considerations:

Where I live, the months of December through February can include some very cold and nasty weather. Extreme weather may force me to deal with the danger, and postpone bugging out. I may instead choose to make my home as secure as possible, and prepare to defend it. Those traveling through my neighborhood would also be susceptible to extreme weather, perhaps giving me a bit of an advantage. If I’ve already bugged out, and set up camp in advance of cold weather, preparing to survive cold conditions will be a high priority. This includes the construction of a substantial shelter, and a way to provide heat.

The Long Run:

In the event that federal and state government no longer exist, law and order will be maintained at a local level, by an assembly of the people of that area. A protective force can be created, and guard duties shared. Efficiency can be realized in areas such as food production and cooking. Those with special skills will be highly revered, and will serve the entire community. Bartering will be commonplace.

I don’t expect my wilderness life to last more than a couple of years. In a serious SHTF situation, many people will die off from lack of food, or simply from the inability to survive without the conveniences we take for granted today. If that happens, there will be plenty of empty homes to move into. I would choose one with a fenced back yard, to help protect my food source. Most of my food will come from my garden, and perhaps some fish, chicken and rabbit.

Summary:

If I can’t safely stay in my own home, which is at the edge of a big city, or move in with someone else, far from a densely populated area, moving to the forest may be my only option. I need to be ready to bug out quickly and travel safely. I’ll need to bring the appropriate equipment and supplies. And finally, I need to be able to survive wilderness living. I’ll have to depend upon my hunting, trapping, fishing, and gardening skills. My prepping includes the equipment and knowledge to do those things. I don’t expect it to be easy. The competition for limited resources will be fierce, and not everyone will be honest and ethical. Still, I plan for a comfort level far exceeding that of tent camping. I applaud those who can live in the forest with only a knife and the clothes on their back, but I can’t do that.

Perhaps the best things I have are a list, and a plan. I don’t depend upon a modern vehicle, since impassable roads, or an EMP event, could stop me dead in my tracks. My pack-out list helps to ensure that I’ll bring the essentials, while not being overloaded with items I can do without. My extensive database of information will be useful in the event of a medical emergency, or other unexpected circumstances. Moving quickly, with a destination in mind, might prevent me from becoming a victim of the lawlessness that would likely follow a SHTF situation. Getting to my destination quickly means that I’ll also be able to “scavenge” more quickly than some, and acquire useful stuff before it’s all gone. Banding together with trust-worthy, like-minded others may offer the best odds for survival.

John D

The post Will You Survive If You Have to Bug out to the Forest? appeared first on The Prepper Journal.


from The Prepper Journal
Don't forget to visit the store and pick up some gear at The COR Outfitters. How prepared are you for emergencies?
#SurvivalFirestarter #SurvivalBugOutBackpack #PrepperSurvivalPack #SHTFGear #SHTFBag

Car Crush Survival: Do You Know What To Do?

No matter whether you are the driver or passenger in a vehicle, a car accident can be a very traumatic experience.

Even if the accident is minor, you may have hidden injuries, or you may become trapped in the vehicle. Or things could go worse and you might need to get out of the vehicle as quickly as possible.

While every accident is a little bit different, here are just a few basic things you should keep in mind about how to get free from the car and survive the crush.

Subscribe to Survivopedia and get our monthly report for a full version of this article!

Driving Safe is not Enough: How to Reduce the Damage

Knowing what to do prior to an imminent crash can save your life and also mean the difference between minor injuries and ones that leave you in pain or disabled for the rest of your life.

While you may not have much time to act, these simple things can give you the best chance of survival.

Wear Your Seat Belt Properly

Over the years, more than a few people have railed against using seat belts because they feel the government should not tell them how to live their lives. While I am not a big fan of “nanny state” thinking, there is a time when common sense must prevail. As a matter of simplicity, the laws of physics aren’t going to stop working just because you don’t like government interference.

In this case, “a body in motion tends to stay in motion”. If you aren’t wearing a seat belt at the time of a crash, your body will continue to be propelled in the direction of motion even though the vehicle has stopped.

Use the Steering Wheel to Minimize Damage

You can still use the steering wheel and the crumple zones of the vehicle to minimize damage from the crash as much as possible. Depending on the situation, you may start out with as much as 4 seconds. Count on at least ¾ second before you actually see the vehicle move in the direction you turned the wheel.

Keep Both Hands on the Wheel

Insofar as protecting yourself from damage in the crash, there are some techniques you can use. First, always drive with your hands, wrists, and forearms in alignment. A bent or limp wrist can easily be shoved against the steering wheel and broken. In addition, a limp wrist also gives you less support and control in those seconds when you need it most.

Be Careful when Using the Horn

Consider what you do when you are sleeping soundly and someone throws a bucket of water in your face. This is how a distracted driver’s mind works. Their primary focus and main involvement revolves around talking on the phone or sending a text.

At best, if you hit the horn, it will take them time to respond as they shift gears away from the phone and back to driving. At worst, a distracted driver may freeze up or do something else unpredictable.

Safety Tips for the Passengers

As a front passenger, properly belted into your seat, the best thing you can do is push your body into the seat and make as much contact as possible. The larger the surface area, the more room there is for the impact force to diffuse.

If seating in the back, try to choose the middle seat. Excluding the increased safety associated with air bags and seat belts in the front of the vehicle, the middle back seat is the safest in the vehicle.

One Second After: Status Check

If you have ever been in an accident, there is no mistaking how those first seconds of awareness will feel. No matter whether you lose consciousness, are slightly dazed, or are simply startled by the “bump” or “tap” that got your attention, the reality that you were in an accident can take time to settle in.

You have to realize that what you thought was a slight tap could have turned your vehicle upside down, or sent it crashing into a guardrail or worse. In these first few seconds to minutes, it is very important to stay as still as possible.

Before you move, try to take note of the following:

  • The actual position of your body. Are you crumpled up, arms at odd angles, or is your head drooped over onto your chest?
  • What do you see? Are you looking out the windshield, a side window, or is everything dark inside the vehicle?
  • What do you smell? Is there a smell of gas in the air, dust, or something burning?
  • What do you hear? Are there sounds of sirens, voices, or other sounds that might indicate someone is trying to get you out of the vehicle?

During those first few seconds, it is entirely possible you will not feel any pain. Do not be fooled by this. As your senses return and you become aware of the situation, you may feel a great deal of pain, along with coughing, dizziness, nausea, too hot, too cold, or even shaky. It can take seconds to minutes for this to subside.

If you move around too much or start thrashing around trying to escape, you can make wounds worse, or cause broken bones to scrape against each other. The key to this time is to stay still and make each movement count.

While you may be tempted to see if you can open the vehicle door, or try some other escape maneuver, the first thing you must do is make sure you are calm and composed. Take some deep breaths if you are able, and give yourself a chance to adjust to the shock of your situation.

Even if you smell gasoline or something burning, you must not panic. Get control of yourself and you will escape faster and with less effort than if you are in a panic.

Getting Out of the Crushed Car

There is no such thing as a car accident that won’t cause you to feel upset and distressed. In some cases, it will be absolutely necessary to try and escape from the vehicle if you want to remain alive. Having the proper tools on hand is every bit as important as knowing what to do.

But most of all, what you need to survive is trigger words and the right mindset. When you have only minutes to escape, it is best to know how to achieve calm in a matter of seconds. A few sessions of self hypnosis and the choice of an activating keyword or image can give you this calm in any situation. Gain this tool and practice it often so that you have confidence in your ability to control yourself and think clearly.

After you have secured relatively dust free air, regained composure, called for help, and assessed your situation, and medical condition, it is time to see about getting out of the vehicle. Here are the basic steps to follow:

  • If you have cuts or gashes, try to bind them up with plastic ties and cloth. Even a plastic bag will do if you have nothing else to stop the bleeding and prevent the wounds from picking up dust and dirt as you move.
  • Cut yourself free of the seat belt if you cannot reach the release button or it does not work. Don’t forget to brace yourself if you are upside down or in a position where you are going to fall once the belt is no longer holding you in place.
  • See if you can open the vehicle door nearest to you. If you cannot and there is a risk of fire or sinking, then break the window nearest you in order to get out of the vehicle. In situations where there is less immediate risk, you can see if another door will open. When breaking a car window, it will produce very sharp glass shards. It is best to avoid having to break the window and try to crawl through all those bits of glass unless you have no other choice.

More than a few sources recommend gathering up your personal belongings before trying to exit the vehicle. While this may be somewhat appropriate advice if the crash is minor, I feel it can cost your life if there is a high risk of the vehicle catching fire or sinking.

If danger is that imminent, you will be best served by focusing on getting out of the seat belt and then out of the vehicle window if necessary. Remember, nothing is as important as your life, and that objects can all be replaced later on. Unless there is another person in the vehicle that also needs to escape, focus on your own well being.

This article has been written by Carmela Tyrell for Survivopedia.


from Survivopedia
Don't forget to visit the store and pick up some gear at The COR Outfitters. How prepared are you for emergencies?
#SurvivalFirestarter #SurvivalBugOutBackpack #PrepperSurvivalPack #SHTFGear #SHTFBag

Wednesday, June 7, 2017

Everything needed to prepare for a local disaster or even a total SHTF event can be found and purchased at your local Wal-Mart.

Prepper’s Checklist: everything needed to prepare for a local disaster or even a total SHTF event can be found and purchased at their local Wal-Mart.


from TheSurvivalistBlog.net RSS Feed
Don't forget to visit the store and pick up some gear at The COR Outfitters. Are you ready for any situation?
#SurvivalFirestarter #SurvivalBugOutBackpack #PrepperSurvivalPack #SHTFGear #SHTFBag

I’ll Be Dead In a Week

Check out today’s post on MDCreekmore.com – I’ll Be Dead In A week.


from TheSurvivalistBlog.net RSS Feed
Don't forget to visit the store and pick up some gear at The COR Outfitters. Are you ready for any situation?
#SurvivalFirestarter #SurvivalBugOutBackpack #PrepperSurvivalPack #SHTFGear #SHTFBag

How to Survive a Venomous Snake Bite

Written by Guest Contributor on The Prepper Journal.

Editor’s Note: Today’s article is courtesy of Alex Ramsey. If you have information for Preppers that you would like to share and possibly win a $300 Amazon Gift Card to purchase your own prepping supplies, enter the Prepper Journal’s Writing Contest today.


The best way to increase your chances of surviving a venomous snake bite is to have a contingency plan in place. Remember, that your end goal should be to receive anti-venom because without a dose of anti-venom you have almost zero chances of surviving a poisonous snake bite. Today we discuss steps you can take to act quickly to survive a venomous snake bite. As a bonus, at the end of this article you’ll also learn how to get rid of Copperhead Snakes.

Call emergency services immediately

Don’t make the mistake of trying to drive yourself to a hospital or waiting to see whether or not you’ll display any symptoms of being poisoned. If you plan to survive a snake bite and live to tell the tale, time is of the essence. Instead, call 911 as soon as you’ve been bitten.

Better yet, if you’re with a family member or friend, direct them to call emergency services right away. Ideally, have your companion stay on the line with emergency services as they may be able to give your friend instructions on how to best look after you. If your symptoms worsen, while your companion is on the phone, emergency services may choose to send a helicopter to transport you to the nearest hospital, which will have anti-venom in stock.

Describe The snake that bit you

An accurate description of the snake that bit you will help emergency services locate the appropriate type of anti venom.

An accurate description of the snake that bit you will help emergency services locate the appropriate type of anti venom.

Make sure that either you or your companion gives emergency services an accurate description of the snake that bit you. That way, emergency services will be able to ascertain what type of snake bit you and will be able to select the appropriate type of anti venom.

If possible, disclose how long the snake was, how thick the snake’s body was, the color of the snake and whether or not the snake had round eyes or slit style eyes. If a snake has a triangle-shaped head beware as venomous snakes often have triangular heads. If the offending snake is still around, try to get your companion, if you have on to take a photo of the snake which bit you. Either that or kill it and there will be no question of the species.

If you live in an area that is frequented by snakes, it’s well worth learning how to identify the different types of poisonous snakes in your area. That way, if you’re ever bitten by a venomous snake, you’ll have a far better chance of correctly identifying the offending snake.

Stay as still as possible

Did you know that the faster you move, the faster the snake’s venom will be absorbed by your body and the faster the venom will affect your body? That’s why if you’re in an area with phone coverage, it’s far wiser to get emergency services to rescue you, rather than attempting to walk back to your car.

Leave your snake bite alone

Some research suggests that an ice pack will reduce your body's circulation and will decrease the spread of venom, throughout your body.

Some research suggests that an ice pack will reduce your body’s circulation and will decrease the spread of venom, throughout your body.

While you may be tempted to suck the venom out of your leg or cut your wound open, in order to try to remove as much venom as you can, doing so will only worsen your condition. Also avoiding crafting a tourniquet as a tourniquet will only speed up the symptoms of your snake bite.

However, if you have an ice pack handy, it is a good idea to hold the ice pack against your bite. As some research suggests that cold from an ice pack will reduce your body’s circulation and will decrease the spread of venom throughout your body. Remember that you’ll significantly increase your chances of survival by keeping calm and waiting for emergency services to reach you.

What if you’re unsure of whether you’ve been bitten by a venomous snake or not? If you can’t tell the difference between a venomous snake and a non venomous snake it’s still wisest to call emergency services. As emergency services should be able to ascertain whether or not the snake that bit you is venomous.

Remember that you’ve got nothing to lose by contacting emergency services but if you fail to make the phone call, it could cost you your life.

How To Get Rid Of Copperhead Snakes

If you live in an area that is rife with dangerous Copperhead snakes, simply continue reading to discover how to prevent snakes from exploring your property, as well as how to safely remove any Copperhead snakes that have already invaded your property.

Make sure your property isn’t attractive to Copperheads

Make sure that your lawn is cut short and that there is no garbage in your yard. Copperhead snakes are known to hide in long grass and are attracted to garbage as it is a possible food source for hungry snakes. It’s also worth cutting down or trimming any bushes that are on your property. As they are also attractive to snakes who are looking for a safe hiding place. Also make sure to seal any possible entry points to your home, to prevent snakes from making their way into your home itself.

Invest in a non-lethal snake trap

By far the safest way to get rid of a Copperhead snake on your own, is to place non lethal snake traps around your property. Such traps are a humane way to catch any snakes which are hiding on your property. Once caught, call your local council to find out how you should dispose of the live snake that you’ve caught.

Alternatively, you may want to call a snake removal specialist to remove of the snake which you’ve caught for you. If you do choose to release a Copperhead on your own, it’s worth driving to a remote area, so that the snake you release won’t make its way to another family’s property.

Call a snake removal specialist

If you don’t want to run the risk of being bitten by a venomous Copperhead, don’t hesitate to call a snake removal specialist. Who has the appropriate skills to safely catch and release a Copperhead. Keep in mind that the sooner you call a specialist, the less likely the snake on your property is likely to breed.

After all the last thing you need is a pregnant Copperhead residing on your property.

About the author: Alex Ramsey – Work hard & live to hunt! Countryman Hunter, Archery, shooter, Freelance outdoor writer and loves the USA. Founder of Thebigdeer.com where he shares his hunting experiences with all. Alex’s site is all about guns, showcases real gear & real reviews to help you become more prepared. Knowledge will save you, but great gear will help! Let’s Get Out & Go Hunting


The post How to Survive a Venomous Snake Bite appeared first on The Prepper Journal.


from The Prepper Journal
Don't forget to visit the store and pick up some gear at The COR Outfitters. How prepared are you for emergencies?
#SurvivalFirestarter #SurvivalBugOutBackpack #PrepperSurvivalPack #SHTFGear #SHTFBag