Saturday, April 15, 2017

Emergency Bags Every Prepper Needs to Have

Written by Guest Contributor on The Prepper Journal.

Editor’s Note: This post has been contributed by Daniel. If you have information for Preppers that you would like to share and possibly win a $300 Amazon Gift Card to purchase your own prepping supplies, enter the Prepper Writing Contest today.


Prepping is not an easy job as you always have to be prepared for the worst. Still, while everyone talks about the supplies you need to carry no one actually specifies what to carry all this stuff in. Your emergency bag is just as important as the supplies inside it, so pay close attention to what you are buying.

The good news is that there are tons of bags out there that will do well as emergency bags. The bad news – it can often be intimidating when deciding which one to choose. This is why we’re going to go over the basics of emergency bags with you, so you know exactly which type you should purchase for different situations.

The Features You Should Be Looking For

Make sure your emergency bag has the following properties:

Lightweight: The importance of an emergency bag’s weight cannot be over-stressed. You don’t know how long you’ll be carrying it around, so you need something which is lightweight and thus will not hinder your movement. You need to put a lot of survival gear in there, so the bag itself should not add much to the weight.

Some bags can weigh as much as one-third of your body weight, once filled. While these bags are spacious and you can pack a lot of supplies in them, they are difficult to haul around for a long time. It is better, therefore, to choose a lighter model.

Subtle is Best: Sure, pink or orange is your favorite color, but when it comes to choosing an emergency bag, go for a dull, solid color. Your bag should not be screaming, “Look at me!” Black works perfectly because it is not visible at night, and also it does not draw attention to itself. In an emergency situation, you do not want people to focus on your gear and blending in with the surroundings is your best bet.

Internal Frame: An internal frame backpack is a better option because it lets you move freely. You can walk, run, jump or climb without the bag hindering your progress. This kind of bag hugs your back and thus feels more comfortable.

Waterproof: Make sure your bag is waterproof. After all, you do not want all your supplies to get wet when it rains or snows.

Size: Don’t go for something which is too big. Again, it draws too much attention to itself and you might find yourself in trouble as people try to rob you thinking you have a ton of supplies in there. Also, the larger the size, the more difficult it will be to carry the bag. At the same time, the bag should be spacious enough that it lets you carry everything inside.

Rush 24 by 5.11 – Great option for a Go Bag.

A good idea is to measure your own height from shoulders to the torso. Your bag should be around this big. If it is bigger, it will ride below your hips and thus bang against them every time you move. If it is smaller, it will be too high up on your back and will not feel comfortable.

Durability: The bag you buy should be built to withstand the elements. If a zip breaks, or a strap tears, you will be in huge trouble. Never compromise on the durability of a bag, even if you need to spend more. The fabric of the bag should also be tough.

Compartments: Bags which have many zippered compartments are easy to handle as you can organize your goods. That way, whenever you need anything, you do not have to turn all the contents topsy-turvy to find it. It also lets you prioritize your stuff so you know where the important things are.

Comfort Level: Your emergency bag is something you will be wearing for extended periods of time, as in a bug out situation you will constantly be on the move. Before you purchase your bag, wear it to see if it adjusts well to your body shape and structure. The straps should be adjustable and comfortable; they should not dig into your shoulders and waist. The bag should lie comfortably across your back and not bounce around too much when you move.

It should also be easy to wear and remove your bug out bag. You don’t want to spend ages putting it on and adjusting the straps every single time.

Types of Bags

Gerber and Maxpedition make smaller but tough as nails bags to hold plenty of survival gear

Let’s talk about the different types of emergency bags in the market, and which one will suit your specific needs.

Go Bag or 72- Hours Bag

This bag will sustain you for three days, and is best used in case of a natural disaster, when help might be on the way. The go bag is only large enough to carry three days’ worth of food and water supplies. You can also pack some essential tools (like a knife) and a first aid kit, but that is basically all you need.

Car Bag

This kind of bag is meant for people who travel via car a lot. The bag will have tools and supplies to repair your car, like a jumper cable and tire repair tools, so if you are stranded on the road, you can fix your vehicle and get going. The bag should also have other essential items, like food and water which will sustain you for about a day, in case you cannot fix your car and thus have to wait for help.

Bug Out Bag

A bug out bag is something which will sustain you for a long time. This bag is meant to carry supplies which will help you survive in any dangerous situation. The bag not only has food and water, it also has supplies which will help you make it on your own in the wilderness.

If the situation gets so bad that you need to leave your house and go to the wild to survive, alone, you need this bag. Here, you will have cooking supplies, hunting gear, change of clothes, fire starters, a knife, medical kit and other goods which will help you.

Duffel Bag

A tactical duffle is another option to quickly store a lot of gear.

A duffel bag can be used as an emergency bag if you have nothing else at hand. It is spacious and large and thus you can fit a lot of your gear inside. However, keep in mind that it is not the ideal option. You cannot compartmentalize the goods in a duffel bag, and just have to stuff everything in the same big space. This can prove to be rather cumbersome if you need something which you packed in the bottom of your bag.

Get your Emergency Stuff Ready

You never know when disaster might strike, so there is no time like the present to prepare yourself. Get a great bug out bag and pack your supplies so you can be ready to leave in a few minutes, if you need to. Remember, surviving in the wild is difficult, but not impossible. If you have the right equipment, you can certainly make it.

Do you have any particular bag you want us to know about? Let us know your preference in the comments section.

About the Author: Daniel Carraway knows everything there is to know about survival, hiking, camping and backpacking materials. If you want a review of any gear, he would totally be the best person to ask and he can also tell you a lot more about the best bug out bag backpack. Daniel learned a lot from attending REI Outdoor School, and one day he hopes that all his knowledge will help him in climbing the highest peak in the world.

The post Emergency Bags Every Prepper Needs to Have appeared first on The Prepper Journal.


from The Prepper Journal
Don't forget to visit the store and pick up some gear at The COR Outfitters. How prepared are you for emergencies?
#SurvivalFirestarter #SurvivalBugOutBackpack #PrepperSurvivalPack #SHTFGear #SHTFBag

Prep Blog Review: House Projects To Start In The Spring

I love spring! Is the perfect time to start new projects around the house, in my garden, for my homestead, and take my prepping goals to the next level. Every new projects means learning a new survival skill or practicing an old one, and you can transform these activities into a fun family activity.

If you are having some extra time and you are looking for cool, fun and easy spring prepper projects, for this week’s Prep Blog Review I’ve gathered four articles on this topic.

Do you have other spring projects on the way? Share them in the comment section!

1. 50+ Things You Can Make Using Essential Oils 

“While essential oils have been used for aromatherapy for hundreds of years, these all-natural scents are seeing a spike in popularity as more people are learning about their de-stressing and energizing abilities.

Derived from plants or flowers, most often through steam distillation, essential oils can be used to make scented candles, oil diffusers, even pest repellants.

To show you all the possibilities a little bottle of essential oil holds, we rounded up some of our favorite things to make with essential oils—along with our guides to picking the right scent.”

Read more on Apartment Therapy.

2. Making Furniture and Other Structures With Sticks 

“If you’re living off the grid, chances are you are in a rustic setting and possibly/most likely have a rustic dwelling, maybe even a log cabin that you built by hand (that would be awesome).

Well, what would fit with that rustic theme better than rustic furniture?

Clearing the Land

When you make your homestead location, chances are there will be a lot of trees there that you will be cutting down to clear a spot for your home and garden areas.

Besides the heavier logs that come from cutting trees that can be used for making boards, beams, and split rails, you are also going to amass quite a pile of sticks.

No, seriously, there will be a huge pile of sticks. So why not put those sticks to good use? After all, waste not want not, right?”

Read more on Survival Sullivan.

3. The Prepared Home: 5 Prepper Project to Start in the Spring 

“ReadyNutrition Guys and Gals, as many of you know, planning is an important aspect of emergency preparedness.

Each year, you should make new plans and practice your new skills.

I wrote an article a little while back about planning (and possibly starting) an icehouse/root cellar during the wintertime.

As of this writing, spring is just around the corner (officially), and the cold weather is starting to retreat bit by bit.  We’re going to cover a few ideas for you to pursue during the spring months for building projects around your property.

Let’s jump right into it, with a description of the projects and the reason for building them.”

Read more on Ready Nutrition.

4. Smart Ways to Reuse Things 

“My grandparents never threw away a thing that could have been used later on.

They were the old time preppers: stockpiling and re-purposing almost everything.

Today we live in a throwaway society, where even our water comes in a disposable, single use bottle.

Electronics and other consumer goods are expected to last until the next, better model comes out.

Our landfills are filling up and this throwaway mentality benefits only the producer who can sell more.”

Read more on Ask A Prepper.


This article has been written by Drew Stratton for Survivopedia. 


from Survivopedia
Don't forget to visit the store and pick up some gear at The COR Outfitters. How prepared are you for emergencies?
#SurvivalFirestarter #SurvivalBugOutBackpack #PrepperSurvivalPack #SHTFGear #SHTFBag

Friday, April 14, 2017

The Top 10 Survival Supplies That Can Save Your Life

Written by Guest Contributor on The Prepper Journal.

Editor’s Note: This post has been contributed by Sarah. If you have information for Preppers that you would like to share and possibly win a $300 Amazon Gift Card to purchase your own prepping supplies, enter the Prepper Writing Contest today.


When a disaster happens, you don’t have time to start thinking about survival supplies you need. You need to be prepared and function on autopilot – when it comes to fighting for your survival, drafting shopping lists just isn’t possible. So, what are those essential supplies you need to have prepared for when disaster strikes? Here is a list of the ten survival supplies that could save your life.

1. Dry bags

One of the most important survival supplies is a stock of dry bags. These are similar to dry boxes and they are designed to ensure the contents stay dry and untarnished. If you’re clothing or electronics get wet, then you are going to have a tough time surviving and thus, these things are the first things to purchase.

You can keep the dry bags unpacked, but it can be a good idea to prepare a few with extra clothing. This way, you are always guaranteed to have dry clothes – some underwear, a pair of hiking trousers, a fleece shirt and some socks are enough to get started.

2.Fire starters

Aside from staying dry, your second most important survival element deals with setting a fire. You need heat not only to keep warm but also to cook things, among other important functions. There are tons of different fire starter supplies and it’s a good idea to even learn how to set fire with nothing but what nature has on offer.

However, make your survival a bit easier and get automatic fire starters. The magnesium fire starters are a solid option and you can use it in challenging conditions.

3. Sleeping bag

Sleeping is probably to least of your worries when things go sour, but you shouldn’t skip it. We need to sleep and rest our brains – without it, we can’t function properly and all your survival efforts will go to waste.

A sleeping bag is a must-have supply and you should have enough of them to ensure you can put your head down. You want the sleeping bag to be good quality – don’t try to save money with this purchase.

4. Water purification tablets

You definitely need to have a solid stock of water purification tablets, such as Polar Pure. Without water, you won’t last very long and therefore, it is an essential part of surviving in the wild or during a disaster. When you buy water purification tablets make sure to learn how to store them and use them! Test your tablets a few times to ensure you’re able to use them effectively.

5. Canned liquids

Food supplies are essential for a survival kit. You should definitely have a good stock of food supplies (canned meat, canned vegetables, protein powders and so on) at your home or designated survival location. However, you should focus on a few food supplies above anything else and keep these at hand at all times. The magic supply? Canned liquids like canned juices, condensed milk, coconut milk, chopped fruit in their own juice and so on. These are the best for survival because they provide you with both nutrition and hydration at the same time.

6. First Aid Kit

Sometimes survival becomes more than just finding shelter and food. You might be injured and you won’t have access to modern medical facilities. It’s crucial to be able to tend to your wounds and know how to get through injuries without causing more damage.

First aid kit with basic essentials like alcohol for cleaning wounds, scissors, bandages of different kinds, blasters, and so on, are a must-have part of a survival kit. You can create your own or opt for pre-made first aid kit from places like the Red Cross.

7. Bear pepper spray

While you definitely should get your hands on other forms of weaponry, your immediate survival kit should have a can of bear pepper spray. The spray is a great way to protect against animals, whether a mountain lion or your neighbour’s dog. It’s easy to use as well so make sure to teach your younger family members as well! You just have to point the can in the general direction of the animal or human attacking and they should be disoriented and run away. At least the spray is good for buying more time and getting your hands on a knife or a gun.

8.Fishing line

The beauty of fishing line it’s in its versatility. You can use it as a traditional fishing line and catch food but you can also use it to tie things, cut things and set different types of traps. Fishing line is durable and it’s cheap.

9. A proper map of your immediate location

Always have a sturdy map in your survival supplies kit. We’re too used to using modern technology to getting around, but when the worst happen, your iPhone is unlikely to save you. A good map with plenty of detailed information of the roads and terrain won’t cost a fortune and will ensure you find your way if other forms of communication are gone.

10.Fuel

Finally, you’ll need to stock up on some fuel. If you look back to some modern disasters, such as Hurricane Sandy, people were queuing to get fuel because the generators were out. Don’t be the person who has to find fuel after the disaster, but keep a few cans of it in secret locations – make sure it isn’t near things that could ignite.

Now, when it comes to having these supplies, it’s important to keep check of your stock and to ensure things aren’t going old (although by nature these supplies should last a long time, you do need to ensure the packages don’t get tampered with and so on). You can make savings with all of the above supplies if you shop with VoucherBin UK – it has a range of camping retailers offering discounts.

You should ideally have one set of kit available at your house, one smaller kit in your car and another stock at your designated safe house. This ensures you have a few access options when disaster strikes and you’re not left stranded.

So, when it comes to being prepared, don’t forget to get your hands on these ten supplies – they might save your life.

The post The Top 10 Survival Supplies That Can Save Your Life appeared first on The Prepper Journal.


from The Prepper Journal
Don't forget to visit the store and pick up some gear at The COR Outfitters. How prepared are you for emergencies?
#SurvivalFirestarter #SurvivalBugOutBackpack #PrepperSurvivalPack #SHTFGear #SHTFBag

What did you do to prep this week?

Well, folks here we are again. Another week of prepping and doing awesome stuff. You’re reading this site so you are awesome, you’re an elite prepper, you are the wolf pack!

Speaking of being awesome, before we get started with this weeks segment I’d like to thank Mr. Bill D for his generous contribution this month. Thank you Bill you are awesome!

On another note I noticed this morning that our Alexa traffic rank jumped to a rank of 55,651 and a U.S. rank of 11,259 – Alexa measures the traffic numbers by unique visits to every site on the web, the lower the number...

Read the whole entry... »


from TheSurvivalistBlog.net RSS Feed
Don't forget to visit the store and pick up some gear at The COR Outfitters. Are you ready for any situation?
#SurvivalFirestarter #SurvivalBugOutBackpack #PrepperSurvivalPack #SHTFGear #SHTFBag

Our Off The Grid Solar System

by Ron – author of  Off Grid and Free-My Path to The Wilderness  

This is a follow up to a reader’s question I received from a previous post. As a reminder, my wife and I are the couple living alone 100 miles in the Canadian bush. Back around 1980, when I first started on my off-grid journey, both money and experience were in short supply. One might say I was young and clueless. Nonetheless, I set out to homestead in northern Maine and I outfitted my cabin with an off grid setup which was so small it bordered on the absurd. I had one small solar panel, small charge controller and a...

Read the whole entry... »


from TheSurvivalistBlog.net RSS Feed
Don't forget to visit the store and pick up some gear at The COR Outfitters. Are you ready for any situation?
#SurvivalFirestarter #SurvivalBugOutBackpack #PrepperSurvivalPack #SHTFGear #SHTFBag

We EMP Solar Panels, iPhone, PC, & more!


from TheSurvivalistBlog.net RSS Feed
Don't forget to visit the store and pick up some gear at The COR Outfitters. Are you ready for any situation?
#SurvivalFirestarter #SurvivalBugOutBackpack #PrepperSurvivalPack #SHTFGear #SHTFBag

Prepper News Brief April 14, 2017

1. Senior Russian lawmaker Konstantin Kosachev, says the U.S. is a greater threat to global peace than North Korea…

Meanwhile… South Korea’s Foreign Ministry has criticized comments by North Korea’s vice foreign minister, who told The Associated Press that the North is capable of conducting another nuclear test at anytime and ready to “go to war” if the U.S. provokes it. Via The Associated Press.

2. It’s coming… probably this weekend…

U.S. May Launch Strike If North Korea Reaches For Nuclear Trigger. The U.S. is prepared to launch a...

Read the whole entry... »


from TheSurvivalistBlog.net RSS Feed
Don't forget to visit the store and pick up some gear at The COR Outfitters. Are you ready for any situation?
#SurvivalFirestarter #SurvivalBugOutBackpack #PrepperSurvivalPack #SHTFGear #SHTFBag

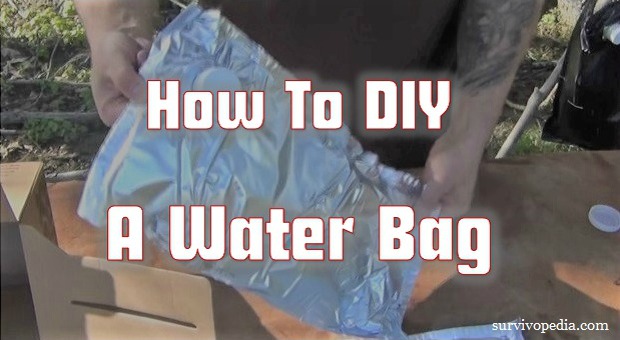
How To DIY An Emergency Water Bag

When it comes to survival, water is of utmost importance. The problem with water is that it’s pretty hard (as in heavy and voluminous) to carry it on your person, especially when you’re on the move.

That makes the problem even more difficult: if you don’t have water with you when you’re hiking, walking, riding your bike, or whatever, chances are you’ll get dehydrated, and then you’ll be in a world of hurt. Dehydration is a very serious problem, especially in extreme climates (very hot and very cold), as it sets in quickly and makes your life miserable.

That’s why hydration packs were invented in the first place –keeping your body hydrated at all times is absolutely crucial for staying healthy, especially for elderly folk.

As you get older, your body literally dries out, causing your ligaments and tendons to lose their resistance and flexibility. Staying hydrated if you’re a senior citizen is critical to maintaining optimal health.

Regardless of one’s age, poor hydration leads to dry/itchy skin, which is a pest for women, not to mention constipation, nose bleeds, fatigue, headaches, sinus pressure, sneezing/coughs, urinary tract infections (the body can’t wash out the germs accumulating in the bladder if you don’t drink enough water).

All of these conditions result of toxins accumulating in your body. Also, poor hydration is the main enemy of your immune system and it leads to all sorts of imbalances: pH, nutritional, and chemical.

Chronic dehydration is the main cause of daytime fatigue, which seems to be endemic in our modern society, especially among teenagers who rarely drink water nowadays. They have Gatorade, right?

Overall, we lose 3 quarts of water per day and half of that is through breathing alone. If you have a dynamic/active lifestyle, i.e. you walk a lot or you’re into physical labor. If you jog or you’re a workout aficionado or whatever, you’re playing in a different league.

The simplest way to determine if you’re properly hydrated is to check out the color of your urine. If it’s light yellow, you’re okay; if not, chances are you’re not drinking enough water.

Keep in mind that eating certain foods like carrots, beets, fava beans, or asparagus may turn your urine orange, green, red, or brown and the same goes for certain types of medication.

This preamble brings us to the camelbak idea, an interesting piece of gear that is currently used in various scenarios by both civilians and military forces, basically in every type of strenuous outdoors activity.

Now, the question is: do you want to spend (at least) 40-50 bucks on a water bag or would you rather DIY? I bet you fall in the latter category; that’s why you’re reading this article.

The good news is that you can DIY your own water bag with minimal costs and you’ll end up with a very convenient way to carry half a gallon of water on your person – a nice trick which comes handy during camping trips and what not.

This proven-to-work portable device provides clean fresh water 24/7! 

How to DIY a Water Bag

A CamelBak water bag is basically a fancy looking plastic bladder/reservoir with a straw. That about sums it up.

The hydration capacity ranges from 1.5 to 3 liters (50-100 oz) and it comes with all sorts of bells and whistles you’d expect from a professional piece of gear.

But simply put, what we’re dealing with here is a bladder filled with water with a straw which can cost up to 150 bucks. Paying that kind of money for a plastic bladder is a little bit rich for my taste.

So, the main thing to do to make a DIY water bag is to get yourself a dirt-cheap/free-of-charge bladder, and that’s not very hard if you know where to look for it.

To begin with, there’s a school of thought that says something along these lines: DIY-ing your water bag (the bladder respectively) is not very smart, as most plastics and glues are not food-safe and, after all, you’ll be filling them with water and all that jazz (think BPA).

However, you can still buy a food-grade bladder from a local camping store, but the price may be a deal breaker now and then. The best things in life are free, right?

Project 1

That brings us to the first DIY water bag project. This guy recycles the innards of a Dunkin Donuts Box of Joe. The bladder inside these bad boys is not made of plastic, hence it doesn’t leave that unpleasant taste of plastic, water-hose like, in your water supply. And that’ s because the bladder inside that box is made from Mylar.

In order to prevent the bladder from getting punctured and what not, you may use a dry-bag for protection.

Video first seen on Don Yackel

Project 2

Here is another guy with a pretty cool idea about how to protect the Mylar/plastic bladder from getting punctured.

Spoiler alert: he uses 12 feet of duct tape for creating some sort of armor/outer shell for his water bag.

Video first seen on Snowalker13

Project 3

The second idea is to use  the bladder that can be found in certain types of boxed wine. The bladder can be removed and re-used as a water container.

The bag inside the boxed wine is just as good as the more expensive platypus, not to mention that you’ll end up with 2 liters of wine in the process (if you don’t pick up the box wine from the garbage, like our guy).

Video first seen on 123Homefree

Another interesting idea about how to make a sleeve for your water bag (regardless of what type of bladder you end up with) is to use a large envelope. Just think about those 3M bubble mailers cushioned with plastic.

Now that you know how to make your own water bag, discover how to DIY your own portable device for an endless water supply.

Click the banner below for more!

This article has been written by Chris Black for Survivopedia. 

References:

http://www.instructables.com/id/Camelbak-Unbottle-DIY/


from Survivopedia
Don't forget to visit the store and pick up some gear at The COR Outfitters. How prepared are you for emergencies?
#SurvivalFirestarter #SurvivalBugOutBackpack #PrepperSurvivalPack #SHTFGear #SHTFBag

Thursday, April 13, 2017

Introduction to Gunsmithing – Part 1

Written by John Hertig on The Prepper Journal.

What is “Gunsmithing”? It is the process of repairing or modifying firearms. You can do it on your own firearms without any problem, and you might be able to do it for friends and family, especially if you don’t get paid for it. But if you do it as a “business”, then you will need to be licensed by the Bureau of Alcohol, Tobacco, Firearms and Explosives (BATFE).

There are three aspects necessary to do successful gunsmithing: Knowledge (what to do), Skill (capability to do it) and Tools (what to do it with).

Tools are perhaps the “easiest” aspect to achieve. After all, it is a binary condition. You have the tools you need or you don’t have them. If you need a tool and don’t have it, all you need to do is track it down, and be able to afford to buy it (or rent it or borrow it) or be able to make it.

Tools for Disassembly and Reassembly

Gunsmithing tools are often similar to “regular” tools, but sometimes there is that slight, critical difference. For instance, the “first” type of tool to consider is the lowly screwdriver. No you can’t go down to the big box store and buy their no-name cheap screwdriver set. Or go to the fancy tool store and buy their top-of-the-line screwdriver set. Most “regular” screwdriver sets have a limited number of sizes AND their blade shape is a blunt wedge (taper ground). And this is a recipe for disaster when working on firearms. They have a lot of screws, often of the slotted persuasion, and in a wide number of sizes. Your “standard” tapered screwdriver set probably won’t have a blade of the right thickness or width, and without this degree of fit, the screwdriver will mar up the slot. Even if by some lucky coincidence the screwdriver is the right size, the tapered sides of the blade have a tendency to cam the blade out of the slot, which messes up the top edge of the slot. And firearm screws are often blued so any marks you make tend to really stand out. If you are looking at a gun with buggered up screws, the odds are someone who did not know what they were doing (and had the wrong tools) has been monkeying around inside of it (or failed to get inside).

What you need is a screwdriver set with a wide number of sizes AND parallel sides (called “hollow ground”). Because of the number of sizes, the best choice is usually a set with one or more handles and a large number of bits. Kind of the “reference” for this class of tools is a Bownells Magna Tip Set.

Their beginner’s sets are not cheap, and their top of the line set with 75 standard, 4 Phillips, 17 hex (Allen), 11 Torx®, and 13 specialty bits for sights, scope mounts, grip bushings, Ruger ejectors, and other unique applications, along with 7 assorted handles, runs $320. You can get cheaper hollow ground sets, but they usually won’t have the variety of bits and may be of lower quality than the Brownells sets, but can still be quite adequate. It is a reasonable methodology to start out with a small set, and add additional bits as you need them, although when you find you need a bit, you “should” stop what you are doing until you can get the correct bit. But this is often unacceptable in the real world. If you are gunsmithing professionally, get every bit you can; otherwise, get any new bits you need every time you access a new firearm. If there is a bit which you use “a lot”, having a spare of that bit is wise. Note that if you don’t have the right sized bit, you can grind a bigger one to size.

You may find some Phillips screws, particularly in rifle stocks, and Allen (hex) screws have become fairly common. Thus having Phillips screwdrivers (or bits) and a set of Allen wrenches is recommended. Allen bits are available, but the “L” shaped wrenches tend to be more durable.

Another thing found in abundance in firearms are “pins”. These can be solid or “roll” pins. To get them out and back in, you need the “second” type of tool to consider, a set of punches in various sizes. For solid, flat end pins, you use flat face, constant diameter “pin” punches. For roll pins, roll pin punches with a little bump in the middle of the face are strongly suggested. If you will be doing a lot of roll pins, a set of roll pin “holders” would make things easier; since each holds the pin in position and drives it part way through. Occasionally you will have a pin with a rounded end, and a “cup” face punch is optimal for these. If you have a pin which is stuck or extra tight, a “starting” punch is often suggested, but I don’t trust these. They are tapered, and although they do reduce the chances of bending or breaking a punch, only the face is the correct diameter, and I’m concerned they could deform the pin hole. Pin punches come in various lengths; shorter ones tend to be more durable, but if not long enough to drive the pin all the way out, less useful. A non-marring (brass) pin punch set may be useful, but for me, the deformation they could suffer outweighs the low mar factor they offer. However, a non-marring “drift” punch of brass or nylon (or both) should definitely be included.

Weaver Deluxe Gunsmith Tool Kit – beginner set with basic tools.

By themselves, punches are of limited use. When driving a pin in or out, you need a way to provide some impact force to the punch, and you need something to support what you are driving the pin out of, and a place for the pin to go without running into anything. These aspects are provided by a small hammer or mallet, with brass and sometimes rubber or plastic faces, and a “bench block” with holes you can drive the pins into.

To handle small parts, a selection of hemostats, large tweezers and precision “needle nose” pliers is in order. I also include a pair of parallel jaw pliers, a small Vise-Grip and a strip of thick, raw leather (to protect the part from the Vise-Grips) in my pliers assortment, but these are usually not required for normal disassembly or assembly. Assorted picks and probes can help you get gunk out of a tight space as well as help to manipulate small parts.

These are the “universal” basic disassembly/assembly tools. Specific firearms sometimes have specialized tools which make it easier (or in some cases “possible”) to disassemble or reassemble that firearm or class of firearm. If you will be working on that particular firearm, some of its specialized tools could be considered “basic”.

Tools for Maintenance and Testing

In order to keep a firearm functioning optimally, you need to maintain it. Maintenance usually involves cleaning it after use (or after it is exposed to an adverse environment). A cleaning kit is in order to clean out the bore. This includes some solvent, a caliber specific set of patches (squares of cloth), “mops” (fuzzy cylinders) and (soft) wire brushes, and a rod to push these items through the bore. Cleaning rods can damage the muzzle (and thus accuracy), so some sets have a bore guide included in them; some others use a coated rod or a very soft rod material. Some sets, particularly those intended to be carried with you, use a cable to pull the cleaning elements through the bore instead of a rod used to push. Alternatively, some people prefer to use a “bore snake” these days, claiming these pull-through combinations of mop and brush are quicker and safer (than rods). To clean the rest of the gun, a selection of brushes and cloths is in order.

The bore of a firearm is critical to its performance, so a way to check out its condition is necessary if you are considering acquiring a particular firearm. And for that matter, after you clean the bore, you want to check that you did a good job and that no damage has occurred over time. The reasonably priced way to do this is with a bore light; a lighted bulb which fits, or a drives a fiber optic tube which directs the light, into the bore. Alternatively, you can use a mirror, prism or “light pipe” to direct an external light source into the bore. For the well-heeled, there are even “bore camera” systems. If you see crud in there, you need to do (or redo) bore cleaning to get the crud out so you can see if there is any damage under the crud.

Once you get a firearm clean, you want to lubricate it with the appropriate grease and/or oil, and perhaps give it a wipe down with oil or other protectant to provide some protection against rust to the finish.

If the firearm is operating correctly for you, then it is sort of “self-testing”. If there is a new (to you) firearm for which you want to verify the functioning, or an existing one which it seems might be having problems, testing is in order. For testing feeding function safely, some “dummy rounds” are wise. Polymer dummies are cheap, but I prefer machined aluminum ones, or even better (if you can still find them these days), ones made of actual brass and bullets, but of course, no primer. Avoid ones which are “painted”, as the paint tends to flake off in the firearm. If you reload, you could even make your own; just mark them so you can tell them from active ammo at a glance. For testing the hammer and/or trigger function safely, a brightly colored “snap cap” (or six, for revolvers) would be useful. In order to verify a firearm is correctly headspaced and thus safe to fire, “GO” and “NOGO” gauges for that caliber are useful but costly. A complete set for a caliber, with GO (measures against the minimum factory specification), NOGO (measures against the maximum factory specification) and FIELD (measures against the maximum safe headspace after lots of use) will probably run $90 or more. You can buy the gauges individually, but do NOT mix brands of gauges for a caliber.

This is a good starting set of tools. Tune in next time for a discussion of Knowledge and Skills.

The post Introduction to Gunsmithing – Part 1 appeared first on The Prepper Journal.


from The Prepper Journal
Don't forget to visit the store and pick up some gear at The COR Outfitters. How prepared are you for emergencies?
#SurvivalFirestarter #SurvivalBugOutBackpack #PrepperSurvivalPack #SHTFGear #SHTFBag

How To Build A Walipini Greenhouse

We use cellars because they maintain a more constant temperature than structures that are built above-ground. We use greenhouses to extend the growing season because they hold in heat. Well what if you combined a greenhouse and a cellar? You’d have a greenhouse that would allow you to grow plants year-round.

This type of greenhouse is called a geothermal, pit or, Walipini greenhouse, and is common in South America. ‘Walipini’ means ‘place of warmth’ in Aymara Indian, and it’s an apt name.

Basically, the idea is that once you get below the frost line (3-5 feet below the surface, the Earth maintains a fairly constant temperature. In the US, that temperature is typically around 45-50 degrees in the northern states and 50-70 in the south. That range makes for perfect plant-growing temperatures, especially when you add a covering to one side that sun can shine through and warm it up a bit.

You’re harnessing the existing geothermal heat by digging 6-8 feet underground and capturing and storing solar radiation in order to create a near-ideal growing climate that’s resistant to surface-level temperature changes.

Benefits of a Walipini Greenhouse

There’s the most obvious benefit – you extend your growing season, or even make it so that you can grow food year-round.

Another reason that this type of greenhouse may appeal to preppers is that, depending on how you build it, it’s not obvious what’s in it so your food will be better hidden.

I’ve even seen articles about Walipinis that are built in such a way that they are a self-sustaining unit containing animals, aquaculture, and hydroponic plants. That’s a bit complicated and beyond the scope of what we’re doing today, but it can be done.

If you live in a dry climate, another advantage is that your Walipini is going to hold moisture from the ground in. You can help this along by using water along the wall to help pull the heat from the earth. That way, you’re making the air warmer and moister. Plants will love you. Actually, take condensation into consideration when you’re building.

The final advantage that a Walipini or pit greenhouse has is that you can build the whole thing for just a few hundred bucks. Less if you already have the materials.

Learn from our ancestors the old lessons of growing your own food.

How to Situate your Walipini Greenhouse

The first thing you need to do before you start gathering materials is determine where you’re going to build. You need to know a couple of things when you make this decision:

  • your local water table
  • how large you want your greenhouse to be. The larger it is, the more stable the temperature will be.

Ideally, a Walipini greenhouse is built by digging into the ground so that 3 sides and the floor are underground, and the exposed side, which is covered with windows or plastic, is built facing the winter sun – south in the northern hemisphere – and at a 90-degree angle to the sun. Think digging into a hillside, then covering the hole with plastic, which is actually a pretty good description.

Of course, what’s ideal isn’t always realistic. We don’t all live in places that even have hills to dig into. You can also dig them so that they’re just a pit and the sun is directly overhead. Of course, you’ll see that you can use the dirt that you remove from the pit to build up the rear side of the pit both for better insulation and to give you that angle for your plastic that will both help with rain run-off and position your light better.

The important things are that you dig beyond the frost-line, provide good insulation that will pull the heat in, and make sure that you don’t dig below the water line. Obviously, that would be bad. You need to make sure that the floor will be at least 4 feet above the water line.

Now, if you live in an area where the water table is measured in inches instead of feet, (many coastal areas) that doesn’t mean that you can’t build this – it just means that you need to be a bit more creative and that most  of your structure will be above ground and you’ll pile dirt around it.

Video first seen on Ben Green

What do you Need to Build a Walipini Greenhouse?

At its most basic, all that’s needed is (maybe) wooden support beams (2x4s or poles), greenhouse plastic or windows, and insulating materials – natural soil may be used for the walls if it’s structurally sound enough to hold up – such as clay or mud bricks, clay, straw bales, earth bags, concrete, cinderblocks, or stone. Of course, you’ll need nails or screws for the support beams, and a door and door frame.

Video first seen on elicia clegg

Digging out your Walipini

When you start to dig, save the topsoil to use as the soil in the floor of your Walipini because the sub-soil won’t be good for growing. You can use the remaining dirt that you remove to build up the back berm of the structure so that you have better insulation and a higher back wall.

Many people dig a drainage ditch around the Walipini to help the water flow around the greenhouse instead of into it.

Dig down at least 6 feet (8 or 10 feet is even better) as long as you’re maintaining your distance from the water line. If you’re building into a hillside, you’re literally going to scoop a section out of the hill so that the back wall is vertical and the floor is horizontal.

If you’re building a pit, pile the soil that you’re removing so that it creates a berm behind and on the north side of the hole.

Remember when you’re digging that you’re going to be insulating the walls and floor so you’ll be adding at least a foot or so back to what you’re digging out. Account for that when you’re designing it.

There are so many different ways to design your Walipini based on your needs and geography that telling you where to put the door wouldn’t be of much help; just remember not to build one into your plans when you’re designing the Walipini.

Once you have your whole dug, reinforce your north, east, and west walls with whatever you chose as your insulator. Natural stone and brick are both great choices because they naturally pull the heat (and moisture) from the ground and into the greenhouse. Some people choose to line the floors with stones and some don’t.

Now, you have to decide if you’re going to plant directly into the floor or are you going to treat this as a standard greenhouse and use containers? I also saw a few great examples of container garden-type methods.

If you’re planting straight onto the floor, it’s a good idea to put a layer of gravel 6 or 8 inches deep under the soil to help with drainage and to pull more heat up from the ground. You can use compost or manure under the topsoil because it naturally generates heat as it decomposes and will help warm things up.

After you get your walls built, it’s time to cover the pit. I’ve seen several examples where people built a vent into the roof in order to let some of the heat escape. This may sound silly, but the inside of a Walipini can be as high as 100 degrees even in its below freezing outside – that’s no exaggeration.

So, either build in a vent or be prepared to leave the door open or cracked for part of the day in case it does get too hot.

The roof (cover) doesn’t have to be fancy. It can be clear plastic stapled over a wooden frame with braces every few feet.

There you have it – the basics on how to build a Walipini greenhouse. It’s a simple yet effective method to help grow plants during the winter or even in climates that aren’t typically conducive to gardening at all.

Click the banner below to discover the long forgotten secrets that helped our forefathers survive during harsh times!

Do you have a Walipini or pit greenhouse? If so, please share your ideas and experiences with us in the comments section below. Also, feel free to ask questions.

This article has been written by Theresa Crouse for Survivopedia. 


from Survivopedia
Don't forget to visit the store and pick up some gear at The COR Outfitters. How prepared are you for emergencies?
#SurvivalFirestarter #SurvivalBugOutBackpack #PrepperSurvivalPack #SHTFGear #SHTFBag

Wednesday, April 12, 2017

Prepper Must-Haves: Vices

Written by R. Ann Parris on The Prepper Journal.

Are vices really and truly a must-have item? No. History is full of periods and survival situations, particularly during the exploration of the colder climates, when even people accustomed to “modern” conveniences went months and years without goodies.

Our vices aren’t necessary to our survival in many cases, but when you cut us off from them, hard times and adjustments just get harder.

The ramifications on families and partnerships in stressful but not life-threatening situations are out there to be viewed in rates of dissolution’s, divorce, separation, domestic violence, addiction-abuse, and suits and counter-suits. If you think a crisis will smooth those away, I have a bridge to sell ya.

We can add one more stress to those difficult times, or we can find alternatives (some of them long-term sustainable) and plan supplies and caches to make things as easy as possible.

Top Vices

Some of the top vices are going to be sugar and caffeine, with tobacco and alcohol right there with them. I can’t do anything to prepare a family to lose internet and TV besides make sure we have puzzles and games, but I can slow our transition away from some of our other vices.

Bad times are already stressful, and we’re already looking at making some hard adjustments. Things that we consume daily before we even feel human are worth stocking – in bulk and out of proportion to the rest of my supplies, really.

If I like coffee, I might also consider stockpiling tea. I can get gallons to the cup per dollar for tea, without taking up much if any more space than pre-ground or instant coffee.

If I’m in a warm enough climate, I might even go so far as to plan greenhouse or protected space for a yaupon holly for caffeine and tea camellia species. Herbal teas will lack the zing, but many tea herbs have the benefit of being perennials and hardy.

There are a wide range of trees that can be tapped for syrup, all of which (and honey) will boil down into candy or can be dried to crystals. Sugar beets and stevia are just two options for producing sweet syrups and flavor at home even outside sugarcane territory.

Everyday Cravings = Higher Priorities

While we tend to look at sugar, caffeine, alcohol and tobacco as the common vices and see them high on bartering lists, they’re not the only things we’re doing without. Pure sugar is a fantastic preparedness item with both vice and food-preservation value, but we don’t all have a sweet tooth.

Our vices are our feel-goods.

They’re our comfort foods – be they salty or sweet or savory – activities, and even exercise or hobbies. All of those may be crimped in an emergency, whether it’s widespread or personal.

Know your actions, and those of family.

Just because my priority leads me to crunchy-salty goodies and chicken broth, and I am willing to scoff off sweets, without sweets my lover is pretty miserable. He is also annoying, gets antsy, and breaks down and goes to the store.

When determining priorities (and budgets), snag and stash the store receipts for a couple of weeks or months. Snag them ahead of holidays and in-family events as well. Do it in all four seasons.

They will rock-solid determine what you’re getting, and even when.

Just going by the shopping list and menu plan isn’t enough. I recently realized that a full third of our Walmart-supermarket spending is not on the lists. They’re not even impulse. They’re actually the things my lover ends up going to the store for because they aren’t on my radar as much.

Those are the kinds of everyday priority to watch for.

My vices, my parents, the kids’ – they’re taken into account with small, compact puzzles to bring out, stashed books, a portable hard drive of movies, little games, baking mixes, inexpensive instant pudding, Hershey’s syrup, and the ability to add crunch to our lives on a regular basis through familiar cold cereals, chips, crackers and dry cookies.

It didn’t actually add all that much to the preparedness budgets to do it, and it allows “treats” and normalcy in unrest, even if I never harvest anything else.

Anticipated Cravings

We can look at history and the way modern North Americans and Western Europeans eat to anticipate some of the food cravings we’re likely to see and can account for with our storage.

Meat – For most of us, meat is going to become a treat, just as it has been for most of human history. It will go back to being more of a flavoring, especially if a crisis drags on.

Anticipating that, I stock it.

I have no lost love for t-rats and MREs. I dislike canned meats pretty much across the board. But they’re in my pantries and caches, because the men in my life will dive after them, and I might wind up desperate enough to eat my share.

Things like pouches of bacon bits, canned hash, the less-expensive freeze-dried meats like crumbled sausage, and the TVP-soy products we can buy for long storage can at least give me and my guys some flavor and the hint of our usual meats.

Things like Slim Jim’s and small beef sticks can be used as a snack, presented as a whole to bite into, or sliced into cold pasta and wheat salads.

Non-Spoon Foods – Maybe somebody eats oatmeal and farina, soup for lunch, and Hamburger Helper or shepherd’s pie pretty much daily. Most of us are probably accustomed to picking up, cutting or stabbing something somewhere through there.

For parts of the growing season, we can adapt how we prepare fresh foods to create a fork-and-knife meal. Some fruit trees will also allow us to present a crunchy for weeks or sometimes a couple of months after harvest.

One advantage to MRE entrees like the feta chicken is that it’s not as gag-worthy, but also, it’s a nice, whole breast portion. You can flake it with a spoon, but you can also stick it on a bun or a bed of couscous.

Planning for pancakes and omelets, to turn Bisquick into pseudo-tortillas, stashing dry cookies in canning jars with oxygen absorbers, and stashing bigger pastas and spaghetti for fork meals will help alleviate the boredom with spoon meals.

Dairy/Cheese – Without dairy animals and specific skills, a long-term crisis will affect us hard and fast in the cheese category. We love fresh cheese. I’m lucky enough that we also really like Bega, and I buy it on sale cycles.

Local stores sell tins of mild cheddar chip sauce at a fairly reasonable price, and it can readily top potatoes or be used as a cracker spread or pretzel dip, even if chips are painful to store due to the bulk they require. Velveeta and Cheez Whiz live on shelves as-is, too. Cheese soup can season rice, potatoes and macaroni.

Powdered parm from the pasta aisle can at least impart some flavors and toast up on top of zucchini, or be used in pasta salad.

There are shelf-stable cheese sticks and slices from companies like Northwoods and those awful combo packets put out by Jack Links and others, but they’re almost as expensive as freeze-dried cheese (and soooo much worse tasting).

I also keep most of the cheese packets that come in our processed foods. I dislike them, but as mentioned in the article about canning jars, being able to whip them up to top or season something makes them well worth a few oxygen absorbers.

Portion Control

The canning jar article also talked about portion control, and how I accomplish it on a regular basis. That goes for both the annual “events” and the weekly-monthly allowances we put back.

If we’re accustomed to free-grazing coffee and tea (I am), we may very well start our path to ratcheting back by only pulling out enough for a day at a time instead of buying things in a giant tub. Maybe we only buy instant packets for a week or a month, and keep it somewhere *else* in the house or kitchen to keep us and our families from snagging out of habit. As we adjust to our new levels, we might bring it out more often.

Cool drinks are another place where we might portion things out.

Instead of mixing up a pitcher and trusting all the kids (and adults) to pour the same amounts, which is bound to lead to arguments (adults, too), maybe we stash a rotating couple of short juice bottles with the wider mouths. We mix up the pitcher, everybody gets their (labeled) bottles. Once that’s gone, that’s it. No discussion of “I only poured half a glass earlier” or “everybody’s pouring extra and I only got half a cup” or “I’ve only had one cup of coffee, but the whole tub is empty, and now I want my second cup with my cookie”.

And I’m serious – anticipate that stress and aggravation or just personalities will pull that crap out of adults as well.

Once things settle into a new normal, no big deal. But I can drink an entire pot of coffee without realizing it until it’s empty, and I’ve seen people mow through a bag of chips or pack of cookies one or two at a time without realizing just how many they’re having.

Portioning things out can also help us truly plan for daily, weekly and monthly uses.

Not everything needs to be strictly regimented, but some things are really easy, and would be easy to lean on early, until they’re all gone. That big stack of canned meats looks like a lot, but can drop fast.

A case of canning jars (or three) and a couple of boxes or kitty litter buckets labelled 1-12, cold or warm, lets us really and truly portion things out.

Pudding fits 3, 5 or 6-8 in a jar, and might be a monthly or quarterly allowance. We might stick our Lorna Doone’s and Cheez-Its in baggies before we put them in a Mylar bag, and take out only this week’s or month’s to jazz up a plate or have as a snack. Instead of just calling it “good” with a few dollar-store boxes of Slim Jims and pepperoni, a test run and then busting in and separating will help them last, in an appropriate amount.

Vices in a Crisis

Not all disasters are equal. Some are very personal, and some are widespread – localized, regional, national, international. Some are short term, while some leave a question mark and some we can anticipate being truly devastating and taking years to recover from.

Or stored supplies and our resupply-production plans should reflect those varying possibilities.

Regardless of the crisis, it’s likely to be stressful. Change itself is stressful. Combining the two is already a recipe for hard times.

Adding the dynamic of spouses and family, any partners, and the potential of neighbors and coworkers to still be contending with creates additional stresses and variables.

Regularly our vices are not all that good for us. It’s still not a great idea to go cold turkey on all of them immediately or shortly after a life-altering job loss, spouse/partner death that affects funds, natural disaster, long-term outage or rolling brown-outs, or big-time disaster.

At no other time in our lives are we likely to be so grateful for whatever our vice is – a couple little cookies and a cup of tea, strawberry syrup for topping pancakes, campfire tin-can cakes topped with applesauce, something nice and salty and crunchy, popcorn with Molly McButter, a cracker-cheese-meat snack or meal after a week of beans and various grains, a new puzzle or game, the ability to put our feet up and watch a show, or delighting Grandpa and the kids with some little Lego vehicle kits to then race across the dining room table.

With a little forethought and planning, we can readily and affordably still have and give our loved ones those feel-goods, to enjoy with a candlelit game of Tsuro or clustered around a screen watching old cartoons. They’ll offer breaks from reality, just as they do now, and help destress our lives a little.

The post Prepper Must-Haves: Vices appeared first on The Prepper Journal.


from The Prepper Journal
Don't forget to visit the store and pick up some gear at The COR Outfitters. How prepared are you for emergencies?
#SurvivalFirestarter #SurvivalBugOutBackpack #PrepperSurvivalPack #SHTFGear #SHTFBag

Savior Forever: Lyric Video - LifeChurch.tv

Savior Forever: Lyric Video - LifeChurch.tv

via YouTube Video Don't forget to visit the store and pick up some gear at The COR Outfitters. How prepared are you for emergencies?
#SurvivalFirestarter #SurvivalBugOutBackpack #PrepperSurvivalPack #SHTFGear #SHTFBag

The Only Trap You’ll Ever Need: The Havahart Live Traps an Ideal Choice for Preppers

By JD – this is an entry in our non-fiction writing contest.
live animal trapping

I don’t like cats. Okay, maybe that’s an understatement. I hate cats. Especially the “free range” variety that you so often find in suburban America. We lived in an area where they were becoming a real problem that animal control wasn’t able to keep up with. I’d wake up in the middle of the night to cats fighting in the street, find cat crap in my garden and see them just about everywhere on evening walks. The time had come to take a stand.

From previous experience, I knew that cats were...

Read the whole entry... »


from TheSurvivalistBlog.net RSS Feed
Don't forget to visit the store and pick up some gear at The COR Outfitters. Are you ready for any situation?
#SurvivalFirestarter #SurvivalBugOutBackpack #PrepperSurvivalPack #SHTFGear #SHTFBag

The Debt Crisis Of 2017: Once Their Vacation Ends, Congress Will Have 4 Days To Avoid A Government Shutdown On April 29

by Michael Snyder at The Economic Collapse Blog.

He is the author of – Get Prepared Now: Why A Great Crisis Is Coming & How You Can Survive It

April 2017 could turn out to be one of the most important months in U.S. history that we have seen in a very long time.  On April 6th, Donald Trump attacked Syria on the 100th anniversary of the day that the U.S. officially entered World War I, and now at the end of this month we could be facing an unprecedented political crisis in Washington.  On Friday, members of Congress left town for their two week “Easter vacation”, and they...

Read the whole entry... »


from TheSurvivalistBlog.net RSS Feed
Don't forget to visit the store and pick up some gear at The COR Outfitters. Are you ready for any situation?
#SurvivalFirestarter #SurvivalBugOutBackpack #PrepperSurvivalPack #SHTFGear #SHTFBag