Saturday, July 28, 2018

Prepper Must-Have: Minimal-Smoke Cooking Backups

Written by R. Ann Parris on The Prepper Journal.

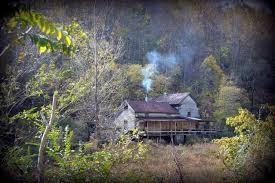
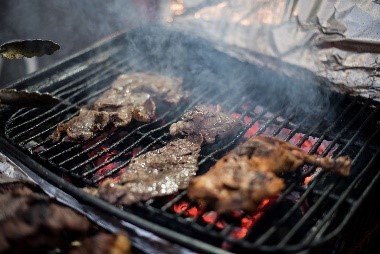
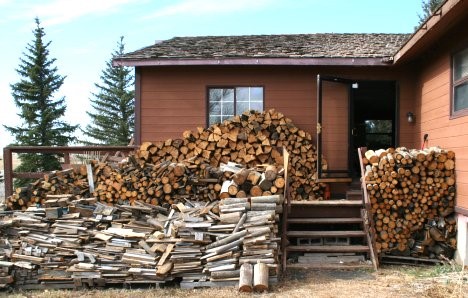
Some holiday weekend, head out to the ‘burbs” or stroll through some campgrounds or a public park. Your nose will pick up a couple very distinctive smells: Wood smoke and charcoal grills. Charcoal and wood fire scents carry far and linger long, presenting a pretty significant cue that people are nearby.

They also regularly offer really lovely wisps and plumes visible above rooftops, retaining walls, hedges, and woods depending on fuel source, weather, and skill. Even relatively small grills can pump enough to home in on once scents have us in the neighborhood.

We may very well want to avoid those telltales in some disasters, and there are plenty of other reasons low-and-no-smoke cooking backups are a must-have for preppers.

They apply to “normal” outage-based disasters and world-shaking events, and to beginners, apartment dwellers, and “soft” climate dwellers as well as the old hats who are already familiar with the numbingly, back-achingly incredulous amount of wood it takes to cook daily and keep even a tight, well-insulated home warm.

The backup methods I’ll list commonly use less fuel or completely different fuels than our primary systems. That diversity and efficiency helps our resources last longer and keeps us cooking when resupply isn’t available.

If we already count on wood or propane for winter heat or cooking, using alternatives now can lower our current burden, giving us the ability to stockpile more. (Or some extra cash and time!)

Many of us try to avoid pine and unseasoned wood in chimneys, especially brick that can’t be taken apart for easier access. Nonflammable, cleaner-burning and tabletop methods help limit buildup.

There are also scenarios where an injury or illness limits our usual labor, there are reasons to stay hunkered down inside, limit noise, and as such our most-efficient tools go down and our production slows; that or something like a flood or mudslide limits our access.

If we can cook and warm spaces without wood, we can horde that “now” precious commodity against greater need.

Or, we may not have a massive woodpile (yet), or a fireplace or woodstove of either species. We may not have a functioning chimney, or our chimney may develop a problem during a crisis. Backups for our backups keep us plodding forward.

*Liquid-gas fuels share some of the wood-charcoal factors, and have some new ones of their own.

Many of us live places where it gets pretty hot. Whatever the fuel used, heating the house unnecessarily just isn’t conducive for easing the stresses and burdens of an already difficult time – whether the crisis is widespread or only affecting us.

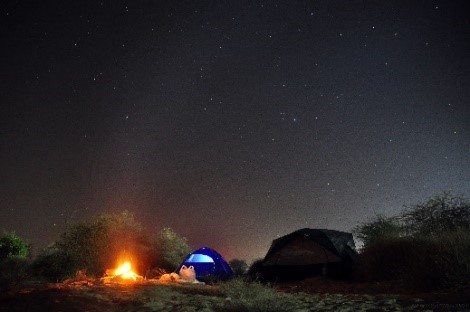
On the other hand, outdoor cooking gets old fast for those of us with seasonally or perennially dusty-windy conditions. That’s how it goes with picking oak catkins and maple spinners out of food, and dealing with flies and mosquitoes.

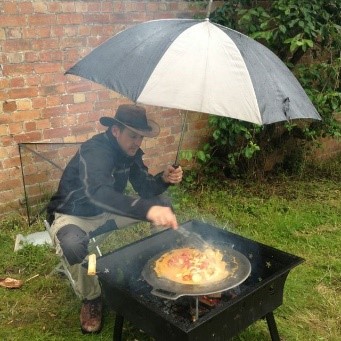
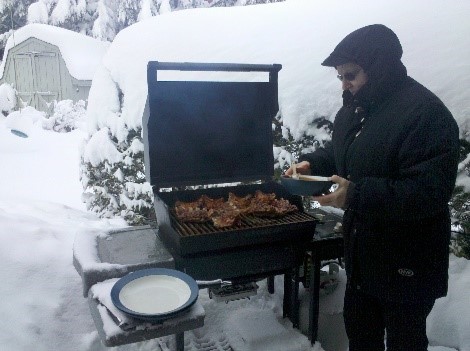
Grilling outside in a pounding rainstorm or frigid winds also kind of sucks – and can take forever – but then again it’s not usually a great idea to use charcoal grills inside.

Slight Consolation: Food you’ve suffered for in cold weather tastes better. (Muggy/hot weather, not so much.)

Options we can use indoors and under screened porches and pop-up pavilions check a big, big box.

There’s also the *other* rule of threes that some of us ascribe to: three ways to reach and accomplish any task. It’s not always possible (or practical), but in the case of alternative cooking methods, we can check that box, too, easily and with very little outlay in time or money.

Most of the methods below use things already in the home, very basic “everybody everywhere” tools, and outright trash/recycling that costs nothing but time. Some don’t even take up extra space.

The internet abounds with options for DIY’ing these and making them more efficient or portable, so I’m not going to reinvent the wheel on that front.

*I am not affiliated with any of the links provided, nor do I always agree with the authors (or even have any idea what else they post) – they’re the simplest, easiest, or most expedient versions that popped when I wanted an example.

Minimal-Smoke Cookers

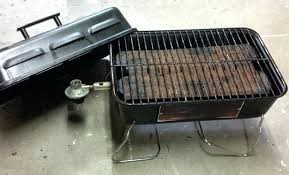
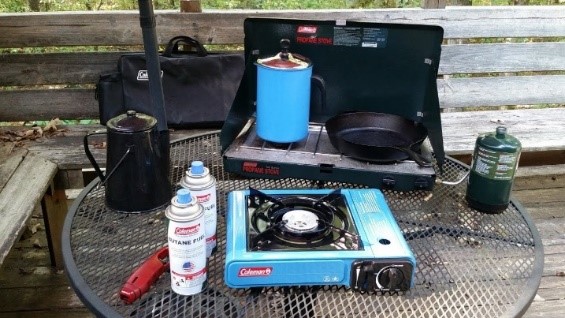
Propane/Butane Stoves & Grills – There’s not a safe DIY for these and there’s potentially competition with preppers’ primary fuels or generators, but they’re pretty handy and inexpensive, so I don’t want to ignore them.
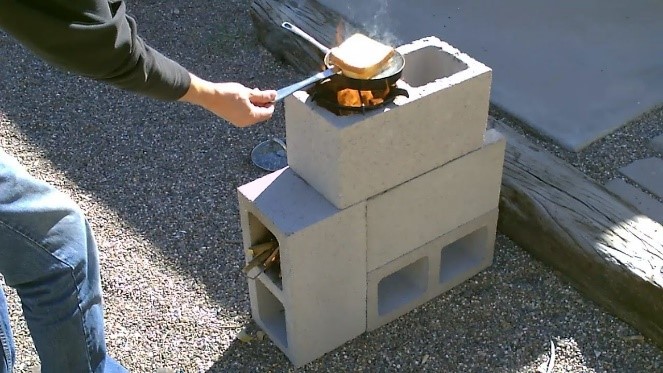
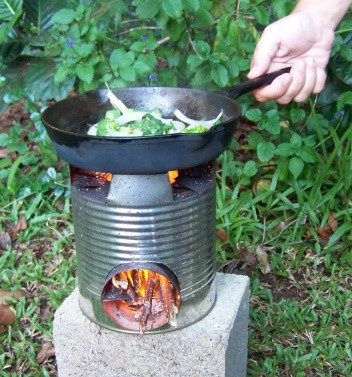
Rocket StovesI love these things. They take small kindling and sticks or trash wood and turn it into a high-efficiency, high-temperature burn. There’s a variation for everyone – balcony, porch, or backyard; homes, RVs, vehicle kits, or bag-portable.

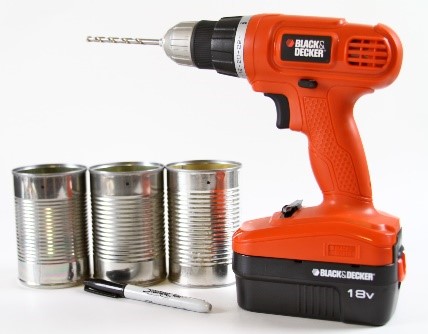
Super easy DIY’s use CMU block, or a paint can, #10 can, or tall baked-beans or spaghetti-sauce cans and increasingly smaller cans. Other builds involve buckets, ammo cans, large terra cotta pots, cement, and sand. They’re not quite as super-easy or super-fast builds, but some variants further increase efficiency by burning the wood gas that’s generated from burning most woods.

Some of the store-bought versions have an added bonus: They’ll charge small devices or battery packs.

They can put off a fair bit of smoke, but they do it quickly and then stash away. They use wood, but we can fuel them with pruners and busted-up furniture and boards instead of axes and campfire/stove logs.

They’re not a simmer-beans or bake-bread oven/stove. It’s too fast and hot of a burn. They specialize in fast-cook foods and quickly bringing foods/water up to a boil to use with…
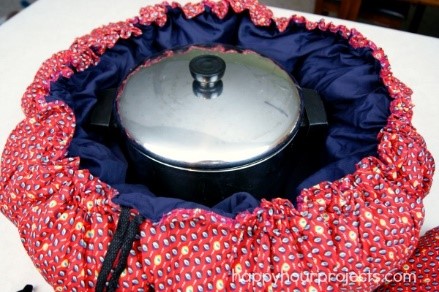
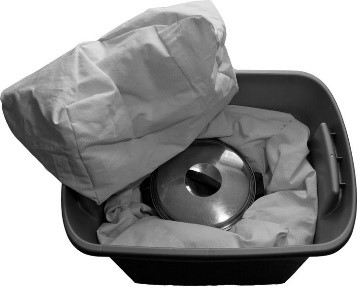
WonderBag/Wonder BoxesPurchased or DIY, bag or box version http://www.instructables.com/id/How-to-Make-a-Wonder-Box-CookerCooler/, these function like a thermal cooker  https://delishably.com/cooking-equipment/Thermal-Cooker.

They allow us to use a short “burn” time to heat food or water to boiling, then retain the heat, turning preexisting pots into non-electric slow cookers or crock pots.

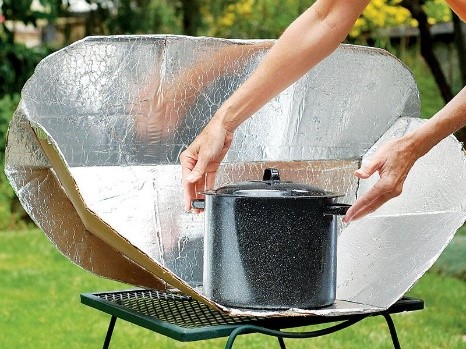
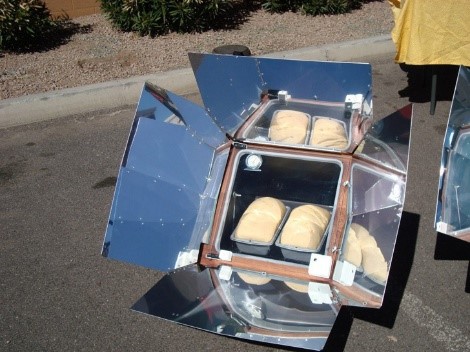
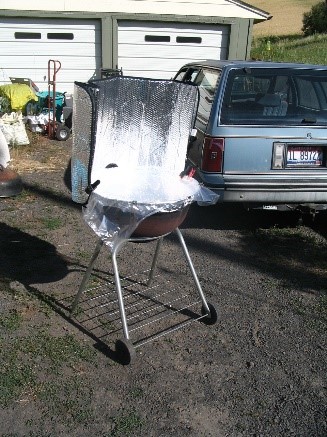
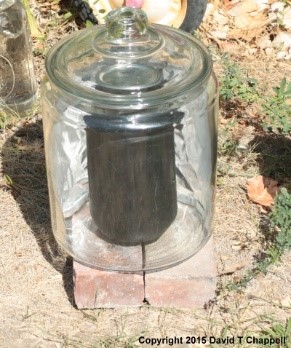
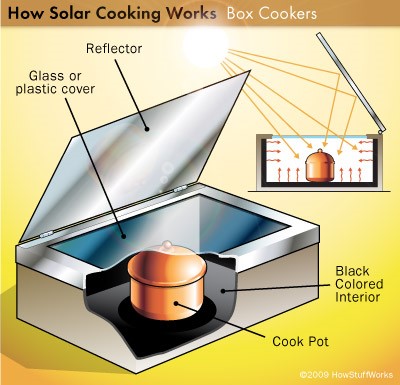
Solar Cookers – DIY for solar ovens abound, from the simple glass over a tire with a pot inside, to some pretty complicated tilts, cuts and hinges. They’re done with pizza boxes and aluminum foil, vehicle reflectors, polished scrap metal, and mirrors. You can spend as little or as much as you fancy, ordering in or building.

I find them limited to mid-late spring through autumn, but I can protect them from pests pretty easily and they’re great for not heating the house or burning fuels in summertime, as are…

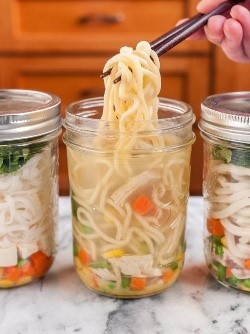
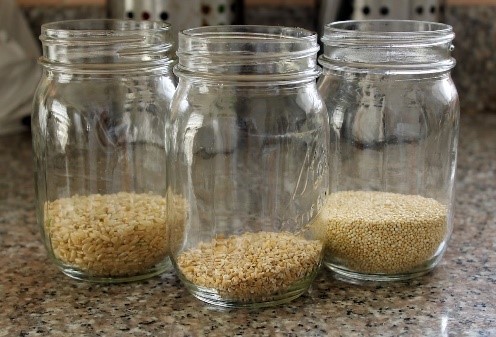
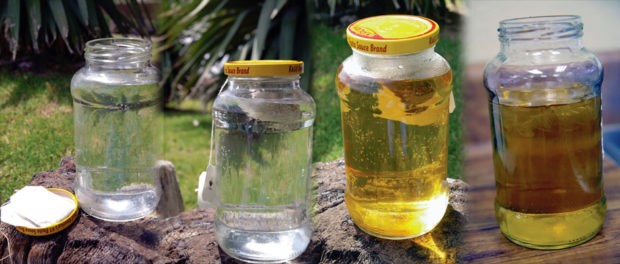
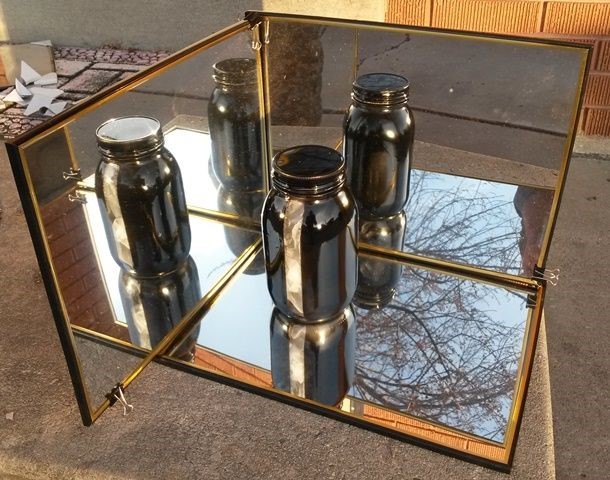
Steeping Jars – These are basically small-scale solar cookers. It’s as simple as pouring dehydrated veggies, grains, or pre-soaked beans in any ol’ jar, adding the needed water, and hanging/setting it in a bright spot.

Dark paint or fabric on jars, reflectors, and added insulation like a larger jar or aquarium can increase efficiency, reducing cook time and extending the weather they’re useful in.

*Don’t forget to brew sun tea & coffee.

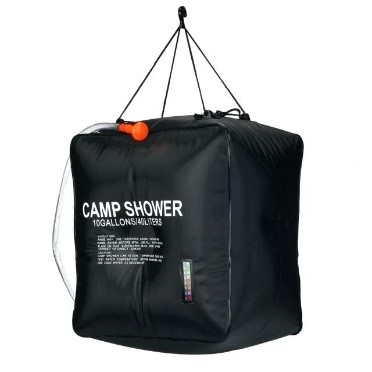
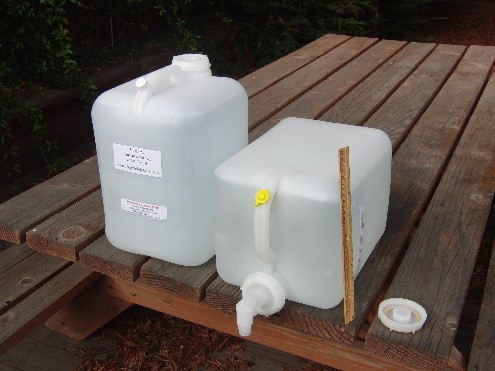
Water Bags & Camp Showers – Getting the sun to give us a head start or completely handle heating water for us decreases resource and time expenditure. We can use anything, purpose-made, painted/covered garden sprayers, or regular ol’ jugs.

The warmed water can be used for wash-ups or for soaking and cooking freeze-dried foods, Lipton-Knorr-Rice-a-Roni sides, or our own noodles and rice.

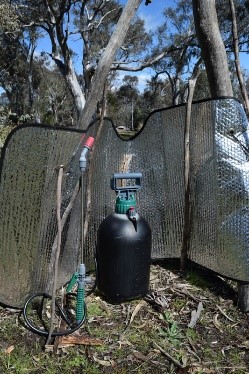
The sun is free (when it’s there), compared to other resources – whether it’s propane, charcoal, or self-cut wood – and there’s little wear on parts compared to hydro or wind power. Even if the sun only warms that water, it’s reducing wait time and resource use.

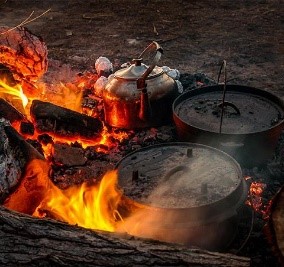
*Keep a pot of water on a conventional oven, arctic brick stove, space heater, or woodstove, or on, under, or beside a grill and while a rocket stove burns out to accomplish the same ready-to-use pre-warming – even now. It’s even handier in winter, increasing heat radiation and serving as a heat sink.

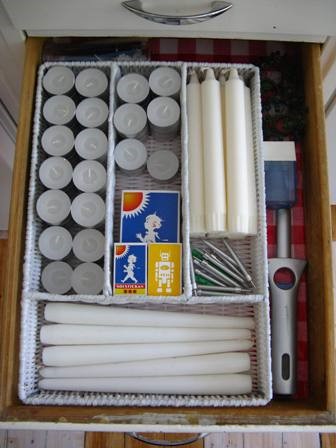
DIY Candles – The upcoming methods call for a candle or alcohol stove. Those heat sources are interchangeable. (Differing flame heights will require adjustments.) We can also create our own.

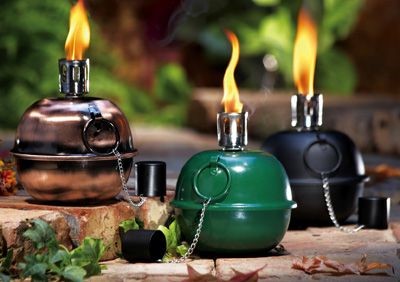
With cotton mop strands, cord, or “real” wicks, olive oil can fuel lamps (https://www.littlehouseliving.com/olive-oil-candles.html). *Small citronella burners are really nice alternatives to open jars if we’ll have our lamps in and out of service for a while during an outage or long-term disaster.

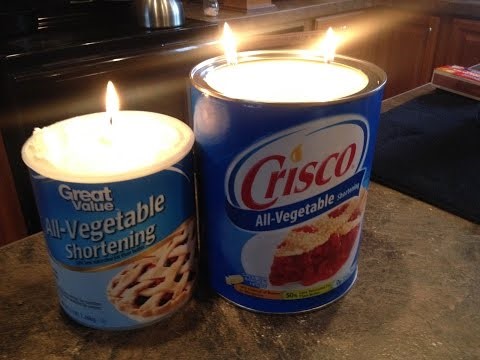
We can sink wicks into shortening, too, in jars or the original tubs, creating another simple (and surprisingly long lasting) cooking method out of multi-functional storage items.

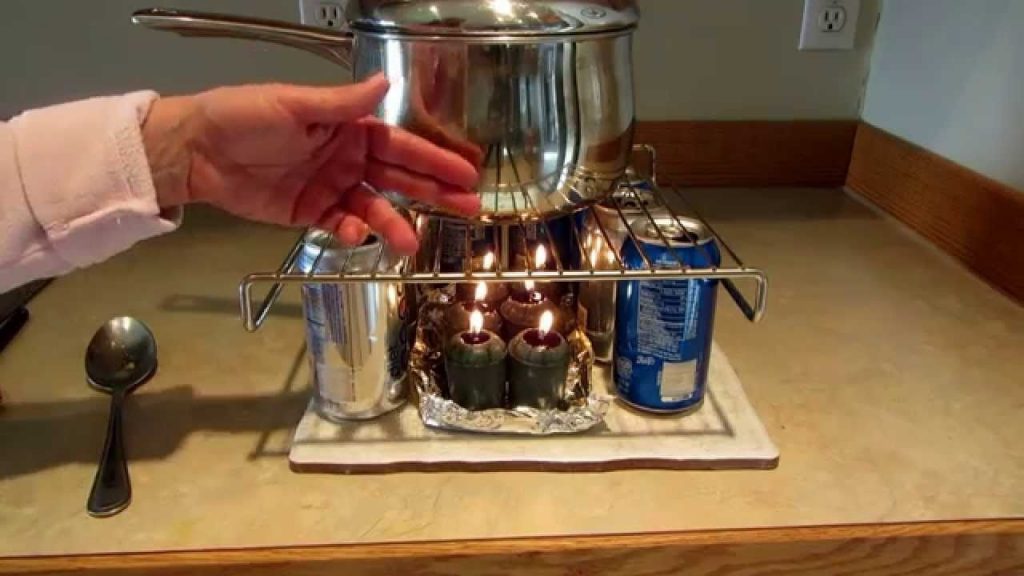
We use candles and mini-stoves in a grill, or set them up campfire/tailgate style with a grate over a terra-cotta pot, bricks, or some cans (fill them with water – sturdier + pre-warmed/boiled water).

Smells from candle, oil, and fuel-brick stoves and ovens will carry to nearby neighbors (so will cooking foods) but they dissipate even faster than quick-burn rocket stoves. The traces are even more contained when used indoors.

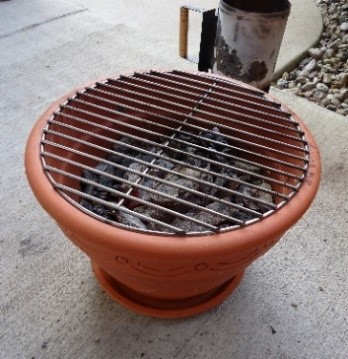
Clay Pot Heaters/Cookers – These are pretty easy to find for DIY – using as much hardware as you like, or kept streamlined and simple – or as prettied-up ready-to-use purchases.

They can be effective on their own, most usually to slowly warm foods like a slow cooker, but if they get plopped in a grill or oven (crack the door), the efficiency goes up and food will heat faster and more evenly.

*That goes for any of the methods that will fit. Be mindful of flame size and fumes.

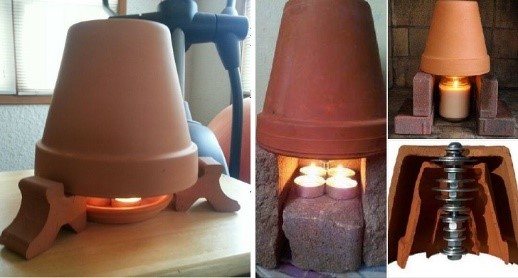
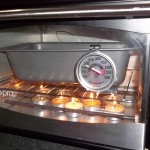
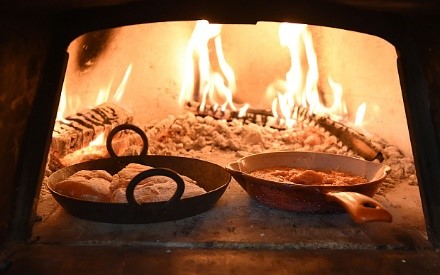
Candle Ovens – We can buy a HERC oven (multiple recipes/examples: http://prepared-housewives.com/baking-with-the-herc-oven/) or DIY our own. It’s just rigging clusters of taper or pillar candles, DIY candles/lamps, or a whole slew of votives or tea lights on a drip-safe surface inside an oven, and cooking or baking at 200-300-degrees on the grate above.

*Hood/tent foods in full-size ovens (and campfire grates) with an overturned bowl or larger pan. It’ll hold heat closer to the food, speeding things up and cooking more evenly.


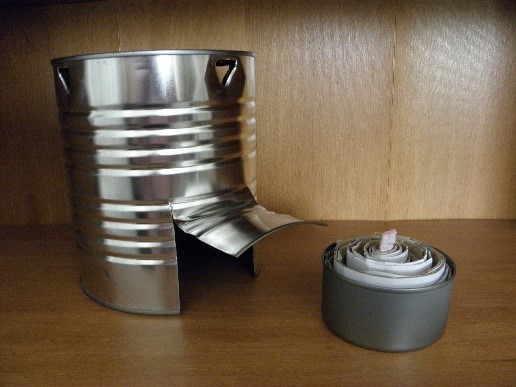
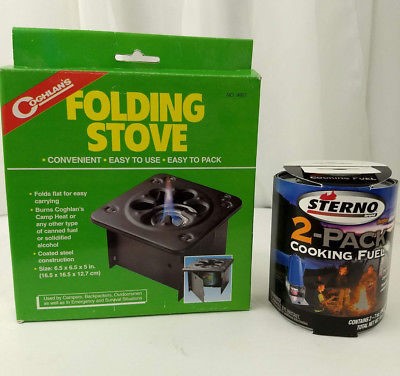
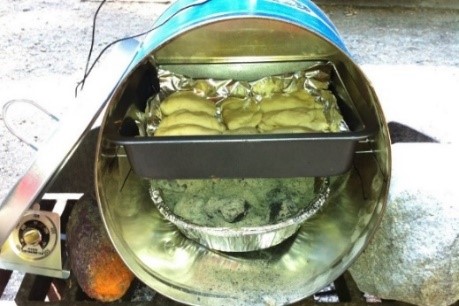
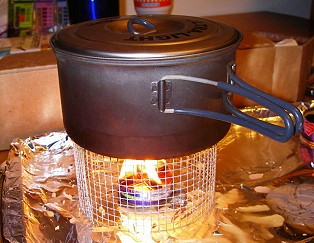
Can Stoves – These are super easy, super effective spinoffs of Sterno stoves and the military, camping, and emergency solid-fuel stoves that abound.

They can be done with greatest simplicity with just two types of can openers, or we can go to town with tin snips to increase ease or rig cross-bar “grills” at the top.

Backing up Backups

Increasing redundancy in our disaster cooking increases our ability to weather absolutely any storm. That makes these guys a prepper must-have in my book.

Some methods also significantly reduce our observable footprint, which may end up a major benefit, and some are reasonable alternatives to heating up our kitchens even now. Most of these have easy, inexpensive DIY options, allowing everyone to build extra resiliency into their disaster plans.

Follow The Prepper Journal on Facebook!

The post Prepper Must-Have: Minimal-Smoke Cooking Backups appeared first on The Prepper Journal.


from The Prepper Journal
Don't forget to visit the store and pick up some gear at The COR Outfitters. How prepared are you for emergencies?
#SurvivalFirestarter #SurvivalBugOutBackpack #PrepperSurvivalPack #SHTFGear #SHTFBag

Friday, July 27, 2018

Time to Revisit BOB

Written by Guest Contributor on The Prepper Journal.

Editors Note: Another article from Angela Williams to The Prepper Journal. As always, if you have information for Preppers that you would like to share and be entered into the Prepper Writing Contest with a chance to win one of three Amazon Gift Cards with the top prize being a $300 card to purchase your own prepping supplies!

It has been awhile since we talked about the most important of survivalists gear, known the world over by preppers as BOB, the Bug Out Bag. Most everyone has one, even people who don’t think they do and call them their “day pack”, their “emergency bags” and as every parents knows, their “get through a day out with the kids bag”, most complete with a finite supply of diapers. In fact most Preppers carry them under a different name as well, things like my “get back home bag” while their real BOB’s sit at home at the ready, of course under the assumption that they can get home and get their BOB and collect their family.

No matter the reality of YOUR BOB and where it lives the fact remains it will not serve you very well if you do not know how to pack and use it. Everyone has an opinion as to what belongs is a bug out bag and the rule of thumb is it should be able to sustain you adequately for up to three days. However, if the circumstances change, it should be the basis to keep you alive for an indefinite period. This is why you have to get it right before a survival situation knocks at your door. In this post, I will share with you my tips for your bug out bag before you can choose the best gears to include in the BOB.

Consider the Size of the Pack

The thought of what to include in your BOB could cloud your judgment as to the right size of the bag to use. It would be calamitous to overestimate the weight you can carry or handle versus the pack you choose. The fact that these packs come in various sizes means you can find the right fit for you although the task could be a daunting one.

Most Bug Out Bags are rated in cubic meters or liters or square feet. There is really no correlation between the volume rating and the actual weight of the pack when fully packed. However, a trick I have learned is that you can actually infer the expected packed weight of the Bug Out Bag from the volume rating.

For instance, if the volume rating is 40 cubit liters (1.4 cubic feet), the weight of the pack could approximately be 35-40 pounds. Using this estimation, you can choose the perfect fit for you from the various pack sizes available in the market.  Make the right size choice because it could make the difference between comfort and suffering.

Balance between Weight, Security, and Speed

We have already discussed a little about weight. Another helpful tip is to balance the weight of the pack vis-à-vis your speed and security. How does this work? Picture this: can you carry 50-lbs comfortably on your back all day long? If so, can you also run with it in case a situation demands so?  In most cases, the maximum weight we can carry when standing or walking proves too heavy to allow us to run or move at speed.

When packing your Bug Out Bag, ensure that you can guarantee your security and that of your loved ones by balancing/attaining a weight you can comfortably run with if such need arises. Try out the pack after placing the necessary items to see if it would weigh you down to prevent you from achieving the speed necessary to safeguard yourself and your family or friends.

The items that will increase the weight of your BOB include shelter, foods and cooking items as well as sleeping items. These are also the most vital items. Therefore you must do a serious balancing act in order to ensure you carry enough of these items yet you keep the weight of the pack as low as possible.

Cultivate Stealth and Quietness

In an emergency situation, stealth could make the difference between death and survival. For one, the noise will scare away potential prey that could be your only food source or at worst alert a predator to your presence. One of the most important tips for your bug out bag is to cultivate stealth. Let your BOB be as quiet as possible.

Before setting out on your journey, grab your pack and shake it. If you hear any noises that is bad news. The items notorious for noisy packs include ammo, cook sets, half full water bottles as well as an assortment of loose tools. Since you cannot get rid of some of the noisy items, a good piece of advice is to include extra bandannas and ranger bands. In case you have not maximized your pack, reduce the noise level by pulling and tightening its straps.

Arm Yourself with a Freeze Alert

This tip is especially true for those residing in cold temperature areas and generally in areas that experience winter. Colder temperatures are enemies to batteries, your water supply, and even your water filters. Always pack items in a manner that makes batteries and other electronic gadgets close to your body so that they can obtain warmth especially when temperatures drop below freezing.

Water bottles are extremely difficult to deal with since they are made of materials that are difficult to warm. The same goes for bladders at the back of the pack. A good tip would be to use insulated water bottle and bladders. The insulation will cushion these items from a drop in temperatures and save your water supply.

Organize Your Pack and Secure Your Gear

As a frequent camper and hiker, I always come across abandoned gloves and other items on the trail. Why is this happening? Many campers and survivalists pack these items and forget to zip or button up the pockets from where they removed such stuff. The best way to secure your gear is to ensure that you zip and button up all the pockets after retrieving an item. Never assume the item is secure and lose it altogether.

Besides securing your items, you also need to ensure your BOB is well organized. Put items depending on the frequency of their uses and type in different pockets. This will allow you to carry more items and at the same time make it easier for you to retrieve the item you want quickly and with ease. In case of a stuff sack, do not trust cord locks. Instead, tie a slip knot after cinching the sack’s cord lock to prevent the unit from sliding or the knot becoming loose.

Ensure Your Bug Out Bag Is Always Ready

The biggest mistake you can ever do is to have items scattered around your house. Some people have packed their items well but somewhere along the way, they may realize that one or two of the items originally stored need replacement. This thought is good but many fail to replace them immediately only to run up and down looking for missing item when they are bugging out.

Even worse is the fact that they can forget to double check their pack only to realize a vital gear is missing when in the wilderness or when an emergency strikes. Pack your BOB with all the items you will need and always have it ready for survival at all time. If you have to replace an item, please do it immediately. Ensure you replace any consumables immediately.

Maintain Your Gear, Keep it Dry and Make Sure it Floats 

Consider what will happen to your gear if you were to trek through a trail on a rainy day or crossing a creek. An important tip you need to keep in your mind is the dryness and flotation of your gear. You can use a pack cover which in most cases will double as a rain collector. However, a pack cover could prove useless in just a single misstep.

Thankfully, you can use a dry bag. Such bags have a variety of uses including gathering food, water and keeping things like blankets and kindling moisture proof. Besides they are virtually waterproof making them ideal for crossing creeks since they trap air and remain buoyant. A good pack should be able to float. You can just remove your BOB from your back and toss it in the water before you or off your side (as long as you have it tethered of course.)

Final Verdict

Think about it! What is the worth of making a mistake in bugging out? Simply put, your safety and security (and therefore your survival) depend on optimizing your BOB. If you follow the above tips for your Bug out Bag, you will not go wrong in your preparedness. Experienced survivalists know these tips and that is their reason for success.

Follow The Prepper Journal on Facebook!

The post Time to Revisit BOB appeared first on The Prepper Journal.


from The Prepper Journal
Don't forget to visit the store and pick up some gear at The COR Outfitters. How prepared are you for emergencies?
#SurvivalFirestarter #SurvivalBugOutBackpack #PrepperSurvivalPack #SHTFGear #SHTFBag

Thursday, July 26, 2018

These Exercises Prepare You for Survival

You never know when a large-scale disaster can strike and you could find yourself stuck in the middle of chaos, needing to get out. To have the best chance of surviving you should begin training your mind and body now.

from Survivopedia
Don't forget to visit the store and pick up some gear at The COR Outfitters. How prepared are you for emergencies?
#SurvivalFirestarter #SurvivalBugOutBackpack #PrepperSurvivalPack #SHTFGear #SHTFBag

GPS Hacks: 5 essential things you must know about your GPS

Written by Guest Contributor on The Prepper Journal.

Editors Note: An article from John Lewis to The Prepper Journal. As always, if you have information for Preppers that you would like to share and be entered into the Prepper Writing Contest with a chance to win one of three Amazon Gift Cards with the top prize being a $300 card to purchase your own prepping supplies!

A GPS is one of the important tools you must have in your bug-out bag. This is one of the most effective tool to help inform you ‘where you are’, which consist of three essential components namely your position, your orientation and the intended direction you want to go.

It is only by using the GPS effectively that you can navigate your way with ease. GPS here would refer more towards handheld hunting GPS systems rather than the Global Positioning System used in vehicle/transportation navigation per SE. While they both operate on a shared signal the end-product filtering is specific to the medium of travel – overlaid on known roads and channels vs unrestricted access to all that is in front of you, no matter which way you turn.

Utilizing Distress Signals to Keep Yourself Safe in Times of Trouble

You can choose to make use of the distress signals and navigational aids for your GPS. You can do so by utilizing the two kinds of transmitters that can give out distress signals, which are personal locator beacons and satellite messengers. The personal locator beacons are usually used only when a person is faced with extreme emergency situations. It uses the Distress Alerting Satellite System (DASS) which is controlled by NASA to track distress signals.

We would commonly utilize satellite messengers as navigational aids to inform our rescuers where we are so that can focus on rescuing us rather than ‘searching’ us. Remember to put an adapter into your GPS to allow this function because most GPS units only contain receivers which are incapable of sending out distress signals.

Do Scouting Before You Go on Your Next Trip


Scouting is one essential thing you have to know how to do because it can make your outdoor trip a success. Basically, you have to first utilize computer maps to understand how the surroundings appear. Next, you can put several markings on a path which interest you. Later, you can transfer those markings as way points into your GPS, the electronic breadcrumbs Hansel would have loved to have.

When you are outdoors hiking or hunting, you can use these waypoints as a reference on where you should go. The thing you have to make sure is that your GPS has sufficient memory to store all the waypoints you would like to put. If you employ this method and scout before you go to your next destination, you would be able to keep yourself on track while having a better understanding of your surroundings.

Adding your own Point of Interests (POI) is a relatively easy thing to do as well! Usually, the POI information in most GPS is either outdated or lacking in information that we really require.

Keep Your GPS Software Updated

Usually, your GPS manufacturer would provide firmware updates for free. These updates are really useful because it can help make your GPS function smoother than before and it can help fix some system glitches. Do keep in mind that your GPS needs a current list of all mapped places to be truly effective. Fortunately, keeping your device updated only involves a simple process.

First, you can connect your device to your computer and make sure your device is powered on.  Using Garmin devices as an example, you just have to install Garmin Express in your computer and have an account to install updates. As for other units like Megellan, you can try searching its support page.

For firmware updates, the manufacturers would usually provide it for free. However, you may need to pay a fee to update maps. Also, be sure to keep you GPS in good shape. Clean the screen with an eyeglass lens cleaner as opposed to harsher chemicals and avoid abrasive paper towels or cloths for clean microfiber pads.

Explore Different Navigation Methods

With a wide spectrum of GPS systems to choose from, you can also choose how you would like to navigate from point A to point B using a GPS. You can have 3-D locations which you can navigate on your GPS screen, but this method would require a huge memory capacity on your device. Another method is to input Point of Interest in your GPS and simply follow the POI that you set.

You can employ different navigation styles to know which of them best fit you in various situations. You may want to navigate by touching the maps on screen if you want to know where a certain destination is. However, you may only want to navigate following the way points you saved in your GPS if you are on foot. This would influence how effectively you are able to move from one place to another.

Using Your GPS to Help You Get Your Game

For specific activities, a GPS can be used specifically to benefit you in carrying out those activities. For hunting, a GPS can aid you by searching direct routes to your favorite hunting spots. You can even know how to place your tree-stands by using the information given by your GPS.

Usually, it is better for us to stand on a tree-stand with north wind because it helps to push our shots forward. With a GPS, you can determine which tree-stand can give you this result at that particular time of the day. Furthermore, you can navigate your way to a tree stand in the dark using your GPS, which means that you won’t expose your honey-hole to other hunters!

Other benefits include helping you determine whether the land you are crossing is public land or private land, and, if the latter, drive you to search for either the most direct through or to a point of interest where you can seek the owners consent to hunt or pass through. All these benefits can extend to when you are mountaineering as well!

Conclusion

By understanding how to use a GPS, you would have an edge to go to the places you want in the most effective way possible. Selecting the most suitable GPS for yourself would be an important aspect as well. There are several aspects to consider including the screen size, whether you are more comfortable navigating using buttons or touch-screen and whether it is durable enough to sustain what you plan to go through. Also power consumption, a fully bright color screen is cool but it drains battery power much faster than a monochrome screen. Obviously also consider battery life, if it can be recharged by your portable charging devices, the use of solar, etc.

Other important aspects would be how good you need the satellite reception to be especially if you like to travel deep into the woods which usually has minimal reception. The map images above serve as examples of coverage in small city areas for commercial stations; true radio mapping surveys are sometimes classified, depending on what is in the area of the survey. They do serve as an example of the limits of coverage based on many factors. The “know before you go” can’t be over stressed. The memory capacity is also an important thing to consider, especially the availability of an MicroSD Card slot for your GPS. If you select the most suitable GPS for yourself and make the most out of your GPS, you can definitely navigate effectively!

John Lewis is a blogger, survivalist and outdoor enthusiast who can be reached at Epic Wilderness.

Follow The Prepper Journal on Facebook!

The post GPS Hacks: 5 essential things you must know about your GPS appeared first on The Prepper Journal.


from The Prepper Journal
Don't forget to visit the store and pick up some gear at The COR Outfitters. How prepared are you for emergencies?
#SurvivalFirestarter #SurvivalBugOutBackpack #PrepperSurvivalPack #SHTFGear #SHTFBag