I decided to make beeswax soap for Christmas gifts last year. It has been on my list of things I should probably know how to do and when my stepfather, who keeps bees, brought me seven pounds of beeswax from his hives, I thought the time was right.
I started my soap-making adventure with a recipe that included beeswax from a book, “Beeswax Alchemy”. This book contains directions for making candles, balms and bars, salves, cream and scrubs, soap, and even beeswax art.
BEESWAX – WHERE TO GET IT AND HOW TO HANDLE IT
You can either acquire your beeswax from a beekeeper, which I was fortunate enough to be related to, or you can buy it online and it comes in handy little balls that are easy to measure and melt. The wax I had was in giant hunks which I sawed off with a bread knife. I do not recommend this method. It’s maddening. Since then I have learned another method which would have saved me a lot of blood, sweat, and tears.
First, beeswax becomes brittle when frozen and is much easier to cut. Secondly, and I think I will go this route next time, the wax can be melted and poured onto a large cookie sheet lined with freezer paper. Once hardened, the wax can be broken off into small chunks without sawing at it like a crazed butcher.
Without lye, there is no soap. Lye, or sodium hydroxide, is required to make the chemical reaction that makes soap. Period. I had seen lye in the hardware store for cleaning out drains and thought that there must be a softer, gentler lye available for making soap. To my surprise, the lye I made soap with to give my loved ones was made with the same highly caustic chemical that will burn the eyes out of your head. Since lye is so dangerous, I want to give you some tips:
Measure everything correctly. This is not the time for measuring with your eyes, use a digital scale, it is most accurate. If your lye to fat ratio is off, or you have added too much beeswax you will waste your time because your soap will be sludgy or rubbery.
Once you have added the water to lye, it’s all business. Wear clothing to cover your skin and protective eye-wear.
When the water is added it creates fumes that should not be breathed in. I didn’t know this and I leaned over the pot of lye and took a deep breath. I am still here, but I wouldn’t recommend it.
ONLY USE STAINLESS STEEL! The lye will react badly with other metals. I bought a stainless steel pot that I use only for soap making. I just cannot make mashed potatoes and serve them from the same pot that had a toxic chemical in it. I am just weird that way.
Other equipment you need to make soap
Immersion blender – This is a luxury item. You can mix all your ingredients up with a STAINLESS STEEL whisk, but I have to tell you, this blender made mixing so much faster and easier.
Freezer paper – You can buy large rolls of it and it is essential for lining cardboard if you are making your own rectangular molds. It is also nice to wrap the soap in and tie with twine to give as gifts or just to store for yourself.
Soap molds vs. cardboard – If you use the cardboard and make a box (approximately the size of a bread pan) and line with freezer paper. I bought a silicon soap mold that was the right size. The advantage of a mold is that it will be more durable than cardboard over time and you don’t have to fool with the freezer paper. You can get fancier molds INSERT AMAZON LINK HERE that have lovely designs in them, but I opted for the box shape and cut with a blade for a more homesteader look.
Fragrance – I bought essential oils and used the lemongrass. Any of the essential oils will work great, but I would buy the most concentrated possible so the scent is present. You can combine scents to create something unique, or just use one of them for a distinguishable scent.
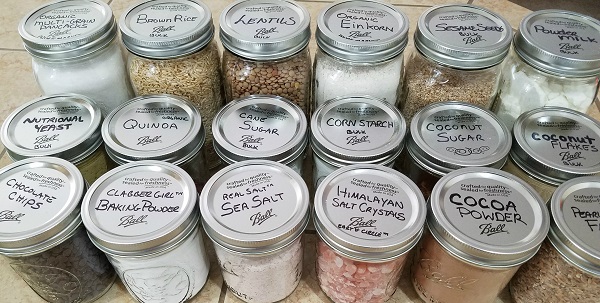
Beeswax Soap Making Material List
olive oil – 358g
coconut oil – 225g
palm oil – 177g
castor oil – 32g
beeswax – 7.2g
distilled water – 266g divided
lye – 111g
honey – 1 TBS
fragrance – 2 TSP
disposable paper bowl
stainless steel bowl for lye
stainless steel pot or microwave save container for oils
stainless steel whisk or immersion blender
digital scale
mold
freezer paper (if using cardboard)
digital thermometer INSERT AMAZON LINK HERE
Yield – eight 4 ounce bars
How do you make soap?
Measure out the lye and place in disposable paper bowl.
Measure out 148 grams of distilled water and pour into stainless steel bowl. Place bowl onto heat resistant surface and then add dry lye crystals to water (NEVER THE OTHER WAY AROUND) Stir until lye is completely dissolved. Set aside to cool.
SIDE NOTE: Those new to digital scales, this is for you. When measuring ingredients, first select the TARE WEIGHT and then set the container that will hold what you are measuring (ex. plastic cup, bowl, etc.) This will analyze the weight of the container so that weight is NOT included in the weight of the ingredients. Then, once the TARE WEIGHT is selected, the scale should read 0.0 (give or take some zeroes) and then you can add the ingredients to be weighed. If you are not using a digital scale you will have to weigh the container then add the ingredients and subtract the weight of the container to get actual weight of ingredients.
Microwave the honey, 118g of remaining water, and microwave until dissolved.
Prepare the mold.
Heat all the solid oils and beeswax in a stainless steel pot. Add the liquid oils (excluding honey and water mixture) and stir.
Check temperature of lye and the oils. This is crucial! To keep beeswax from getting hard, the oils need to be around 120 F. The lye needs to be 120 F as well.
Now add honey water to the lye water ONLY when it has reached the correct temperature. Sometimes this will result in a color change, which is normal.
Now pour the lye water into the oils and mix with the stainless steel whisk or the immersion blender.
When the mixture begins to looks creamy, it has emulsified and this is the time to add your fragrance.
Keep mixing until it looks like a light cake batter. This is called the trace.
Quickly pour into prepared mold or cardboard container lined with freezer paper. Scrape every bit of residue from the pot with a high-temp spatula.
Tap soap mold on the counter to remove air. Smooth out the top and cover mold with cardboard to hold heat in.
In twenty-four hours the soap should be cool enough to cut. If it seems too soft, then wait and continue checking every 4-6 hours. Once it is hard enough to cut into bars, I cut it with a blade made for cutting soap. The handle and size made cutting more even and straight. I wrapped my soaps in freezer paper and twine and stored them in a cool dry spot.
I also allowed my soaps to cure for 30 days because more water will evaporate from them, resulting in a longer lasting soap bar. I hated the thought of going through this process only for the soaps to sludge away in the shower.
The finished product – looks like… Soap.
FOR THE HARDCORE SOAPERS – MAKE YOUR OWN LYE
For those that are more adventurous than myself, this is probably the best article describing how to make your own lye.
END RESULT
Like anything else, there are pros and cons, here they are:
PROS
Making soap is a good skill to have under your belt. One day you may not be able to drive to your local Walmart and pick up a bar of Ivory soap.
They make wonderful gifts!
It is natural and uses a bi-product produced by our dear friend, the honeybee.
This soap is the best if you have sensitive skin, eczema, or other skin conditions. It will leave you clean without the drying effects of the cheaper commercial soaps.
CONS
The next time I make it, the cost will be significantly less, but it will definitely cost more than cheap drugstore soap. You can always stock up on the cheap stuff in the event of an emergency and you can shower yourself clean with the best of them. Personally, I like the idea of having a chemical-free, all natural way to clean up.
from The Prepper Journal
Don't forget to visit the store and pick up some gear at The COR Outfitters. How prepared are you for emergencies?
#SurvivalFirestarter #SurvivalBugOutBackpack #PrepperSurvivalPack #SHTFGear #SHTFBag
Growing your own food offers you a great feeling of self-reliance. It doesn’t matter if your have a big garden, or you are growing your food indoors, in small containers, as long as you preserve it to feed you and your loved ones through the winter and during harsh times.
With this thing in mind, for this week’s Prep Blog Review I’ve gathered four articles on this topic.
1. 20 Plants You Can Turn Into Flour
“In most of the world, wheat is a staple of almost everyone’s diet. Bread, pasta, cakes, cookies, cereal, and even beer all have wheat in them. Because of this, many off gridders are trying to grow their own wheat, but unfortunately, wheat can be difficult to grow depending on the land and climate.
Thankfully there’s a plethora of other plants both wild and domesticated that can be made into flour. Some of these plants are gluten free which can be great for those with sensitivities, but keep in mind they can be quite different to bake with. Gluten is what gives dough made from wheat flour its characteristic stretchiness.”
2. Stock Your Prepper Food Pantry on an Affordable Budget
“If you live in an earthquake-prone region, or one that has seen deadly hurricanes, the devastation will happen again. If you live in a floodplain or an area that has seen tornadoes, you can be sure to experience those events every few years. The densely populated east and west coasts can shut down for a week from a serious storm or mudslide. And deep snow will fall in the mountain states that can affect the infrastructure, making it impassable.
Some of these natural events are commonplace each year, some every few decades, and some may only occur every hundred years. What’s surprising is that too many people still don’t prepare for a serious event they know is likely to occur.”
“Nearly every part of the common dandelion, from its brilliant yellow petals, to its roots have been foraged throughout history for food, drink and medicine.
A rich source of beta-carotene, dandelions are also packed with vitamins and minerals including calcium, iron, potassium and zinc. Young dandelion leaves are fantastic to eat raw and the roots can be roasted, ground and used in place of coffee. Dandelion extract and tincture is used all over the world to treat ailments from high blood pressure and diabetes to liver complaints. Here you can find another 78 edible flowers to forage.
Dandelions are so easy to gather and it’s worth finding out how many ways you can use them. Pick them somewhere that hasn’t been sprayed with herbicides and is not too close to busy roads. Your own garden is probably perfect!”
“No garden? No Problem! You can grow your own indoor herb garden without a pinch of soil. Even if you live in an apartment with nothing more than a tiny back porch or balcony, there is still room to grow some fragrant herbs.
All you need is water, sunlight, and a place for your plants to spread their roots.”
This article has been written by Drew Stratton for Survivopedia.
from Survivopedia
Don't forget to visit the store and pick up some gear at The COR Outfitters. How prepared are you for emergencies?
#SurvivalFirestarter #SurvivalBugOutBackpack #PrepperSurvivalPack #SHTFGear #SHTFBag
I love writing firearms related articles like this, because these types of articles always brings readers out of their silence because everyone who knows anything about guns (and some that don’t) has an opinion about what “the best guns” are and they will argue and defend their beliefs relentlessly, so we get plenty of comments and ideas that will, hopefully help others make the best choices when purchasing firearms for self-defense and survival.
But, before we go farther I’d like to point out that even though this article is titled “Top 5 Handguns for...
from TheSurvivalistBlog.net RSS Feed
Don't forget to visit the store and pick up some gear at The COR Outfitters. Are you ready for any situation?
#SurvivalFirestarter #SurvivalBugOutBackpack #PrepperSurvivalPack #SHTFGear #SHTFBag
Well, folks here we are another week of prepping and another week closer to the collapse that will end life as we know it. It’s coming, and guess what… it does not matter who is setting in the White House. We are hanging by a thread and that thread is about to break.
So many people stopped prepping after Trump got elected, so many in fact that even I was shocked at the downturn in the number of active preppers just days after the election results were announced.
Why so many people would put all their faith in one man to protect and provide for them is beyond me, but then I guess...
from TheSurvivalistBlog.net RSS Feed
Don't forget to visit the store and pick up some gear at The COR Outfitters. Are you ready for any situation?
#SurvivalFirestarter #SurvivalBugOutBackpack #PrepperSurvivalPack #SHTFGear #SHTFBag
from TheSurvivalistBlog.net RSS Feed
Don't forget to visit the store and pick up some gear at The COR Outfitters. Are you ready for any situation?
#SurvivalFirestarter #SurvivalBugOutBackpack #PrepperSurvivalPack #SHTFGear #SHTFBag
“I love Wikileaks,” candidate Donald Trump said on October 10th on the campaign trail. He praised the organization for reporting on the darker side of the Hillary Clinton campaign. It was information likely leaked by a whistleblower from within the Clinton campaign to Wikileaks.
Back then he praised Wikileaks for promoting transparency, but candidate Trump looks less like President Trump every day. The candidate praised whistleblowers and Wikileaks often on the campaign trail. In fact, candidate Trump loved Wikileaks so much he mentioned the organization more than 140 times in...
from TheSurvivalistBlog.net RSS Feed
Don't forget to visit the store and pick up some gear at The COR Outfitters. Are you ready for any situation?
#SurvivalFirestarter #SurvivalBugOutBackpack #PrepperSurvivalPack #SHTFGear #SHTFBag
1. Trump to address NRA on eve of 100 days in office…
Trump is “so far so good” when it comes to guns, laws and ownership. My main fear with Trump is that with his extensive history of flip-flopping on issues that he doesn’t flip-flop on the gun control issue after another mass shooting… And let’s not forget that Trump was once openly anti-gun – will he flip-flop back? We will have to wait and see where he stands a month from now, because with him you never know. Read the article here.
from TheSurvivalistBlog.net RSS Feed
Don't forget to visit the store and pick up some gear at The COR Outfitters. Are you ready for any situation?
#SurvivalFirestarter #SurvivalBugOutBackpack #PrepperSurvivalPack #SHTFGear #SHTFBag
At its most basic, growing food doesn’t take much. At home it can be accomplished with some tin cans and plastic bottles, maybe some storage totes or buckets or drawers that were salvaged for free, and seeds or starts. When we’re working on that scale our hands and a pencil are sufficient.
Most of the time, though, we expand beyond small and tiny containers. Even with some small, modest beds, there are a few tools like hooked three-prong hand cultivators or a small spade that come in handy. When we’re dealing with numerous beds and a larger plot, we want to step up again. If our food production deals with shrubs, brambles and trees, we need a few more things yet.
To some degree, growing style largely dictates what is a must-have item and what can be set aside. Our bodies and health dictate more – as we get older or accumulate injuries, we may need more mechanical help or to spend less time crouched and thus more time with a long-handled tool of some kind. However, for veggie-veggies – not the large-scale calorie staple and protein staple crops like grinding corn, wheat, barley, beans, lentils, and field peas – there are some standards that will apply for most gardeners.
The Underdog
When I see articles about garden tools for beginners, upgrades for old hats, and reviews on the best contraptions to hit the market, there’s one thing that never seems to make it on the pages: Twine.
Maybe the big guys don’t need it. I sure use a fair bit of twine, string and cord in my gardens, though. I also use a fair bit while I’m air layering. Okay, in truth, I use some, and I also use strips of ruined clothing.
We need something to be tying up plants with, though, regularly, and I regularly use cord for parts of my trellises. There are alternatives, like using netting or light-gauge fencing. Cultivar selection for our plants might also reduce or eliminate trellis needs.
Regularly, though, we need to support something, from a seedling tree that needs staked to hanging planters or containers from and above porch railings.
Some decent twine that doesn’t break as we tie the knot and doesn’t rot in a single season will save us a lot of not-nice words. In the long run, it’s worth the money.
It’s also one of those things that really ought to just wander around the garden and outside with us, right there with a handy pair of pliers, pruners, and our pocketknife.
Machines
Stone me now; there’s not the first Kubota, Deere, Gator, or Kioti on my list. Tractors revolutionized the way we farm, made our way of life possible, and made it possible for the human population worldwide to snowball. The thing is, most of us don’t need them.
Sure, a riding mower or an ATV – especially with tow-behind cultivators, furrowers, spreaders or even just trailers – make life a lot easier. As we start cultivating significant properties, move into producing our own staple crops or producing grass hay and grains for livestock, when we start cutting grass straw, we should look in that direction. Until then … they need fuels, they need maintenance, and for the most part they’re a convenience. With the exception of folks who can’t push or pull physically, they’re not necessary for a veggie garden, even a big one.
Tillers/Powered Cultivators might be a must-have or might be a convenience. It depends on our bodies, growing scheme, and the scale of growing. There are some smaller versions where the power head cross-purposes with other tools like weed-eaters, overhead saws, and the tiller, and that’s a right handy tool to consider. Another option would be either electric tillers that can be powered from a running vehicle or charged from a solar battery bank. Because diesel stores so well, diesel-powered machines – or the vehicle that’s going to be used as a generator – might appeal to others despite the upfront costs.
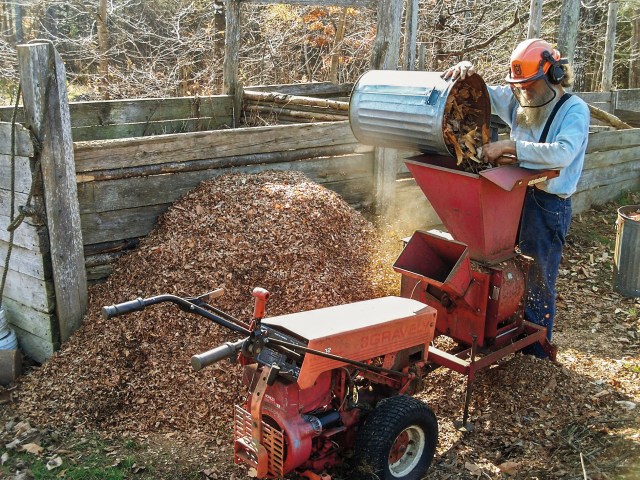
Wood Chipper-Shreddersdo make my list as a must-have garden item when we get serious about production. So long as we have plenty of junk trees, firewood trimmings, or fruit trees and brambles to feed through them, anyway.
Mulch is an enormous aid in gardening. It saves labor in weeding, prevents soil compaction and erosion, and limits evaporation of rain and irrigation water. While some types of mulch-bed growing creates an alkaline environment that’s tougher on acid-loving domestic veggies and berries, for the most part we can mitigate the pH of our gardens.
Being able to convert bamboo, privet (pre-seed), and tree prunings from living specimens and firewood or construction into mulch is too valuable to ignore that particular machine.
On the other hand, if we’re shy on trees but have the land space, there’s nothing wrong with switching that chipper-shredder for a weed-eater that’s been modified into an electric, gas or diesel powered scythe. It’ll allow us to relatively quickly cut and lay out straw we can use for garden mulch.
Standard Manual Garden Tools
By and large, once we have beds or plots eked out of the ground with either a tiller or a sod cutter, and have dedicated ourselves to maintaining them, getting them seeded with weed-choking cover crops or heavily mulched, we don’t need a whole lot to maintain gardens.
Still, there are some tools that are right handy.
The short list for manual tools for a garden would really be a round-point digging shovel and-or a trenching shovel, a small garden trowel, a hay rake or flat-tined garden rake for leveling and aerating soil or dragging rows for seeds and transplants, a hoe, and in many cases a cultivator of some kind – a weasel, tiller, broad fork, or similar.
A small three-prong cultivator for one-handed or a long-handled, two-handed version can make weeds a much simpler task, and be used for spacing out seed rows.
A garden fork rates pretty highly as well (like a hay fork but with flat, wide tines) since it can be used as a secondary cultivator following a shovel or furrowing plow
Garden by garden, a leaf rake, square-point (transfer, moving) shovel, and both a pointed and a flat-square hoe rate really highly as well.
With them we can turn beds, collect and distribute chipped or leaf mulch and compost, dig in-situ composting trenches and holes, break up soil, level beds and rows, build up triangular and flattened-top mounded rows and beds, and even use them to create seed furrows and cover our beds again.
Mallets
They’re not as ignored and maligned as string, because I don’t use them or see them used quite as much, but I spend a lot of time hammering things. Mallets deserve a little credit there.
I hammer stakes for supporting row covers and baby trees, bird netting, and to keep things from digging under fences. I hammer in supports for new trellises and arbors. I pound in stakes and string line for rows and to mark expansions or areas I want left alone. I tap CMU block into place. I infrequently use nails or stakes to assemble trellises or bounded beds (usually I’m a fan of a screw and a drill for those).
Could I do it with a plumber’s wrench, carpenter’s hammer, or my pruners? Usually. I’d work harder and longer though.
Sometimes the right tool, right at hand, is worth it. Mallets are one of those tools for me, and the shorty 2-3# mallets with a flat square side are one of them for me.
If a garden area is small, and there’s a lot of pre-fab without as much annual assembly season-by-season, a mallet would go down in usefulness.
Power Tools
Having busted on energy draws while discussing machines, I’m going to contradict myself. There are two things that get reached for constantly, especially at the beginning of the growing season, the beginning and early in warm-tender crop seasons, harvest seasons, row-cover seasons, and bed-down-the-garden seasons.
They are my trusty-dusty little drill, and my trusty-dusty little saws-all.
When I say little, I mean that.
As with CCW firearms and EDC/GHB kits, when things are big, bulky and heavy, we don’t carry them all the time. In this case, that means that things get put off or I spend time making round trips to the vehicle.
With lighter, compact tools, they can sit in their bags with a variety of tips and blades, both of them inside a bucket with some string, sturdy pruners, a small hand cultivator, a mini hoe, and a hooked knife. I snag my bucket whenever I’m working in the yard, and whatever I need, it’s right there.
Must-Have’s for the Garden
I have a friend who managed in excess of three acres of just vegetable and fruit production without any fossil-fuel or battery-powered assistance. She does use a “work pig” and her birds, sheep and goats to help her, but the bulk of what she does is by manual labor. It’s possible. It’s not easy, it takes time – especially with livestock – but it’s possible.
I consider it telling that with few exceptions for “block” crops like corn and peas, she doesn’t grow in conventional rows or big plots. She grows in beds, by curving blocks and lines that follow her land’s fairly minor contours. It’s too much work to eke out the space, initially and every year after thaw, to use conventional methods.
It’s also too much work to leave bare earth. The work isn’t just the weed maintenance, but also the water hauling and the amount of time that has to be dedicated to plant health. So she mulches. Her mulches melt away in 12-24 month cycle, but the labor of creating and spreading them works out to be less than fighting more weeds and against harder soil and more evaporation.
If we’re planning to live a power-free or low-power-draw “sustainable” and “self-sufficient” life without the noise or fuels of machines, we might want to consider some of the alternative growing methods and ease-of-gardening methods, just as she does.
Our garden “must-have” tools are going to change depending on those methods.
It’s also going to depend on space. If we have smaller gardens, we can get away with fewer and less-specialized tools. At a market or large family scale conventional garden plot, some mechanization is going to be right on the borderline of a must-have.
Aging and broken bodies may also have to rely on some method that will help them, be it a growing style or machines. That will change the tools they reach for significantly.
The number-one “must” for gardening is to get started.
There are a lot of learning curves specific even to one section of a small yard. No book is going to have every answer, and by the time we’re troubleshooting, we’re already behind the curve. Hard times or a disaster is a terrible time to discover our microclimates, niche pests and diseases, and soil types.
Once we get started, our personal “must have” list will refine itself. We’ll want backups of what we use most. We may expand to the full array of shovel and hoe and rake types, or we may stick with a few subtly different styles. Over time, we may find that it ebbs and flows.
We can start small and add a few things as budgets open up, working toward those items that multipurpose or have the most value for our lives first, then adding on the things that will allow us to expand and be more efficient. Knowing some of the rec’s and the priorities for them from other growers may help with that, either getting started or expanding.
from The Prepper Journal
Don't forget to visit the store and pick up some gear at The COR Outfitters. How prepared are you for emergencies?
#SurvivalFirestarter #SurvivalBugOutBackpack #PrepperSurvivalPack #SHTFGear #SHTFBag
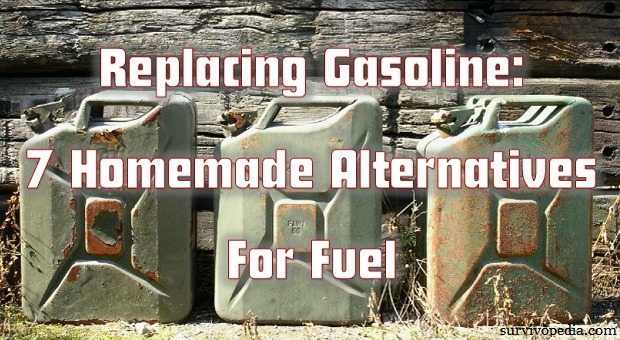
Whether you commute several hundred miles per week, or only just once per month, letting go of traveling by car doesn’t feel comfortable to anyone.
While it’s possible to make automobile fuel at home, there are some other options you can, and should consider. If one method does not appeal to you, others may also work and give you better options when it is impossible to buy gasoline or other fuel types.
How Easy is to Make Gasoline at Home?
Gasoline is made from petroleum, which is essentially the remains of living things that died thousands to millions of years ago.
Be prepared to face some problems with trying to make gasoline at home that is comparable to what you would get at the gas pump:
Finding petroleum deposits that you can reach with drilling equipment isn’t easy, and most people lack the resources to purchase and process barrels of crude.
It takes a good bit of petroleum, water, and other materials to produce even a single gallon of gasoline, and the equipment is also very expensive.
Many of the sites online that claim you can make gasoline at home may actually be talking about biodiesel or similar fuels. You can make burnable automobile fuel based on alcohols and other “renewable” fuel sources, but it’s not the same as gasoline made from petroleum. The energy, density, burn characteristics, and effects on delicate engine seals and parts is very different.
Even if you have tools and equipment to refine gasoline, it can be a very dangerous process that requires a good bit of skill. Together with that, you will also need to be able to maintain the equipment and make repairs as needed.
Simply put, making gasoline at home isn’t something you can do by yourself, nor can it be done at low cost or in a residential setting. While you may be able to make small amounts of biodiesel, or even a hydrogen based fuel, gasoline is likely to be out of your reach.
Before you try to make any kind of fuel at home, think about how you can reconfigure the engine that powers your vehicle.
Historically speaking, the rise of the internal combustion engine didn’t come about just because this engine design worked better than the steam engine. Rather, it had to do with who got bank loans and how they marketed the product.
In terms of technological simplicity, fuel choices, safety, durability, and power delivery, the steam engine outranks the internal combustion engine.
So if you are willing to change an existing vehicle in order to use homemade fuels, start off by converting to a steam engine. Making this change has its benefits, and here are just a few of them:
You can burn just about anything to heat up the water used to produce steam. If you are interested in liquid fuels, or even gas based fuels, you only need to install the tanks. If vehicle has the right shape, you can easily power the vehicle on five or six fuels without any problem.
Even solar “panels” composed of black plastic tubing with water running through them can be used to heat up the water or keep it in a pre-steam state so that it takes less of other types of fuel to produce steam.
Steam engines might weigh a lot less than internal combustion engines, which means the vehicle will require less fuel.
If you use hydrogen fuels, or fine tune a solar heating system, the vehicle will have few, if any detectable emissions. Concerned about being followed or having the vehicle stolen? With this option, you won’t need to worry about electronic surveillance equipment following conventional fuel signatures.
Today, it is virtually impossible to obtain a consumer level automobile that uses a steam engine. Researchers are still looking at steam engines and working on them, so you they might come back into style in the next few years.
Research on the patents and materials for steam engines, and start with simple ways to boil water with as little fuel as possible, if you are on a low budget. From there, you can move on to building up pressure from the steam, and then using that pressure to drive a piston.
Some people have successfully converted automobiles to run on steam engines, which is a perfect project to experiment with if you have a homestead or a farm. It may be hard to legally take your vehicle out on the roads, but things can easily change in a crisis situation.
Rely on Water for Hydrogen Fuels
Hydrogen fuels offer more promise for an alternative fuel than most other types because it can be made from water and also natural gas.
But remember that during crisis, you won’t find automobile fuel faster than water. Processing some fuels requires large volumes of water, which makes it even harder since water scarcity forces other priorities to the top of the list.
With just a few modifications to your car, you could use water (which is broken down into hydrogen and oxygen) to reduce the amount of gasoline you need to run the vehicle.
If you explore hydrogen fuels further, you might create your own fuel cell to run an electric motor. This is quite interesting if you have a hybrid vehicle.
Check these patents and devices for converting your vehicle to run on hydrogen, or for getting started to develop your own ideas.
Fuel Cells – it produces electrons, which can then be used to power a motor. It differs from a battery because it takes fuel and breaks it down to release energy as opposed to simply store the energy. You can also find small scale kit you can use to start with fuel cells if you don’t want to build one from scratch, and this is a great project to pursue with children or grandchildren.
Garrett Electrolytic Carburetor – if you have a vehicle with a carburetor, this is the perfect invention for you: this design adds electrolysis plates to the lower section of the carburetor, and the plates break down the water to release the hydrogen and oxygen. There are similar devices on the market that break water down, and release hydrogen into the engine, and they won’t eliminate all need for gasoline, but increase mileage by a good bit.
Denny Klein’s Aquygen– even though these vehicles are not as efficient, the technology behind them is valid and will be better than nothing in time of need.
Hydrogen Booster Kits – these kits allow you to “enhance” the fuel efficiency of internal combustion engines by injecting hydrogen into the fuel mix. Some kits are better than others, and results may vary.
As a note of caution, there are many people around the world trying to find a viable way to make vehicles run on water. Most systems either split water apart using hydrolysis, or they try to feed hydrogen and oxygen into the cylinder.
Before building something, check the viability of the plans you are looking at. Look or think about developing a system that pressurizes the oxygen first before attempting to use it to drive a piston.
If you need an electrical charge to drive a motor, look for ways to incorporate a joule thief or some other technology that will give you more current from what has already been produced.
Try to incorporate solar and other devices that can be used to generate power as opposed to simply relying on water or hydrogen. Generating heat to drive a steam engine would also be a viable answer.
Biodiesel
If you have a “flex fuel vehicle”, or one that runs on diesel, then homemade biodiesel may be an option for you. Depending on the recipe, making biodiesel can be dangerous, so study your options carefully and take your time when building and working with your equipment.
There are three main ingredient types you will need for making biodiesel and you can make or obtain them all from natural resources:
Fats or oils – this takes up the main bulk of the biodiesel, and you can obtain them from animal or plant based sources: spent cooking oil, scraps of animal fat, and many other kinds of kitchen waste. If you aren’t sure if a particular fat or oil will suit your needs, you can try visiting the Make Biodiesel website to see how different oils and fats compare to each other.
Alcohol – usually, methanol, or wood alcohol is recommended for beginners. Wood alcohol is not easy to make, but you can purchase some and work with it until you are ready to use grain or ethyl alcohol. Grain or ethyl alcohol is the edible form found in beer, wine, and other beverages, and you’ll have to set up a still and concentrate ethyl alcohol so that it can be used for making biodiesel.
Lye – it’s not only useful for making soap and opening stuck drains, but it also acts as a key catalyst for making biodiesel. While pure lye is still available on the market, it can be hard to get, so learn how to make lye from potash. Remember there’s a difference between lye made from potash and commercial lye: you may need to tweak your biodiesel recipe a bit if it isn’t already calibrated for homemade lye.
A great deal of money and effort has been put into making fuels from corn and other crops that have a high sugar content. Typically, these crops are used to make large quantities of alcohol that can be mixed with gasoline in order to reduce the amount of petroleum used in the fuel.
While there are many problems associated with soil depletion and destruction of plant diversity (because GMO strains are used for fuel production), these fuels are, in my opinion, falsely touted as a viable alternative to petroleum products.
In the last few years, there has also been a push to develop fuels based on the extraction of oils from plants. For example, algae is seen as a viable source of fuel because a high percentage of the plant material is made up of oils. Some people claim that growing algae is hard, but actually extracting oil from algae can be a difficult and expensive process.
If you can get ahold of large amounts of algae, try and see for yourself if you can come up with a viable system.
In a collapsed world, the sheer amount of waste and chemical contamination of surface water will lead to all kinds of algae growth. Learning how to put this noxious stuff to good use for making fuel will be to your advantage.
Natural gas from compost and garbage dumps is truly one of the most overlooked sources of fuel in our country.
It is possible (but expensive and time consuming) to convert your vehicle to run on compressed natural gas (CNG) or liquid natural gas (LNG). Storing natural gas safely, and then compressing it enough to provide fuel for a decent driving distance are difficult too.
While there are a few cars made to burn this fuel in the United States, they are far more popular overseas. As prepper vehicles go, natural gas has more than enough power to operate the kind of engine that will be suitable for rough terrain, however refueling and storing natural gas can be a problem.
If you want to pursue this path, start of by seeing how much natural gas you can generate from compost piles and other renewable resources. Make sure that you can use the gas for other fuel needs such as cooking and heating your home, since you can use it for other purpose if it turns out that you cannot use natural gas to power a vehicle.
What About Magnet Based Propulsion?
The basic purpose of the engine is to make it possible for the surrounding vehicle to move, which requires a certain amount of power to overcome the effects of gravity. There are different methods that can be used to achieve this goal, and magnetic fields can also be used.
There are toys on the market that rely on reversals of the electromagnetic field between the base and an object in order to make the object float. The same principles are used to power some of the fastest commuter trains in the world.
If you’re interested in this topic, your main problem would be keeping the car moving without having a nearby rail or other source of switching current to work with. If you are interested in powering a vehicle for your homestead, you can build a grid to cover the local area.
Research on advances in wireless current transmission. We are still far away from the system envisioned by Tesla, but wireless power transmission can easily be used to power vehicles levitating in a magnetic field.
Other Engine Designs
In some ways, building an engine for an automobile is not so different from building any other power generation system. At heart, both systems must generate some kind of spinning motion that will either push a vehicle forward or induce electrical current flow in a nearby coil.
Study different ways to induce current, and see if any of these devices can be used to build an automobile engine. For example, the Tesla Turbine can be run on compressed air, or even a steady stream of water.
As strange as it may sound, wind power may have far more to offer in terms of engine design than continuing with the concept of an internal combustion engine. Today, many materials can be used to make smaller and smaller wind turbines that may only require a tiny breeze or a slight shaking to produce an electrical current. Even sound or certain sound based vibrations in different media can be used to generate an electrical current that combines with other sources to run a motor, or even power a series of magnets that will enable the vehicle to break the bounds of gravity.
Remember, right now we are dealing with technologies that must overcome large amounts of weight. Simply put, the more weight you have to deal with, the more power it will take to overcome the effects of gravity. Look at lighter weight polymers and newer materials used to create both propulsion units and the surrounding vehicle.
Some situations can make traveling by automobile very expensive and complicated even on regular times. While a lack of gasoline is bound to be a problem in the post crisis world, trying to make gasoline at home is not a viable option.
There are other alternative fuel and engine design options that you can and should consider.
In most cases, coming up with something useful will take time and effort to come out with something sustainable and tangible, given the limited materials available to the average consumer in these times.
Click the banner below for more!
This article has been written by Carmela Tyrell for Survivopedia.
from Survivopedia
Don't forget to visit the store and pick up some gear at The COR Outfitters. How prepared are you for emergencies?
#SurvivalFirestarter #SurvivalBugOutBackpack #PrepperSurvivalPack #SHTFGear #SHTFBag
Last time, we finished our look at the legality and mechanics of building your own firearm, particularly the manufacturing of the receiver. Even though this receiver IS considered to be the firearm, it is not usable as is. In the next two articles, we look at what is needed to get the firearm functional. In particular, we will concentrate on the AR-15 style rifles and pistols. This is because these (and the very similar AR-10 and AR-308) are the most common firearms built from 80% receivers. This decision will give us the widest choices of parts and tooling and options to experiment with. By the way, note that the AR in all of these means “Armalite Rifle” (the company which designed this style), not “Assault Rife”.
I let my fingers do the surfing online to find the best combination of apparent quality and price as of February, 2017. Note that this does not mean this list of parts, prices and sources is still valid, and it was based upon my preferences and budget so may not be the best choice for you and your particular needs.
Once you have a completed receiver which you made for yourself or bought (stripped) through normal firearm purchase channels, you have the basis to easily assemble the firearm. The bottom part of an AR style firearm, consisting of the receiver, pistol grip, internal Lower Parts Kit (LPK), and the buffer tube kit and stock, is often called the “lower”. The upper part, consisting of the rest of the firearm, is called, not surprisingly, the “upper”.
The AR-15 80% Receiver
When choosing a receiver, either 80% or finished, the options usually are “cast” aluminum, “billet” aluminum, “forged” aluminum, or some form of reinforced plastic (polymer). The plastic is likely to be lighter and easier to machine, while the aluminum should be more durable. There is not that much stress on the lower when firing an AR slowly; the choice between the weakest and strongest lowers can be guided largely by rapid fire requirements and non-firing situations such as dropping it, banging it on something, or applying inappropriate force to the buffer tube or when the upper is hinged open. The aluminum receivers tend to be of either 7075-T6 (newer, machines better) or 6061-T6 (the previous standard). The strongest are made by forging, that is, heating the aluminum to where it is softened but not melted, and then forcing it into the desired shape. Like with knives, this process improves the metallic structure. Another decent, but often more expensive choice, is taking a billet (block) of aluminum and machining the desired shape into it, potentially providing a more pleasing appearance than forged but with not quite the same strength. Casting (pouring liquid aluminum into a mold) is the least desirable aluminum choice, not being either the strongest (at least some of them have been known to crack or crumble) or the best looking, and I don’t know why you would choose this option unless you find one dirt cheap, particularly if you are looking for one to practice on. I couldn’t find any, but I didn’t look very hard. As for the plastic, there are a wide range of choices; I like the ones which have metal inserts at the points most likely to be affected by stress, and probably will avoid any which do not have those inserts.
Since I plan to try out at least two of the three mechanical methods of crafting a finished receiver (I have a drill press AND a router), and there are three attractive types of receivers to try, I needed to cut down the vast number of choices to a number I could make valid decisions between. A key factor for me is whether engraving of a serial number and other BATFE recommended text can be provided, as I see following government laws and recommendations to be wise, particularly when the benefits are greater than the costs.
First up would be plastic, which I’m a bit nervous about. To minimize my concerns, I looked for one which had metal at the stress points, and found the “Liberator” from Tennessee Arms. It uses fiber-filled nylon with brass inserts at the threaded holes, available in black, dark earth, grey and olive drab; these shades match Magpul stocks color choices. The cost for the receiver alone is $75, or $99.95 with a one-time use jig which seems a reasonable cost for a single build. Since the jig is for the drill press method, that is the method I’ll use for this receiver. Another advantage of this source is that they do engraving of serial numbers and/or a custom image, and I can make an image of the BATFE recommended information. Their best value is a receiver, jig, set of bits and engraving for $109. And they were offering a 20% discount plus a quantity discount when I ordered.
Next I looked for forged aluminum, and narrowed it down to a few choices. From an economy and appearance standpoint, a good choice seems to be the anodized one from www.80-lower.com for $59.95, or $69.95 with FIRE/SAFE marked. This company offers several multiple-use jigs including the “Easy Jig” so can cover either the router or drill press methods at various price points. However, they don’t offer engraving. For that, an alternative is a raw one from Atomic Engraving for $79.99 or an anodized one for $89.99 which include a serial number and BATFE suggested text engraved; they also have an unmarked (except for Fire/Safe) anodized receiver for $64.95. Another choice is the anodized one from Daytona Tactical for $69.95 with your choice of stock images engraved on one side and for an additional $14.95, they will engrave a serial number and up to four lines of text on the other side. They also have raw receivers for $44.95 and Cerakoted ones for $69.95, but they won’t engrave either of these because “it does not show up well”. I’ll use the “Easy Jig” and my router for whichever of these I end up choosing.
Finally, there are a number of billet options. Since Ghost Gunner has a raw one for $65, which they specifically chose to be used with their machine, this is the one I’d go with if I decide to try that machine. Although allegedly “any” raw aluminum receiver can be used with the machine, I’d use their specified receiver the first time using this methodology. As a computer controlled mill, the machine should be able to be programmed to engrave anything desired, so with the machine, I should be able to save money and trouble on any receiver I like since engraving will no longer be a factor in the purchase decision. If engraving does not enter into the choice, there is a raw one from Daytona Tactical for $59.95 but as mentioned above, they won’t engrave it because it is raw. They will Cerakote it for $15, though. And www.80-lower.com has one Fire/Safe marked and anodized for $99.95.
One way to improve the search for engraved receivers seems to be to look for “CA Compliant 80%” lower or receiver, which is popping up a lot now due to the new California law. If the choice is to get a receiver without engraving, but engraving is desired and you are unable to do it yourself, Atomic Engraving will engrave your own 80% receiver (or one of theirs) for $35 to $95 plus shipping, depending on how much engraving you want.
The AR-15 Lower Parts Kit
Basically, this is a set of all the parts which go into the receiver, including hammer, trigger, other controls, disconnector, pins and springs. Annoyingly, it often also includes the pistol grip, which unless you want a stock (standard) grip, means you end up with an extra. The trigger guard is not used on receivers which have the trigger guard built-in, typically billet and polymer ones.
The parts are standard from most sources with the major difference usually being quality. “Mil-spec” (to military specifications) should be the lowest grade you consider, with higher grade parts used as your budget allows or your uses require. Although a separate hammer and trigger is the norm, you can get a “one piece” drop-in target grade trigger group which can be used instead of the separate parts. Other high-end parts are available for builds which push the limits of what the platform can do.
For good quality at a medium price, I settled on the Anderson set from Anderson Rifles for $49.70 at a mil-spec level. If it turns out I need a higher level of quality, there is Spike’s Tactical LPK from Joe Bob Outfitters for $69.95. And of course there is yet higher quality than that, at a significantly higher price.
Naturally, most LPKs come with the standard right hand only, 90 degree throw, safety selector. These are adequate but not optimal. I would prefer an ambidextrous safety, and might as well stick with Anderson who has an ambidextrous selector for $15.75. It works well, but is wider than the receiver and sticks down enough to be a bit annoying. A 45 or 60 degree throw safety would be a bit easier to use, and with custom shaped levers, perhaps more comfortable. But some of these require a notch in the edge of the safety hole (to encourage use only on receivers with the “FIRE” marking appropriately located), which would be difficult to machine at home. If you use a safety with one of these tabs, it would be easier to grind off the tab than notch the edge of the safety hole. And if you are really into ambidextrous, magazine releases are also available for $25 and up.
Note that the pins which hold the hammer and trigger in place can, over time, develop looseness, and can even “walk” out of the receiver. The way to prevent (or fix) this is “anti-walk” or “anti-rotate” pins. KNS makes a couple of sets for the hammer and trigger pins for up to $40, but you can find their minimal models as low as $20 if you search. KNS also has spring-loaded takedown and pivot pins for $20 which seems like would be very handy for final fitting, testing, cleaning and changing to different uppers.
The AR-15 Buffer Tube Kit and Stock
The remaining parts of the lower are the buffer tube kit and stock. Buffer tubes are available in rifle, carbine and pistol lengths. The buffer tube screws into the back of the receiver, and contains the buffer, which cushions the bolt slamming back, the mainspring, which pushes the bolt back forward into battery, and some mounting hardware. The stock mounts around or to the buffer tube. Stocks can be fixed or adjustable (collapsible); complete stock and buffer tube kits can be found as low as $40, but I wouldn’t trust them. A stock alone for $40 should be adequate though. On the other hand, you can spend hundreds on the stock, which you should avoid unless you know exactly what you are going for (and can afford it). Note that there are two common carbine length buffer tube formats, mil-spec and commercial. Either will work, but make sure all the parts you get are one or the other, since they are not compatible. Mil-spec may offer a bit better selection of stocks. Also, be aware that bolts come in different weights, and it is wise to match the buffer weight to the bolt.
For the carbine length buffer tube kit, I’ll get it from the same place as my bolt for $22.95 to get the best match (and attractive price). If I were building a rifle for which accuracy or long-range was the key factor, I’d get a fixed stock with length and comb adjustments (like the Magpul PRS), which might have its own buffer tube built-in or more likely, requires the rifle length tube. But “tactical accuracy” is good enough for me, although being big; I’d want it to be big and sturdy, like the Magpul MOE SL-S or MOE SL.
You do not want to use a carbine or rifle buffer tube on a pistol (due to a risk of being charged with possessing a Short Barrel Rifle), and Red Barn Armory seems to have good pistol specific ones by Phase 5 Tactical or Spike’s Tactical for $69.95. As a cheaper option, Delta Team Tactical has one for $32.99. And if you want a wrist brace system with the tube, there is the SIG system from Delta Team Tactical for $119.99.
Tune in next time for the upper parts and some useful accessories.
from The Prepper Journal
Don't forget to visit the store and pick up some gear at The COR Outfitters. How prepared are you for emergencies?
#SurvivalFirestarter #SurvivalBugOutBackpack #PrepperSurvivalPack #SHTFGear #SHTFBag
Not so long ago, activated carbon was a common cure for many different ailment as well as a common household staple. Old habits and remedies should be revived: they are based on natural solutions much safer for our health than anything nowadays industries are offering us.
If you know how to use activated carbon, you might revert serious health problems now as well as prevent some of the worst ones that will occur in the aftermath of disaster.
If youwant a good “multi-use” item in your medicine kit, activated carbon is the one to carry.
From removing ingested poison from stomach to air and water filtration, keep reading to find out the top 12 uses for activated charcoal.
Remove Ingested Poison from Stomach
No matter how hard you try, there are going to be times when you consume something that will present a danger to your health. By the same token, if you have livestock or other animals living with you, there is also a chance they will ingest some kind of poison that needs to be absorbed by a media such as activated carbon.
Fortunately, making and using activated carbon for this purpose uses the same basic process as you would use for most other purposes. You may also want to purchase pre-manufactured activated carbon at a local pharmacy that is made for this purpose.
Given the number of toxins and dangerous additives in modern foods, it should come as no surprise that acid reflux and stomach bloating are on the rise. When you factor in side effects from various drugs, this situation gets even worse.
During a major social collapse or other crisis, you may wind up consuming other foods that irritate your stomach simply because you have no choice. These and many other situations may be made even worse because you may not have any remedies on hand to deal with the situation. Activated carbon capsules can help reduce both stomach bloat and acid.
Aquarium Filtration
If you are going to grow your own food, aquariums and fish ponds are likely to be part of your plans. Even if you choose not to eat the fish, you will still need waste from them for hydroponics and other forms of fertilizer.
Large numbers of fish are hard to keep in a smaller area without the use of activated carbon.
Here are some ways activated carbon makes it easier to start and maintain a healthy aquarium or fish pond:
Activated carbon helps remove gas based fish waste from the water.
When aquarium and pond water is cleaner, there is a less chance of toxic algae buildup.
Water that is full of toxins increases the risk of fish disease. Given that some fish carry TB and other illnesses, you will not want to take this kind of chance, especially if you are planning to eat the fish or use the water to fertilize plants.
When aquarium water is full of fish waste or other toxins, the fish will be less likely to breed and produce healthy offspring. While this may not be of much concern while you can still buy fish, it will most certainly be a problem when you must replace them in a crisis situation.
Aquarium and pond water are notorious for pulling toxins from the air. As a result, if the area is polluted, you can rest assured that the water in the aquarium is also in bad condition. Activated carbon will pull these toxins from the water and help ensure your fish remain as healthy as possible.
To use activated carbon for this purpose, just break bigger pieces down to about the size of a pea and add them to the air filter.
I have used bubble filters for decades in my aquariums and have never needed to buy pre-fabricated cartridges for them.
If you plan to use bigger or stronger power filters, then you may need to find some way to refill the cartridge once the activated carbon needs replacing. Some aquarists say it is possible to reuse the carbon after heating it up and letting it dry out. I have never gotten this or other variations to work properly.
Keep Your Teeth Clean
Many people are surprised to learn that activated carbon can remove all kinds of stains and hidden debris from teeth. No matter whether you want to whiten your teeth or keep them clean without using toothpaste, activated carbon will be very useful.
All you need to do is grind the activated carbon down to a powder and mix it with some water. Let the black paste sit on your teeth for a minute or so, brush, and then rinse off as you would any other toothpaste. Since activated carbon doesn’t have a good taste or texture, you may want to follow up with a peppermint wash or something else that helps you feel more comfortable.
You can use baking soda as toothpaste and then follow up with activated carbon now as well as during a major disaster.
Modern toothpaste is filled with carcinogens and other dangerous toxins. As with the air and water, more than a few of the chronic illnesses you are dealing with right now may be made worse by toothpaste.
Give activated carbon a try and see how you feel both from a dental and physical perspective. Remember, cavities and other dental diseases don’t just come from bad dental hygiene. They also come from making bad food choices and ingesting chemicals that do harm to the enamel on your teeth.
Ask your dentist about the benefits of using activated carbon as a toothpaste replacer, as well as what you can do to make your own toothpaste so that you can avoid all the toxins in modern formulas.
If your dentist says that modern toothpaste is an absolute necessity for dental health, bring with you a list of all the ingredients in the toothpaste, and the studies that prove one or more is carcinogenic. As strange as it may sound, if you wind up needing to get a second opinion, this may be better than going on with a growing health problem that you weren’t aware of.
If you thought air and water pollution were bad, you may not realize that soil pollution is just as bad. Runoff from commercial farms and factories as well as pollution falling from the air all lead to soil based problems miles away from the initial site of contaminant release.
Once activated carbon touches something, it will begin leaching various chemicals from it. In this case, if you mix activated carbon into the soil, it will pull out pesticides and other dangerous toxins.
Personally, I would recommend using blocks or sheets of carbon for this purpose. You can try them a the surface level, or bury them in layers in order to give the chemicals a chance to leach through to the carbon layers.
Later on, you will need to remove the carbon so that the plants don’t break it down and release the pesticides right back into the soil.
Remember, activated carbon doesn’t break chemicals down, it is simply a very porous medium that acts as a storage container. You will still have to remove the carbon from the soil to completely get rid of the pesticide and other toxins.
Air Filtration
Do you ever notice that when you travel to certain areas, the air smells really bad? Do you also notice that this sensation seems to fade after a few days? The air around you is so dirty it is probably making you and your family members very sick even though your nose had adapted to it.
From higher volumes of cars passing to garbage dumps and industrial smokestacks, there are actually very few places left where there is safe, clean air to breathe. Here are just a few contaminants that trigger everything from asthma to increased risk of panic attacks, heart problems, and other diseases:
Aside from carbon monoxide, automobiles also release other dangerous chemicals into the air, and some of them are known to trigger asthma and other breathing disorders.
Medical waste and rubbish dumps release dangerous chemicals into the air. If you smell something bad in the air when downwind of a dump, then this is the natural gas released by the piles of garbage. The dump may also be releasing all kinds of chemicals created when trash mixes together and new substances begin to form. You can’t tell just how many of these substances cause cancer or other health problems simply because you inhaled the disgusting odor of rotting trash.
Factories and power plants also release volatile organic compounds and other chemicals into the air. You may be able to smell some of them, while others are odorless.
If you spend the money and time to build an air quality sensor capable of detecting specific chemicals, you’ll be amazed at how dangerous the air around you really is. It will get much worse after a crisis because of increased numbers of fires and a lack of tools, labor, and resources required to manage dangerous chemicals.
Activated carbon can be used to remove most volatile organic compounds, and many other chemical based contaminants from the air. In fact, if you suffer from chronic medical problems, you might need a pre-fabricated carbon filter attached to a fan or some other source of air flow. Aside from cleaner smelling air, it will ease your health problems.
If you are concerned about gas attacks or other social collapse related scenarios – these kinds of filters will be essential if you plan to stay in your home. While there is much more to prepping for an air quality related disaster, activated carbon filters are a good place to start.
There are a number of furnace filters available that have activated carbon in them. In most cases, these are little more than a liquid solution of activated carbon added to the filter media.
You can try experimenting with your own versions to see if you can get a filter that effectively removes odors (and therefore their cause) from the air.
DIY Respirators and Gas Masks
Even if you could seal off your home entirely from the outside world, it would not be a feasible option. Gases and bio weapons will easily seep through even the tiniest crack and can be devastating, and there will also be times when you have to leave your location. And if you are away from your bug out location, you’ll need to protect your lungs as much as possible.
These are reasons why making and wearing a viable gas mask or respirator is very important. As with air filters, activated carbon offers the widest range of protection against a range of chemicals.
Considering the rising rate of smog and other air pollutants, activated carbon masks are also very important for improving and maintaining a reasonable level of health. For example, in many Asian countries, people don’t go outdoors or exercise without wearing an activated carbon mask.
While this is a fairly rare sight in the United States, those who know the truth are doing the exact same thing. If you have asthma or other chronic breathing problems, even a surgical style mask with activated carbon in it can make a big difference.
I have personally noticed a 50% reduction in noxious odors from insecticides, smog, and other fumes when wearing this kind of mask. Others that have tried them notice a 70% or better reduction. While I have not tried the wrap-around designs more common in Asian countries, I suspect they would be more effective because they would seal off the areas where I tend to get the most air leaks.
A surgical style activated carbon mask is better than nothing, however you will need a more robust respirator design for gas attacks and other dangerous situations.
Just remember to practice breathing with these masks, and they can and do restrict air flow. Also make sure you keep the mask clean and change the cartridges on a regular basis. As good as activated carbon is at filtering out many kinds of chemicals, the pores in it still fill up quickly, hence the need to replace the cartridges often.
You can and should try taking used cartridges apart to see if you can find a way to refill the activated carbon part. Even if you cannot obtain or make the other filter media, at least you may be able to keep this vital part of the mask working for a longer period of time.
Filter Water
As a prepper, you may already be giving a lot more thought to water quality than air quality, but activated carbon isn’t only useful for removing the bad taste from water after it has been boiled. That bad taste is an indicator that the water isn’t as clean as you think it is.
Boiling water will kill off bacteria, however it will actually cause an increase in the concentration of heavy metals, pesticides, and even dangerous drugs that have leached into just about every potable water supply at the surface level. While activated carbon will not remove all heavy metals, it is excellent for removing most other dangerous chemicals and drugs.
Typically, filtering water with activated carbon is a lot easier than filtering air. At the simplest, just add some activated carbon to a clean sock and pour the water through it. You can also make your own cartridges and add a pump for larger volumes of water.
When designing your own system, don’t forget to make it easy to change the cartridge as well as detect when it needs to be changed. Since many water quality issues reflect in changes in pH, you may want to try building a pH sensor into your system so that you know when to change the filter.
If you have books, paper based maps, or other important documents in your stockpile, it is very important to keep them free of air based chemicals that will do damage to them.
While a ziploc bag can be very useful, adding some activated carbon to the bag will also ensure the paper does not break down as quickly.
Remove Odor From Fabrics
Today, many people still use moth balls and other camphor based products to store clothes away for long periods of time. Aside from making your clothes very smelly, many of these products can also be very dangerous to your health.
If you want to keep clothes in your stockpile odor free, activated carbon may be of some help. If you routinely have bad smelling clothes, adding some activated carbon to the wash will also get rid of the problem.
You can make activated carbon sachets from nylon stockings (or very thin socks) and aquarium carbon, or buy them pre-made at the pet store.
Scent Block for Hunting
More than a few hunters have lost a chance to capture dinner because the target animal got a whiff of the hunter when the breeze changed. Since most animals are afraid of human scent, even a slight breeze can cause problems.
Today, a number of hunting supply stores sell activated carbon solutions that will absorb body odors before they can be carried to the animal. You can also grind activated carbon into a powder and mix it with water.
Next, just dip your clothes in the solution and let them dry. Even though there is some controversy over whether this actually works, there is no harm in giving it a try, especially if you know or suspect that scent related issues are interfering with the hunt.
More than a few hunters also store their clothes in activated carbon in order to prevent other odors from getting into the clothes.
Tip: if you have been using the same clothes for years, and took a lot of time making sure they absorbed the scent of the woods, this can help prevent that from being disrupted. All you need to do is add a few sachets of activated carbon to the bag or box and store away until needed for the next season.
Bee stings and insect bites can become infected as well as cause a lot of pain and irritation. While activated carbon will not stop an infection, it can pull out the venom from stings and small bites. Just apply the activated carbon to the skin and let it absorb the venom.
If you are allergic to bees or other insects, it is still very important to use an Epi-pen or other neutralizers that have a known track record for reliably managing this problem.
Activated carbon will not work for snake bites. Insect bites have much smaller amounts of venom than a snakebite. You can try a moist chewing tobacco bandage for snakebite and a constriction band above the site of a snakebite. You will still need the proper anti-venom to treat this condition.
Now that you know how to use activated charcoal, discover more valuable survival secrets from our forefathers.
Click the banner below for more!
This article has been written by Carmela Tyrell for Survivopedia.
from Survivopedia
Don't forget to visit the store and pick up some gear at The COR Outfitters. How prepared are you for emergencies?
#SurvivalFirestarter #SurvivalBugOutBackpack #PrepperSurvivalPack #SHTFGear #SHTFBag


 Not so long ago, activated carbon was a common cure for many different ailment as well as a common household staple. Old habits and remedies should be revived: they are based on natural solutions much safer for our health than anything nowadays industries are offering us.