In an emergency situation, it’s difficult to provide good first aid even in good weather, but if you must tend to sickness or injury in freezing weather, your job is going to be twice as hard.
You’ll have greater difficulty getting to a warm place to provide treatment, and snow and freezing weather will make it difficult to start a fire or find healing herbs that would be abundant in warmer weather.
You will also have to take care of yourself by wearing appropriate cold weather gear, which may impair you.
In this article we’re going to discuss how to meet these challenges and provide adequate first aid even in freezing weather.
How to Reduce the Risk of Injury
The first problem that you’re going to face is that chances for injury are going to be much greater. You’ll be facing the risk of frostbite, hypothermia, falls and hunting injuries. As a provider of first aid, the first rule is to avoid injury yourself.
In freezing weather, it will be an uphill climb to provide life-saving treatment without risking yourself as well.
Get this lifesaving information about surviving when doctors, pharmacies and hospitals are shut down!
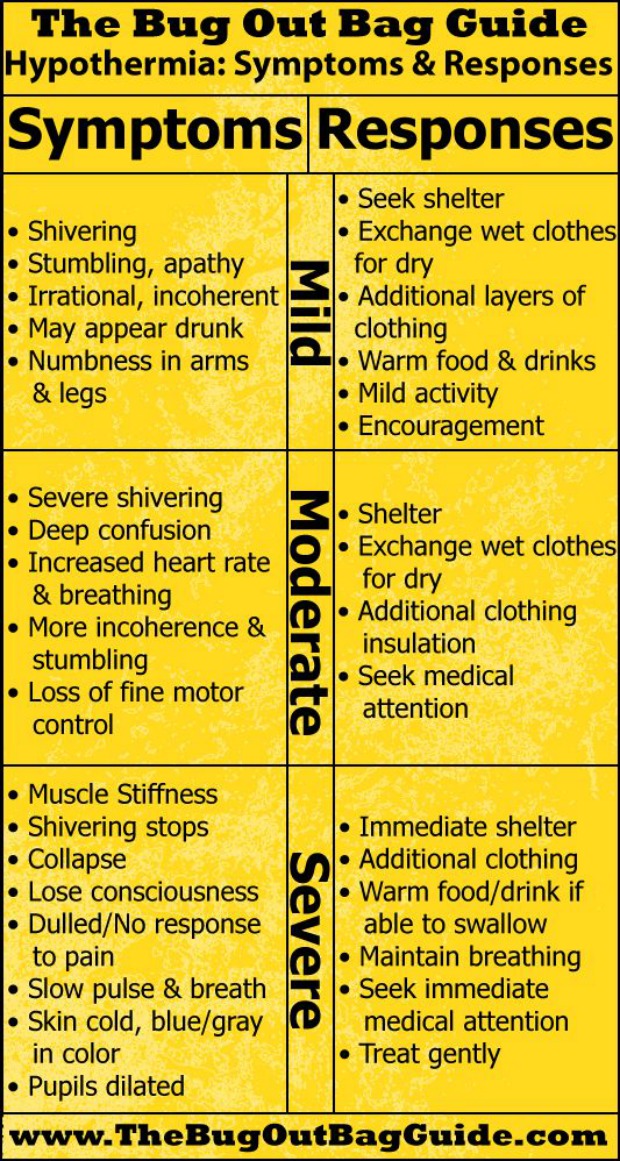
Hypothermia
The first challenge that you’re going to face when providing first aid is avoiding hypothermia on top of treating the injury, or perhaps the injury is hypothermia. The problem is that in order to treat hypothermia, you need a way to warm up the person, which isn’t going to be easy if you’re stuck outdoors.
In severe temperatures, your core temperature can drop dangerously low when exposed to the elements in a matter of minutes even if you’re awake and active. If the patient is unconscious, their body temp drops even faster because they aren’t moving about to generate extra body heat.
When you sleep, your body temperature drops by as much as a couple of degrees, which can be critical since hypothermia, by definition, is a decrease in body temperature. When you’re in a deep sleep, you don’t shiver to maintain body temp.
Your body also pulls heat from the shell (your limbs) to maintain core temp, which puts the extremities at risk for frostbite. Loss of blood increases the chance because blood is basically the hot water in your body’s radiator – the warm blood in your vessels keeps the surrounding temperature warm.
The take-away here is to keep the person awake and warm, even if he or she is in pain and you would normally encourage sleep.
Though you may need to shed at least your gloves or mittens to provide treatment of wounds, it’s critical that you stay warm in order to prevent becoming hypothermic, too. If both of you are down, there’s a high probability that you’ll both die.
Frostbite
If a person has an injury that requires removal of clothing, such as a gash or puncture wound, there’s a much greater risk of frostbite.
Like with hypothermia, it doesn’t take long in freezing temperatures for frostbite to set in and cause potentially permanent tissue damage that can result in loss of digits or limbs, or even gangrene.
The risk is particularly high around the wound area because it’s wet so it’s important to get it dry and keep it dry, or at least under a dry dressing so that the wet material and flesh isn’t exposed to the cold.
Ice
Ice presents many problems when traversing terrain in bad weather. The risk of broken bones, severe bruises, concussions, and just about any other injury is increased exponentially if you’re walking or traveling on ice. It will also make it much more difficult to get an injured person to safety.
If you have to provide first aid in an icy environment, don’t forget the first rule – keep yourself safe.
If a person has fallen through ice on a body of water and you’re trying to save them, do the best that you can to ensure your own safety. Tie yourself to a secure tree or fixed object before going after them, and if you have to go out onto the ice, lay flat so that your body weight is distributed over a larger area.
If you have a path that you use several times a day, use rock salt to melt the ice. You don’t have to use much, but you will need to reapply it at least once per day to keep the water from the melted ice from re-freezing.
Some ice on a shelter may act as an insulator, but if it gets too heavy for the structure to bear, you’ll find yourself without shelter. Monitor and do what needs to be done.
Inability to Travel
First aid is called that because it’s often meant to be the precursor to a higher level of medical treatment. For instance, if a person has severed a digit or limb, or has a severe injury, they’re going to need more than a bandage and some antibacterial ointment.
Tourniquets can only be used carefully and for a short amount of time without causing tissue death or damage and wounds such as gunshot wounds need surgery if the bullet or foreign object is still in the patient.
Freezing weather, especially in a SHTF scenario, makes travel much more difficult. Trying to travel in severe weather may result in further injury to the patient, or injury to you, and we already know that’s the last thing that needs to happen.
The best way to prepare for this is to know how to make snowshoes and to keep a means of transporting a patient, such as a sled, handy in case you absolutely have to get out.
Proper vehicle maintenance will go a long way here, too. It’s also good to know how to make a litter to carry somebody should they be injured away from home or camp.
How to Keep Supplies and Equipment from Freezing
All of those great balms, ointments, and elixirs that you have stored in your first aid kit are likely to freeze, and the lubrication in your equipment can freeze and make them difficult, if not impossible, to operate.
The same thing can happen to cloth bandages if they’re even remotely damp.
Any liquid treatment made with a large percentage of alcohol will likely be fine. That includes tinctures and rubbing alcohol. Peroxide will remain liquid up to -60 F or so. If you’re in temperatures that cold, you have bigger problems that a need for peroxide! Other meds such as cough syrup or saline bags will be popsicles.
One med that you really need to keep from freezing is insulin. Every package insert I researched was adamant about not freezing the product. I did some further study, thinking that this was, perhaps, Big Pharma’s way of keeping you from stockpiling product.
What I found was that “R” type insulin may survive freezing and still be viable, while “N” types don’t fare so well. That being said, I am certainly not a doctor, or even a diabetic, so if you have to use frozen insulin, do so at your own risk and monitor your levels closely. Also know that you’re going to be affected by cold weather more than your non-diabetic peers.
For your other antibacterial and special-use ointments, it seems prudent to store them in small enough packages that you can warm them just by holding them in your hands or placing them in your sock or somewhere else on your body.
Carrying MRE heaters or heat packs to warm them as well.
To keep vehicles running in freezing weather, make sure to use a lower viscosity oil in any internal combustion engine and follow the manufacturer’s instructions regarding the proper antifreeze to use in the radiator.
Working with Layers of Clothing
If it’s below freezing, providing treatment while wearing gloves will be difficult. Another problem is that the injured person may need to have protective layers of clothing removed to be treated. In both of these scenarios, the risk of hypothermia and frostbite is increased.
To protect yourself, always carry rubber gloves. This will help in two ways – it will keep you from getting your gloves and skin wet, and rubber gloves will help keep your body temperature in at least a little.
To protect your patient, provide treatment as quickly as possible and get them re-dressed immediately.
Again, carrying heat packs such as hand warmers in your medical kit can help – you can tuck them into areas such as armpits where the heat will be best utilized.
A nice down-filled jacket that was keeping a person warm ten minutes ago can quickly turn into a body-heat sponge that wicks away warmth if it gets wet. Carrying extra clothing in a water-proof pack can be a life saver.
How to Stop Bleeding and Wound Care
When your body is cold, circulation is increased, which means that your blood pressure goes up. Depending on what type of wound you’re dealing with and whether or not blood flow has been restricted in favor of keeping the core warm, it may be harder to stop bleeding.
If the cut is deep and on the trunk, you may have increased blood flow, which means you’ll have to work harder to stop the bleeding. If it’s on an extremity, you may not have problems stopping the bleeding, but will want to make very sure that your bandage is loose enough that it’s not restricting what little circulation is getting to that area.
The bleeding may be large, medium or small, but in the vast majority of cases, (in 80% of them) the bleeding stops through compression if you press down for 3 to 5 minutes. This is one of the things that I’ve learned from dr.Radu Scurtu after reading his book “Survival MD”, but believe me that it’s only a tiny piece of the medical survival knowledge you can get from his guide.
One more thing to learn in order to properly stop the bleeding: take a good look at the color of your blood since it will tell you how bad the wound is and how likely is to stop it by yourself, without involving specialized help. Arterial bleeding has red, purple blood, venous bleeding has black, dark blood. In the first case, you might stop it by compression, but the second one is much more life threatening, and it’s very likely you will need to get the victim to the hospital as soon as possible.
Caloric Intake
We already know that your body needs more calories to properly heal, but it also needs more calories and possibly even more water, to survive in extreme temperatures. Part of this is because every chore is harder because you’re traveling in snow and bad conditions wearing a ton of clothing, and part of it is because your body burns a ton more calories just keeping warm.
Don’t be surprised if you have people experiencing light-headedness or sugar lows, especially if they’re diabetic, if you’re treating them in freezing conditions. Yes, it may be the onset of hypothermia, but it may also simply be that their body is out of gas or dehydrated.
Make sure that everybody in your party makes allowances for up to twice the caloric intake and at least half again the water requirements to avoid this problem. In a pinch, you can always melt snow and ice for water.
Providing adequate first aid in freezing weather will be challenging, but it’s not impossible. The important thing is that you educate yourself and understand the adversities that you’ll face before going in. As in all things survival-related, knowing and being prepared is half the battle.
How to Stay Dry
Aside from gushing wounds or injuries that render you unconscious, being wet is probably the quickest way to die in freezing weather. Wet clothing, including wet shoes and socks, leeches your body heat and causes your core body temp to drop at least as quickly as if you were standing there naked.
If you have a patient that’s gotten wet, the first thing that you need to do, after treating severe bleeding or more life-threatening conditions, is to get them dry. Pack extra clothes in a way that they won’t get wet.
Another point that you may not consider is that sweating makes your clothing wet. For this reason, dress in layers, with the layer next to your skin being made of a wicking material such as wool. This goes for your feet as well as the rest of your body.
If you’re wet, get dry immediately before the doctor … err, first aider … becomes the patient.
Building a Fire
First order of business when setting up camp should be to find a way to get and stay warm and cook food. Building a fire in snow isn’t nearly as easy as it is in warmer conditions but it’s definitely possible, especially if you have a good fire starter.
Carry a fire starting kit to help you kick start your fire.
Finding or Building Shelter
In warm weather, it may be just fine to sleep under the stars but in freezing conditions, you need something that’s going to hold in heat and protect you from the wind and freezing temperatures. In the end, it’s a survival situation and the rule of three is still applying.
If you’ve studied up on your bush craft, you should already know several ways to build a shelter that will sustain the conditions and hold in heat.
You can even build a snow shelter, though it’s a lot of work and takes hours to do. Ice and snow can act as insulators, though that seems counterintuitive. If for no other reason than building a wind-proof shelter, you should carry garbage bags, moon blankets, or tarps.
In addition to making the walls secure against the weather, you also need to make a floor that will protect you. Lying on cold ground will suck the heat right out of your body. You can use tree boughs, tarps, a thick sleeping bag, or even layers of clothing or newspaper to do this.
How to Avoid Detection
If you’re in a survival situation, you may need to avoid detection. That means that you won’t be able to build a fire during the day because of smoke, at least in an open area, and you’ll need to shield the light from dangerous entities at night.
Since a fire is just about a necessity in freezing weather, learn your local terrain and how to use it to build a fire that will keep you warm without giving away your location. If it’s absolutely not possible, you may have to resort to shared body heat to stay warm.
When I lived in WV and CO, there were numerous caves that could be used both as shelter and as a means to have a fire without being detected, but in many places, that’s not an option. Just know your area and work out ways to make this happen.
If you can think of other challenges to providing first aid in freezing weather, please share them with us in the comments section below. And remember that knowledge is the only doctor that can help you survive when there is no medical help around you!

This article has been written by Theresa Crouse for Survivopedia.
1 total views, 1 views today
Rate this article!
[Total: 0 Average: 0/5]
from Survivopedia
Don't forget to visit the store and pick up some gear at
The COR Outfitters. How prepared are you for emergencies?
#SurvivalFirestarter #SurvivalBugOutBackpack #PrepperSurvivalPack #SHTFGear #SHTFBag


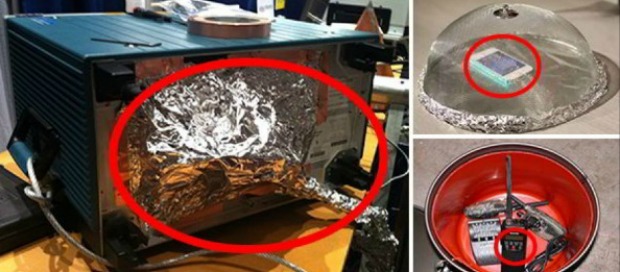
 “Hello my friend and welcome back! I received a letter from one of my readers who goes by the name of Dan. What he wants to know is how he can protect his wind turbine and solar panels, as well as his electronics, from an EMP or another Carrington Event CME. He also wants to know how deep his underground shelter needs to be to protect what he has there. WOW! That was a mouth full. This is the subject of today’s post, so grab a cup of coffee my friend and have a seat while we visit.”
 appliances, either at home or on a business premise. For your system to be exclusively off-grid, it must have absolutely no link to the utility grid.

 If your place is already boarded up and unattractive-looking, don’t bring any more attention to the fact that you’re there than necessary.