Saturday, January 13, 2018

What Did You Do To Prep This Week?

Hello, I hope that everyone is warm and doing well this morning. It’s a cool 20 degrees here now as I write these words and not supposed to warm up much today. One thing is certain, the more cold days we have here the more excited I that I get about turning that page of my calendar over to April.

Just over a week ago the temperatures here dropped down to below just zero and there were lots of reports of frozen water pipes, including mine which stayed frozen up for over a week. Luckily, for me, it wasn’t that a big of a deal because I was prepared for it with other water sources.

...

Read the whole entry... »


from TheSurvivalistBlog.net RSS Feed
Don't forget to visit the store and pick up some gear at The COR Outfitters. Are you ready for any situation?
#SurvivalFirestarter #SurvivalBugOutBackpack #PrepperSurvivalPack #SHTFGear #SHTFBag

Swimming in Snow

Written by Wild Bill on The Prepper Journal.

In a past life I was involved in the Avalanche Survival Classes The Sierra Club taught. This was back when their ranks were filled with outdoor enthusiasts focused on survival and conservation as opposed to politics. Then the organization understood that hunters and fishermen and mountaineers were among the most aware and responsible of people in the wilderness and left the smallest of carbon footprints. As preppers we may end up in the mountains and snow and the physics of snow are another thing to understand to give ourselves the best chance at survival.

While this was all on-piste skiing, the ski patrol was always dealing with the clown that went off-piste and got into trouble. (A note: the term is loosely used to mean within the bounds of a ski area and outside the bounds of a ski area.) Part of the certification process from the Professional Ski Instructors Association (PSIA) was to recognize avalanche potential, on or near ski resorts. As a scientist, I became very interested in this as it was a real world application of some highly technical textbook stuff – a lot of physics as to the bonding of materials, and a lot of fluid mechanics. Working in that alpine environment gave me my first real world experience on how to be “detectable” when you are off the grid. Being buried under a few feet of snow somewhere, anywhere in maybe 200 acres of avalanche slab run off is one hell of a position to end up in. Of course, there were specially trained dogs, transponders and other technical devices to assist…somewhere. Maybe drinking hot cocoa at the warming hut and seldom less than 5 minutes away. I find this interesting because unlike a SHTF scenario your goal here is “how do I QUICKLY get found when I am buried alive!”

Anyone who lives in an area where snow is something to deal with knows the differences in the construction of the snow crystals caused by temperature and humidity. Colder and dryer makes for lighter snow with limited bonding capabilities. You have all seen this in films of skiers blasting through waist or chest deep “powder” with ease, or in trying to make snowballs. On the other hand warmer and higher humidity give you what we called “Sierra Cement” though it has many names, not all of them as complimentary, especially if YOU are the one who has to shovel the porch, walk and/or driveway. The “average” ratio of snow to water is 1:10 – 1 inch of water produces 10 inches of snow. For more on this go here.

Well as you all know sometimes it snows when it is 8 degrees F with a relative humidity below 15% and sometimes it snows when it is 30 degrees F with a relative humidity of 38% or more. (Floridians will shake their heads at these humidity numbers.) What this does is produces layers in any mountain snow pack of dry non-binding snow between layers of wet heavy bonding snow. Now take this snow pack and pitch it on a mountain slope. The steeper the slope, the more likelihood of an avalanche. The reason that a lot of areas that look so tempting around ski areas are “off piste” – closed to resort users. And the exact same reason some idiot is going to chance it to “cut first/fresh/new tracks”.

Now add another variable, the thickness of each layer. Sometimes you get an inch, sometimes it comes in feet. AND when you get a few feet of wet and heavy on a foot of light and dry it compacts it and, for the first few hours does not soak in and stabilize it. This is why after fresh snow fall so many ski areas open late as the ski patrol has to check all the known avalanche-prone areas and do an analysis of the thickness and water content of the fresh layer. Their insurance companies insist upon it. No one checks this outside ski areas so if you are off the grid in this situation this is the time of highest probability of an avalanche. The permutations to this are endless.

A few more fun facts before we talk about how we might survive.

A popular winter “sport” is called “high-marking.” Played with snowmobiles it is exactly what it sounds like – who can make the highest mark on an up-slope covered in snow.

It can have many other names – Bringing Down the Mountain, I Can Die Before You Can, I Didn’t Like this Snowmobile Anyway, Anything You Can Do I Can Do Dumber.

An avalanche slab can move at up to 250 mph (highest ever measured). A large avalanche in North America might release 300,000 cubic yards of snow. That is the equivalent of 20 football fields each filled with 10 feet of snow. Avalanches are normally smaller, but so are we. The reality is if a victim can be rescued within 18 minutes, the survival rate is greater than 91%. Caught in an avalanche the survival rate drops to 34% in burials between 19 and 35 minutes. After one hour, only 1 in 3 victims buried in an avalanche is found alive, and only if they have taken some actions to preserve their lives, and after 2 hours, it changes from rescue to recovery. The theme through all of this that gives me nightmares is you may be buried alive.

So What Do I Do?

Move sideways if you can – like escaping a rip tide.

If you caused it then it may not be happening just above you – attempt to jump up slope to get off of the fractured slab. Claw and crawl if that works. If the slope is very steep, 45 degrees or more, this may only give you a moment to bust a move sideways as the snow above received some support from the slab now sliding away and it has now become unstable as well. And, to be clear, though you may have caused it, the slab above could fracture immediately upon losing the support from the slab already moving away. If the “straw” is there GRAB IT!

NEVER, ever be without a beacon/location transponder. NEVER. Skiing the bunny slope have one. Sitting in the base lodge having a hot buttered rum have one. Nordic skiing open prairie have one. They are water proof so only you will know if you have one when you shower, at home, in Miami. I won’t fault you as they also work in earthquakes, hurricanes, floods, and fires. Not inexpensive but worth the investment.

Yell or blow that whistle if you can, it may help after the slab stops. Avalanches are thunderous. If you are close to a recreational area everyone will hear it and responders will be on their way, and then the noisy wheel gets the oil.

If you can grab something, other than another victim, grab it – a tree, a rock, a lift tower pole if you at a ski resort, straws…ANYTHING. There is an equal chance this will injure you as opposed to save you but given the chance, take it. These objects will create their own air pockets, a best place to be buried, if there is such a thing.

If you are caught dump the skis or snowboard and always keep swimming up towards the surface, and parallel to the flow. You want to be on top or as close to the surface as possible and as close to the edge as possible.

If you are not at the surface create an air pocket as a last measure. Cover your mouth and nose and take a deep breath and push out against the snow in from of your face. If this worked then when you exhale you will have more air to sustain you while you wait for help. If you have the presence of mind wiggle (convulsively) as much as you can when you feel the slab slowing to create more of an air pocket. Once an avalanche stops it sets like Quickrete.

If you are a skier try and hang onto one pole and keep it extended. Almost physically impossible when caught in tons of snow, but worth a try and when you comprehend where “up” is try and push it up to make an air channel as well as a marker for rescuers. When buried in snow, asphyxiation is your biggest worry.

Consider carrying an Avalung mouthpiece, avalanche balloon or avalanche ball. Again, a little pricey but if it is ever needed is does pay for itself.

If you have a pack leave it on: It provides valuable padding to your back and kidneys, it may contains needed supplies, though reaching them will be a superhuman accomplishment, and it makes you a larger object, possibly keeping you closer to the surface.

When the avalanche comes to a stop try and relax. Again snow instantly freezes up like concrete, so most completely buried victims can’t even move their fingers—there’s nothing more you can do so try to relax.

If you do get out stay in a safe place in the area as you have just become the single best source the Rescue Team and other victims have of being reached as you probably saw where at least some other people were.

Now who’s up for a game of “High-marking for Brews?”

Follow us on Facebook!


The post Swimming in Snow appeared first on The Prepper Journal.


from The Prepper Journal
Don't forget to visit the store and pick up some gear at The COR Outfitters. How prepared are you for emergencies?
#SurvivalFirestarter #SurvivalBugOutBackpack #PrepperSurvivalPack #SHTFGear #SHTFBag

Friday, January 12, 2018

Just how to Write a Cultural Analysis Document

Students normally find the acceptable service which could supply a worthy aid and ensure an academic success. At each of the potential method, where the pupils are seeking to find the best creating services they are able to receive the greatest results from these types of services as they’re having the experts that may help provide the most effective product of authorship and all of the composed components are likely to be of proper usage. I’m not a amazing author, and so I like the work your support supplies. Today it’s time to switch the situation with aid from custom article writing service. BestWritingService is among the best custom writing solutions in the business. You’re on the freedom and the most effective website which will provide the compulsory help. The very finest custom essay writers have an interest in being paid so. Hunt the essential problem of your very own custom writing documents. You can even try to manage your composition another document on your own without any custom essays aid. You are assured to get your custom composition ahead of your deadline so you can publish it on-time and obtain a fantastic standard.

Sense is not constantly made by sensations! thankfully, they don’t must.

There aren’t many but some other respectable on-line composition writing companies that provide good – composed papers. Rest www.pay-for-my-essay.com confident that the documents you order inside our web site will depart from your professors impressed. By placing your purchase here, you get a fantastic essay writer as well as an incredible research worker rolled into one. We supply a working guarantee nobody could possibly know that you purchase composition from us!


from Patriot Prepper
Don't forget to visit the store and pick up some gear at The COR Outfitters. Are you ready for any situation?
#SurvivalFirestarter #SurvivalBugOutBackpack #PrepperSurvivalPack #SHTFGear #SHTFBag

Investment Alternatives To An Overpriced Stock Market

Be you an institutional investor, a pensioner looking at your retirement portfolio, or a young 20 something looking to open your first retirement account, a problem facing all investors globally is that nearly every investable asset class is overpriced.

Due to:

  • previous generations investing trillions of dollars into their pensions and retirement plans over the past four decades,
  • central banks across the globe tripling their respective money supplies,
  • as well as China’s economic success creating an investor class bidding up asset prices globally.

The price of stocks, bonds, commodities, treasuries, T-bills, convertible bonds, preferred shares, derivatives, mutual funds, real estate, precious metals, industrial metals, REIT’s, ADR’s, collectables, scotch, even Bitcoin and cryptocurrencies have been bided up well beyond what their cash flows and intrinsic values warrant.

This presents a problem for all investors because as income accrues into larger and larger savings balances, the money needs to be invested somewhere, lest it lose its value against inflation.

But with prices so high, your rates of return are driven so low that you’re looking at a mere fraction of a percent return on savings accounts, a paltry 2-4% on safe, quality bonds, and a pathetic 2% dividend yield from your average S&P 500 stock.

So Where Do You Invest?

The trick is not to look at traditional investments that we have been conditioned to invest in either through “Wall Street” movies, conventional retirement planning, or the tax incentives governments provide for officially sanctioned retirement plans.

It’s to revisit PRECISELY what is an investment and look at our entire personal financial lives to see if there isn’t some unforeseen or overlooked investment we missed.  And when we do this, I think you’ll find there are plenty of investment opportunities, many with lower risks and higher rates of return.

Will You Retire At 60, 70 or 90? Find Out Now!

First, understand an investment has a rate of return.  There has to be some kind of cash flow or profit it generates for its owner.  Stocks pay dividends.  Bonds pay interest.  Real estate pays rent.  These assets are investments because they generate (in theory) more money or “cash flow” over the course of their lives than what you paid to purchase them.

This differentiates these asset classes from commodities, currencies, or collectables since precious metals do not pay dividends, Yen does not pay interest, and baseball cards do not generate rents.  These types of assets are merely SPECULATIVE in nature.

You buy them now in the hopes you can sell them for more later.  But there is no underlying cash flow or profits they generate, therefore, in theory, they have no real value and are therefore NOT investments.

So with this understanding that it is cash flow and profits that make an investment, where else in your personal life can you find an opportunity to pay some money today to increase your cash flow tomorrow?  And there are four general areas in most people’s personal financial lives such a situation exists:

Private companies/Entrepreneurship
Paying off debts
Real estate/rental property
Education/training

These investments may not have the convenience of merely setting up an online brokerage account and trading away or the tax-deductible blessing of your government, but they are mathematically, financially, and factually investments.  Investments that can potentially provide better rates of return than today’s financial markets.

Private Companies/Entrepreneurship

Just because a company isn’t publicly traded on a stock exchange and conveniently purchased via a brokerage account, doesn’t mean you can’t invest in it.  There are thousands of private companies out there, all of which need capital, and at times seek investors from the public.

However, usually they seek investments via “angel investors” or “private equity groups.”  This relegates investing in private companies to those of you who have significant sums of money, usually $250,000 or more.  Still, if you have such sums you may want to consider contacting a private equity group and seeing if they have some investment opportunities for you.

This could range from buying equity in a company (stocks) or lending a company money (bonds), or some kind of hybrid between the two where you lend the company money today and could become a part owner tomorrow (convertible bonds).

However, you don’t have to be rich to invest in a private company.  You can do yourself one step better.  You can start your own company.

Entrepreneurship is, frankly, the best and most self-respecting form of investment out there.  If successful you will be your own boss, all the profits are yours, and if done right you will get much higher rates of return than you will in today’s financial markets.

The only problem is starting a company is hard and takes some creativity, innovation and insight.  Still, this doesn’t mean you can’t pursue some kind of entrepreneurial endeavor in your free time.  And truth be told most forms of entrepreneurship are work you’re already doing but on a contract basis or “moonlighting” on the side.

Programming, accounting, welding, even teaching dance classes after work is more often than not a better expenditure of your time and money and will yield higher rates of return than the paltry 2% dividend you can expect from the market.

Unfortunately (unless you make the company a tangible firm that could potentially be sold later, say like the copyright to a program), there is no opportunity for capital gains in these entrepreneurial endeavors, but again, an investment is NOT “I hope to buy it now for $X and sell it more for $Y.”  It is “what kind of cash flow will my investment generate over the course of time.” 

And I think you’ll find self-employment a much more profitable option than your 2.5% government savings bond.

Paying Off Debts

I always get a kick out of my clients asking me “where should I invest?” when they are loaded to the hilt with debt.

Student loans.
Car loans.
Credit card debts.
Mortgages.

All with interest rates ranging from 4.5% to 23%.

So let me ask you this question:

What is the difference between investing in a bond that pays 4% or paying off your debts that charge an interest rate of 4%?

The answer is nothing.  It results in the same cash flow.  So paying off your debts is no different than had you invested that money traditionally in a stock or a bond.

But paying off debts provides one HUGE advantage over other forms of traditional investing.  It’s risk free.

Realize that when you invest in a stock or bond there’s always the risk you won’t get paid back, the company files for bankruptcy, or there some kind of embezzling or corruption that renders your investment worthless.

But when you pay off your debts it’s 100% risk free because YOU’RE THE RISK.  Your lender is taking the risk that you won’t pay them back.  So paying off your debts is quite literally the only risk free investment in the world.

Additionally, you’re going to be hard-pressed to find a better rate of return than the interest you’ll save paying off your loans.  The lowest interest rates are typically mortgages at 4% or so.  Highest interest rates are typically credit cards around 23% or so.

The stock market only pays a rate of return of 2% in dividends.  Ergo, since most people have some form of debt, that is by far usually the highest returning and risk free investment one should make, and it should be made immediately before any other investments.

Real Estate/Rental Property

Though real estate has certainly been flooded with all sorts of money, both domestic and foreign, real estate does still provide your average investor the potential for higher rates of return than the financial markets.

The key though is that whereas stocks, bonds, and mutual funds are largely susceptible to global economic forces, the individual investor does hold considerable sway and control over which specific pieces of real estate they will invest in.

You can choose whether to invest in a duplex or triplex.  Storage property or a parking lot.  Leasing farmland or and RV park.  Additionally, it is much easier to analyze the profitability of a piece of real estate because most of the variables are either known or can be accurately estimated.

A bank will give you a quote on your mortgage.  An insurance company will give you a quote on your insurance.  Property taxes can be looked up on the internet. And a simple market study will tell you what your likely rents are.

With these variables you should be able to tell whether an individual property will provide the rate of return you need or not.  And if it doesn’t, it’s merely a matter of finding a piece of property that does.

There are risks, however, with investing in real estate.  Namely, people.

Tenants can be a nightmare to deal with as they destroy your property, fail to pay rent, even sue you if local laws favor tenants’ rights over land lord rights.  Because of this you may want to consider properties that do not house humans, but rather things such as storage facilities, parking lots, and garages.

Education and Training

Finally, there is education and training.  One might be confused as to how going to college or learning a trade is an investment, but once again it is no different than paying money now to increase your cash flow later.

And though there is a huge education bubble in the world, if you choose the right degree, profession, or skill, a $20,000 investment today can increase your lifetime earnings by millions, even if you are currently gainfully employed.

The trick is to make sure it’s an investment and not a hobby.  The United States is flooded with millions of young fools all majoring in English, Poetry, Communications, Women’s Studies, Hispanic Studies, Sculpture, and even “Puppetry.”  All of which are hobbies, none of which are investments, let alone professions.

You need to look at fields such as engineering, programming, medicine, accounting, actuarial science, and other fields that are actually in demand in the real world and command a good wage.

And do not think it is only the “esteemed universities and colleges” where you have to fork over 4 years of your youth and $75,000 of your money to earn a coveted degree.  Trade schools, community colleges, programming bootcamps, even self-study and self-certification via (free) online classes like Khan’s Academy and YouTube can provide you the skills you need to significantly increase your future cash flow, all well beyond investing the same money in a bond yielding a whopping 4%.

Look Inwards

The larger point of looking for alternative investments for your money is to focus on cash flow in your own personal life and your personal finances.  Since very few people do this, and most eyes are focused on traditional forms of investment, you’ll be surprised how many genuine investment opportunities there are right in your own backyard.

And while this isn’t to say setting up an IRA or contributing to your pension account isn’t a good idea, it is to say that you can improve your personal finances markedly, perhaps drastically to that of your regular, ole, ho-hum index-investing strategy recommended by today’s conventional finance professionals.

This article has been written by Chris Mills for Survivopedia.


from Survivopedia
Don't forget to visit the store and pick up some gear at The COR Outfitters. How prepared are you for emergencies?
#SurvivalFirestarter #SurvivalBugOutBackpack #PrepperSurvivalPack #SHTFGear #SHTFBag

Be Prepared for Disaster with These Tech Upgrades

Written by Guest Contributor on The Prepper Journal.

Editors Note: Another guest post from Scott to The Prepper Journal. Timely as the world attends the Consumers Electronics Show (CES) in Las Vegas. As always, if you have information for Preppers that you would like to share and possibly receive a $25 cash award as well as be entered into the Prepper Writing Contest with a chance to win one of three Amazon Gift Cards  with the top prize being a $300 card to purchase your own prepping supplies, enter today! And NOW follow us on Facebook!

You don’t need to dig an underground bunker to start planning for the next big disaster. Investing in upgraded disaster preparedness equipment is a smart move. Add these tech items to your disaster preparedness kit now, and you’ll be ready for pretty much any eventuality.

Portable Generators

A good portable generator is the backbone of a survivalist’s tech arsenal. Gas-powered generators can keep your lights and refrigerator on when there’s a serious outage. They also allow you to use cellphones and computers to stay connected.

Small 2 kw generators are ideal for emergency preparedness for most individuals. These units are quiet, fuel efficient, and ideal for keeping low-power appliances on for extended periods of time. Keeping the refrigerator, a few lights, and a computer on can be more than enough during a temporary power loss.

Huge hardwired units, on the other hand, can keep most of your home operational during a blackout. With this kind of generator, you can continue your day-to-day tasks like normal.

Headlamps

Having light can make a world of difference in a survival scenario, even if you’re only using it to finish the next chapter of a good book. The best lights on the market have long-lasting LED bulbs and are often USB rechargeable for convenience and flexibility.

Headlamps are the best emergency lights since they keep your hands free for other important tasks. Lights like the Pelican 2765 are ideal for disaster preparedness kits because they withstand impact, dangerous fumes, and water damage, ensuring you’ll have light when you need it most.

Electricity-Generating Wood Stoves

You can’t always count on electricity or gasoline being available, but you can almost always count on having wood to burn. The BioLite CampStove 2, for example, is an exciting piece of technology that uses a smokeless fire to generate electricity.

This stove is ideal for charging a smartphone or powering a headlamp. It can also be used for heat and cooking. The dual-purpose nature makes this piece of tech an ideal survival tool for the worst-case scenario. When there’s no imminent disaster, the smartphone charging capability can also come in handy during camping trips and tailgate parties.

Water Filters

Ensuring you and your family have access to clean drinking water is an essential step in disaster preparedness. Clean water sources are easily contaminated if a storm compromises treatment facilities. A water filter is essential for both short and long-term resilience to a disaster.

While most filters can capture large particles such as heavy metals, potentially harmful viruses can still pass through to your drinking water. For the most consistent results, it’s best to filter out contaminants with a hollow-core or ceramic water filter, followed by UV water purifier treatment. These handy devices use ultraviolet light to kill off viruses that most filters miss, ensuring clean water access over long periods.

Portable Solar Panels


Barring a meteor impact, sunlight should always be abundant after a disaster. Tapping into the sun’s energy for power is a great way to keep your cellphone and lights going when the power is out. Portable solar panels offer a convenient and lightweight power source you can easily stow in the back of your car until needed.

Portable solar panels, like those tested by Outdoor Gear Lab, reliably generate power in sunny conditions, and their flexible design makes them durable enough to last during a disaster. You can even pair these systems with a battery pack so you can continue using your phone while your panels soak up the sun.

Smartphone Survival Apps

With a reliable backup power source, your smartphone can provide essentially limitless information for many survival scenarios. There are several apps that provide off-line access to critical information for emergency situations, ensuring you can make informed decisions when it matters most.

The American Red Cross offers several first aid apps, including a guide to common first aid issues and a pet first aid guide. The organization also offer several applications for emergency alerts and disaster monitoring for everything from tornadoes to floods.

Home Security Systems

Keeping your family safe doesn’t necessitate a massive disaster. Threats like a home invasion can be just as financially and emotionally devastating as a flood. You can ensure your home is safe and protected with a comprehensive home security system. Bleeding-edge technologies in the security field also offer many benefits for homeowners concerned with preparedness.

Smart home technologies, including automatic locks, doorbell cameras, and smart smoke detectors work around the clock with home monitoring services to ensure your home is completely secure, even when you’re not home. Many systems also interface with digital assistants like Amazon Alexa so you can easily program and monitor your system from any mobile device and any location.

Portable Emergency Weather Radio

It’s not flashy—and it certainly isn’t high tech—but a reliable hand-crank emergency weather radio is one of the best tech items you can include in your disaster planning. Weather radios pick up NOAA weather bands to keep you alert and prepared during any natural disaster, even if your local cell towers are already down.

The best emergency radios double as flashlights, and many newer models include a USB outlet for charging a cellphone or USB-powered light. Most models charge using a hand crank or solar panel, ensuring they’ll work in all weather conditions. An AM/FM receiver can also entertain you with music when you’re waiting for the lights to come on.

As you look to expand your current disaster preparedness kit, consider adding the above-listed items so you’ve got the tech you need to help you weather any storm.


The post Be Prepared for Disaster with These Tech Upgrades appeared first on The Prepper Journal.


from The Prepper Journal
Don't forget to visit the store and pick up some gear at The COR Outfitters. How prepared are you for emergencies?
#SurvivalFirestarter #SurvivalBugOutBackpack #PrepperSurvivalPack #SHTFGear #SHTFBag

Thursday, January 11, 2018

Sample Page of Congratulations

The quality of said duties might be checked with aid from illustration article which could be supplied free of charge. There are quite a few other processes to approach composing such documents. Pupils that are indolent in performing their work plus they don’t want to include superior essay companies are found to utilize instance essays as their closing work. In cases in this way, essay illustration is the greatest alternative as it includes plenty of sources which were picked by the skilled authors. The example article will comprise not just the contents of the correct document it self, but similarly the format of everything like the synopsis, referencing design, yet the achievable references itself. Among the best ways of better understand every kind of article is always to evaluation examples. Have a look at the Walmart composition on these webpages. Your satirical article may make extra brownie points with a suitable title. Now you have the essential points of your own composition, it is moment to organize them all in ways which makes perception.

Get all 40 periods of particular child university talk on my website for *free*..

Each important level or debate has to be discussed in one or a number of paragraphs in the primary body of the essay. The writer might then go to my blog about thesis writing function on one portion of the essay previously, alternating between examination and writing. College application essay writing demands plenty of thought and lots of imagination. There are numerous online libraries and informative websites connected to academic composing. Such pupil wouldn’t stress as they might understand just how to begin the writing job and the manner to conclude it. Use it in order to monitor your own creating, or discover a fellow ( another pupil ) to assist you. An article is an ongoing piece of writing and ought not to feature subtitles. Ergo, you should select the starting of your own reflective essay critically.

This really is done at schools and faculties.

Although the narrative is among the very best kinds of writing for an essay, also it may be challenging. Read the criticism of the fast article. Decision is the final area of the essay your reader may encounter. The advent of an article is really a section where the audience is informed what the article is focused on, and what sort of information it truly is going to include. Starting an essay using a succinct story is easily the most typical and productive of said methods. Preparing an essay might be a quite fascinating occupation, but not for all. Occasionally a full essay can center around only one historical illustration. A great article strategy is favorable for building an opening.

This may be the reason alicia is experienced in dancing along with acting.

The decision of an argumentative essay are at least as critical as the opening. The perfect thought that you have to focus up on initially, is the aim of writing this essay. Today you comprehend the best way to compose a brilliant ACT article. Assess the article actually covers the problems it’s designed to. Be sure your composition stands out. This essay is not going to earn a scholarship! The Typical Application’s individual article permits a student to compose just one article for multiple colleges. If you would like your essay to be respectable, you need to read the papers of additional folks first.


from Patriot Prepper
Don't forget to visit the store and pick up some gear at The COR Outfitters. Are you ready for any situation?
#SurvivalFirestarter #SurvivalBugOutBackpack #PrepperSurvivalPack #SHTFGear #SHTFBag

DIY Survival Defense: Items You Can Turn Into Throwing Spikes

Through the years, I’ve noticed preppers tending to fall into one of two categories, when it comes to self-defense.

The first category is the survivalists who are all about guns and bullets. Their self-defense strategy is to outgun the other guys by having more firepower. The second is into other types of weapons. While they might not be against firearms in general, they don’t want to depend on them for their survival.

I guess you could say that I’m part of both groups. I’m a big fan of guns, carrying concealed and stockpiling enough ammunition to get me through a small war.

But on the other hand, I would rather save my guns and ammo for a last line of defense. When it comes time for survival hunting or just defending myself, I’d rather use something that’s not going to make so much noise and attract so much attention.

So, while I carry concealed and make an effort to get to the shooting range every week, I haven’t limited my arsenal to only firearms. I carry a fighting knife, concealed, right alongside my pistol and I practice regularly with my bow and crossbow. Fortunately, I can do that in my backyard, rather than having to pay for more range time.

I am also constantly on the lookout for other weapons, either to add to my collection now or to make for myself, should the need arise. I believe that the ability to make weapons is an essential survival skill, especially if we are ever faced with a major disaster that takes down the grid or otherwise serves to disrupt society as we know it.

As part of this effort, I’ve made my own bows and arrows, experimenting with several ways of making arrowheads for your survival defense. I’ve also made a number of knives and other handheld weapons. This led me to looking into the idea of throwing spikes.

Click here to get your guide to a layered survival defense!

If you aren’t familiar with throwing spikes, they are a martial arts weapon, originating in the orient. It’s not sure whether they are an outgrowth of throwing knives or of throwing stars, as they are somewhat of a combination of the two.

There are several things that make throwing spikes attractive as a survival weapon. First of all, they are considerably easier to make than either knives or throwing stars, not requiring the fine degree of balance that a throwing knife requires and much easier to shape than a throwing star.

Secondly, a number of them can be carried quite easily, attaching a multi-pocketed sheathe to either the forearm, the belt or a tactical vest. Finally, they are small and lightweight, making it easy to carry a number of them, without them encumbering you.

One thing to keep in mind with throwing spikes, as with throwing knives or throwing stars is that Hollywood aside; you probably won’t instantly kill your opponent with them. These weapons are more disabling weapons, than they are killing weapons. But that’s okay. In a self-defense situation you don’t necessarily need to kill the person, you just need to disable them enough to allow you to escape.

Throwing Spike Design

There is some confusion on the internet over throwing knives, throwing stars and throwing spikes. That’s mostly because there is some overlap between their designs. Suffice it to say that all of them are pointed weapons, intended to be thrown a short range, by hand, in such a way as to stick firmly into the intended victim, causing them harm.

As I mentioned above, what makes throwing spikes attractive as a weapon for survival is the ease of making them.

Unlike a knife, there is no blade to sharpen, just a point. And unlike a throwing star, there is no complex shape to cut out. All you have to do is cut the material to length and sharpen it.

Throwing spikes can be single ended or double-ended. The only real advantage of a double-ended one is that you don’t have to worry about how you grab it. It will work the same with either end hitting. Some people like a tail or tassel on their throwing spike, which helps you to throw it straight; however, these weapons didn’t traditionally have any sort of tail.

The basic throwing spike is about six inches long and from 1/4” to 1/2” in diameter. Thicker spikes are heavier, requiring more strength to throw. At the same time, they have more momentum when they hit, so are likely to do more damage.

Making a throwing spike consists of cutting off the material to length and sharpening one or both ends. Cheap throwing spikes will only have a very short point, less than an inch long.

Ideally, you want that point to be at least two inches long, which allows it to be sharper, increasing the ease of penetration. The thicker the material used, the longer the point will need to be, in order to have the same angle.

Materials You Can Use to Make Throwing Spikes

Ideally, throwing spikes are made of a hardened tool steel. Soft, cold rolled steel, of the type you can buy at your local hardware store, can be used for practice, but you really wouldn’t want to use throwing spikes made out of cold rolled steel as a weapon. The tip would bend or break too easily. You need hardened steel, so that the point doesn’t bend.

This means either buying tool steel rod or using whatever readily available material you can find. One of your limiting factors here is going to be what you have to cut the steel with. The best thing to have is a band saw, with a metal cutting blade. Even if the band saw was not originally designed for cutting metal, it will still work, as long as you have the right kind of blade.

The other thing you’ll need to do, to use any power saw for cutting steel, is to cool the steel with oil. This will help prevent the metal and blade from overheating, which will cause the blade to go dull very quickly.

True metal-cutting band saws have a pump so that they can spray a cooling fluid onto the metal at the point of cut. But if you don’t have one of these, you can do a pretty good job by just spraying oil on the metal and blade every few seconds.

So, what sorts of makeshift materials can you scrounge to make your throwing spikes out of?

  • Broken screwdrivers
  • Hardened (grade 5 or 8) bolts
  • Leaf springs from cars
  • The rods from old shock absorbers
  • Engine lifter rods (these are just about perfect)
  • Metal-cutting files and woodworking rasps

If your tool collection is limited, you may want to stick to materials that are already about the right diameter, such as the engine lifter rods or broken screwdrivers, so that all you have to do is cut them to length and sharpen them.

Making the Throwing Spikes

There really isn’t much to making a throwing spike, as it is one of the simplest weapons there is. The first thing you have to do is cut it to length and the second is sharpen it. That’s it.

I have made knives using both a bench grinder and a bench-mounted belt sander. Of the two, I prefer using the belt sander, as it gives me a broader grind surface. This helps to control the cut better, providing me with a cleaner, non-segmented grind.

When using a bench grinder, there is a tendency to end up with a somewhat segmented surface, unless you are extremely careful and consistent in how you move the material over the grinding wheels.

No matter which you use, chances are that you will generate enough heat in the metal to turn the tip blue. This, or the metal turning red while grinding, indicate that you have lost the temper in the steel. So, once you finish grinding the spikes, you really need to temper them, once again.

Tempering will require a torch or forge, so that you can heat the metal up until it is red hot. Once heated, the metal is then quenched in an oil bath (not a water one). The oil absorbs the heat from the metal at a controlled rate, providing the final temper to it.

Video first seen on The Small Workshop.

Throwing Spikes

Throwing spikes are thrown differently than knives or stars. Typically with knives, you’re looking to flip the knife, spinning it into the target. Depending on the range to your target, you try to have from one to three flips, so that the knife arrives at the target point first.

Learning how to throw by both the blade of the knife and the handle allows you to go for half-flips, giving you more steps in the number of flips between you and the target.

But a throwing spike is thrown flat, not flipped. While this means that you won’t be able to throw it as far as a knife, it also means that you won’t have to worry about ensuring that it arrives point first; it will be point first from the time it leaves your hand.

The trick to throwing flat is the way you hold the spike. Rather than holding it between your thumb and forefinger, you hold your hand flat and allow the spike to sit against the flat of your hand, with your thumb holding it in place and the point about equal with your fingertips. This hold is critical to keeping the spike on a flat trajectory.

The throw itself is made by swinging the arm up, bending the elbow, so that the hand is beside the ear. From there, the hand is moved forcibly towards the target, as if you are trying to point to it. At the moment the arm is fully extended, the thumb releases the spike, allowing it to slide off the hand, directly at the target. Once released, the arm drops to the side in the “follow through” to the throw.

Please note that you will need some practice to get this technique right. It is actually easier to throw a knife by flipping it, than it is to throw a spike flat. But it is easier to get the spike to stick, simply because it will always hit the target point first, once you get the technique down. That is useful when you are in a rapidly changing situation, defending yourself.

This article has been written by Bill White for Survivopedia.


from Survivopedia
Don't forget to visit the store and pick up some gear at The COR Outfitters. How prepared are you for emergencies?
#SurvivalFirestarter #SurvivalBugOutBackpack #PrepperSurvivalPack #SHTFGear #SHTFBag

AR Advanced 80% Receiver Jig Comparison

Written by John Hertig on The Prepper Journal.

Editors Note: Another guest post from John Hertig, number 24 I believe, to The Prepper Journal. As always, if you have information for Preppers that you would like to share and possibly receive a $25 cash award as well as be entered into the Prepper Writing Contest with a chance to win one of three Amazon Gift Cards  with the top prize being a $300 card to purchase your own prepping supplies, enter today!

There are many jigs to aid you in completing an 80% AR-15 (or AR-10/AR-308) receiver, with router based systems generally being preferable. One of the better examples of this style was the Easy Jig by 80percentarms.com.  Then a step forward in jig technology became available from 5D tactical. This system offered much less drilling, more convenient depth setting gauges, more accurate positioning of the jig with respect to the receiver, a larger diameter, better supported end mill bit, less swapping of jig parts during the milling process and a “touch free” (the end mill bit never touches the jig) guide system. All in all it was a significant step forward in 80% jig technology, and a similarly advanced Generation 2 of the Easy Jig became available not long afterwards. As far as I know, these two are the state of the art in jigs at this instant in time (October 2017).

So which one is better? Ask and you’ll likely get one of three answers: 5D tactical, Easy Jig Gen 2, or “If you do only AR-15s then 5D else Gen 2”, and in many cases, the person responding has only used one of them, so their answer is suspect. I imagine that you can count the number of people who have used both on the thumbs of one hand, since neither one is inexpensive.  I got the 5D tactical because at that instant in time it was the only one known, but upon finding out later about the Gen 2, I thought it might address a couple of things I didn’t like about the 5D jig; those quirks were not significant enough though to justify getting yet another jig. But it annoys me when people say one or the other is better unless they have actually used both of them. I contacted 80% Arms to see if they were interested in me doing a head to head comparison, and they agreed.

I’m a fan of the Tennessee Arms brass reinforced polymer receivers but to give the jigs a real test, I got billet receivers from 80% Arms. This was because they were the only place I found which had lowers (and uppers) which matched a particular color I wanted AND could engrave them, and although the other color I use is universally available, I wanted all the test receivers to be as identical as practical to ensure the most accurate comparison. I am quite competent mechanically and have done a few 80% AR receivers using a drill press jig, an Easy Jig Gen 1 and the 5D tactical jig so far, so can be considered quite familiar with the process.

The test will be a billet receiver completed in the 5D jig immediately followed by one in the 80% Arms jig. As a final step, I have a friend who wants an AR in that non-standard color, and has not only never done an 80% before, but is completely unpracticed with anything mechanical, so I’ll have her use the “better” (in my opinion) or at least “easiest” jig to see how “idiot proof” it is.

We will use the Dewalt DWP611 trim router, as in my opinion (as well as many others); it is the best router for this task. And our cutting fluid will be Tap Magic Aluminum, because that is what I have from some people’s recommendations when I started out, and it seems to work well. There may be better choices, but as long as it is used with both jigs, should not affect the comparison.

Specification Comparison (From the Web Sites) 

5D offers free shipping on orders over $200 and so does 80% Arms. The 80% Arms Gen 2 jigs are being ordered faster than they can make them and the site says to expect three weeks between order and shipping.

Construction – Both jigs being compared have the steel side plates to better resist the guide holes being enlarged during drilling and to be as equivalent to each other as possible. If you are very skillful at hand drilling or only need to do a couple of receivers or have a drill press, you can save some money by getting the aluminum version of the 5D jig (AR-15 only). If you’re using a hand drill and are not great at keeping it absolutely perpendicular, the thicker the sidewalls, the less chance you have of drilling the holes at an angle (and messing up the side plates). The 5D walls are supposed to be 1/2″ thick and the 80% Arms walls are supposed to be 3/4″ thick. If you are still nervous, 80% Arms has a hardened steel “stabilizer” which mounts to the side plate and doubles the amount of the drill bit supported to an equivalent of 1 1/2″ thickness. These accessories cost $20 each or a set of two is $30.

Routers Supported – Both can use a quality trim router like the Dewalt. The Gen 2 has an adapter available for an additional $30 which allows use of a full size router. This would be handy if that is the router you already have (and you have a 1/4″ collet for it), but I’m wondering if it would be more difficult to use precisely. I find that hands on the trim router base gives a “better touch” than grasping full size router handles.

Universality – The 5D jig only does AR-15. There is a conversion kit for AR-308 available for $130 (on sale for $120). The Gen 2 can do both. Neither jig contacts the receiver, so should handle most of the receivers out there, although being closed ended, they may have difficulties with receivers with buffer tube sockets longer than spec.

Guide Methodology – The 5D jig has two guide pins which go into guide depressions on each side of the receiver. This could work very well, but you will have to stop milling twice to change the lengths of the pins, which confines your milling to the appropriate areas. And if you drop one of the small parts, you have to look for it, and if you can’t find it, you are at a standstill until you get it replaced. The Gen 2 has a bushing around the bit which rides on the jig; you are limited to the proper area by a pin which goes through a hole across the jig to block the bushing from going into the take-down lug pocket are, and a sub jig is screwed in place to guide milling the trigger slot.

Drilling Required – The 5D jig requires two holes to be drilled, a 3/8″ hole to depth to start the router in, and a 5/16″ hole all the way through as a pilot for the trigger slot, although using a 5/16″ hole for a 5/16″ end mill bit might be a bit tight. Since you are drilling from the top of the receiver, the drill bit can’t “walk” like it can if you drill this hole after milling out the cavity as was required when using older technology jigs, which leaves you with a notch in the side of your trigger slot.  In the 5D, the drill guide is about 3/4″ thick, so using a hand drill can still end up in the hole being at an angle and there have been reports of this happening. Unless you are really good at keeping a hand drill perpendicular, it is better to use a drill press for this hole. The Gen 2 requires only one hole to be drilled, an 11/32″ hole all the way through both to start the router in and as a trigger slot pilot. Although better than 5/16″ for starting the router bit each pass, it is a bit tighter than 3/8″. But if you used a 3/8″ pilot hole, it would be bigger than the trigger slot it is pilot for. The 80% Arms drill guide is 1 1/2″ thick, which should make it harder to screw up with a hand drill. I have not seen any reports of people’s trigger hole being messed up with this jig.

End Mill Bit – Both require using their own (or possibly each other’s) end mill, because neither uses the shank of the bit as a guide like the older technology jigs. The 5D bit tapers from the 1/4″ shaft used by trim routers to 5/16″ for the rest of the shaft to the cutting flutes to reduce flexing and improve cutting. The Gen 2 has the same sizes, but “steps” from one to the other. Either company charges $50 for the complete tool set or $40 for the end mill bit alone. A taper is intrinsically stronger than a step, but since in both jigs the bit is supported by a bearing at the router base well below the transition, that would seem to be a moot point. It is easier to correctly position the step; if you were to tighten the router collet on the tapered section, it is likely to work free and cause problems.

Unique Features – The Gen 2 has a port to which you can connect a Shop-Vac to help suck out the chips.

5D Tactical Jig – Assembly  

Assembling the 5D jig is a bit more involved than some older jigs, but not excessively so. You have to provide your own Allen wrenches (3/16 and 7/64) which some jigs come with, and you need a Phillips screwdriver. The drill guide is held to the side plates by four Phillips flat head screws. The orientation is critical, so the hole spacing is made slightly different side-to-side, preventing you from fastening it in place wrong. This can be disconcerting if you try to install it incorrectly. The pivot pin holder attaches to the front of the jig with two more of these screws. The jig panel is held to the side plates by six Allen head cap screws. There is a disc which screws into the buffer tube socket; if getting it in (or out) is a problem, screw the last two Phillips flat head screws in part way to act as a “handle”. This disc needs to be installed before inserting the receiver into the jig. The receiver is held in the jig by a pin through the pivot pin lug, a pin through the take-down pin lug, and two flat head screws through the jig end into that disk screwed into the buffer tube socket. Make sure you put the pins in before tightening the screws into the disk, or the receiver may be pulled too far to the rear for the pins to go in.  The final assembly step is to thread a long Allen head cap screw from one side plate through the other. Since both side plates are threaded, this keeps the jig from distorting when clamped in the vise. Once assembled, you can remove the receiver by removing that long screw from the bottom and the two flat head screws from the buffer tube disk. Pull the two pins and the receiver drops out. With the pins in place and the two screws tightened into the disk, the receiver does not move at all in the jig.

Note that if your buffer tube socket is longer than mil-spec, it won’t fit into the 5D jig unless you modify the jig plate. The first one I did with this jig was a Tennessee Arms Liberator, which was significantly longer than spec, so I used a 1/4″ end mill and my drill press to cut notches in each side of the end bar to allow the receiver to be installed. I can’t say for sure, but mounting the 80percentarms receiver to be used in this comparison, it appeared this receiver also might not have fit if the modification had not been done, although it looked to be real close.

The router has to be prepared as well. Remove the factory base.  Insert the end mill bit into the router and finger tighten the collet (a segmented band or sleeve put around a shaft or spindle and tightened so as to grip it) until the bit just barely slides, then push in the bit until it stops (hits the start of the taper). Pull the bit back out about a 1/16 of an inch, and tighten the collet VERY TIGHT. Use a “real” wrench rather than the short, thin one supplied with the router. Adjust the depth so that the collet is ABOVE the end of the router (so it is “inside”). Carefully slide the jig router base bearing over the end mill bit, and fasten the jig router base to the router following the instructions for your router. The Dewalt just takes 4 screws though the jig base into threaded holes in the router base. Once the router is ready, adjust the depth to the initial mark in depth gauge 1.

Install the first set of guide pins into the jig base on the router. These are the shortest ones, for milling “full length”, including the take-down pin pocket. I don’t use this, preferring to fit the upper to the lower manually using AC Delco Gear Marking compound on the take-down lug. I force the lug into the pocket as far as it will go; when I remove it, some of the yellow goo has transferred to the places in the pocket which are tight. These areas can be ground down with a Dremil tool, and the upper installed again to find where else it is tight. I repeat this sequence until the upper fits, then wipe off the remaining goo. This provides the best fit of the upper, and reduces the chances of damage to the buffer stop pin hole or the take-down pin detent hole from over enthusiastic milling. If the take-down pin pocket is not already milled at all or you don’t want to “hand fit” the upper, do use the shortest guide pins. If you don’t want to mill the take-down pin pocket, use the medium length guide pins to start.

The instructions are good, but appear to only be available on the site as both text (PDF, so you could print them out) and video.

80% Arms Gen2 Jig – Assembly  

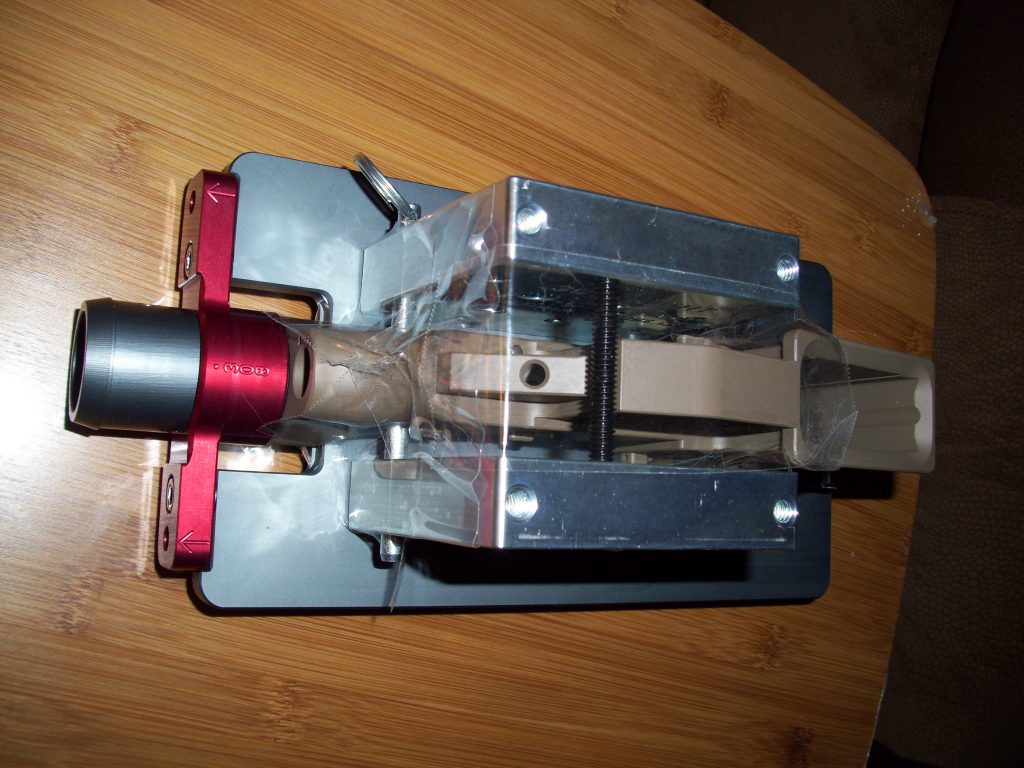
The 80% Arms jig requires assembling as well. In fact, before you can assemble it, you have to “disassemble” it because it comes with the big parts bolted together with two bolts which you are instructed to discard. I wouldn’t toss them; but would keep them for packing away the jig later. All the assembly (and disassembly) uses the supplied (3/16″) Allen wrench.  There are two nylon tubes through the selector holes which hold the side plates securely together; the plates must be pulled apart against the friction of these tubes. I would also save these tubes for future storage of the jig.

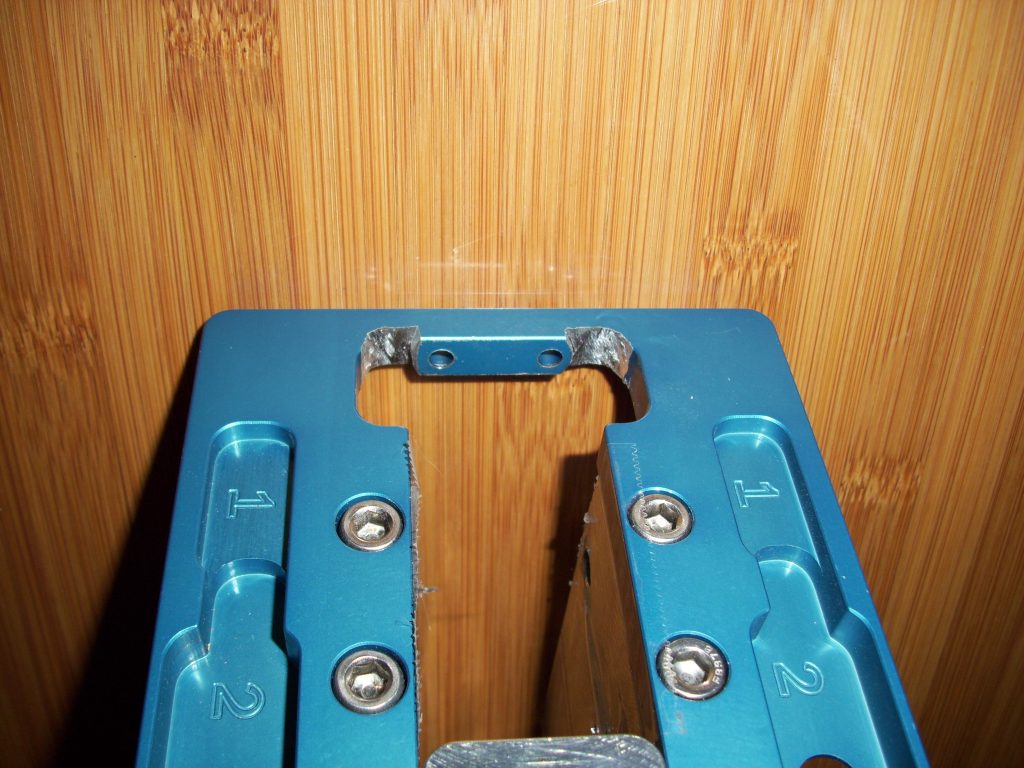
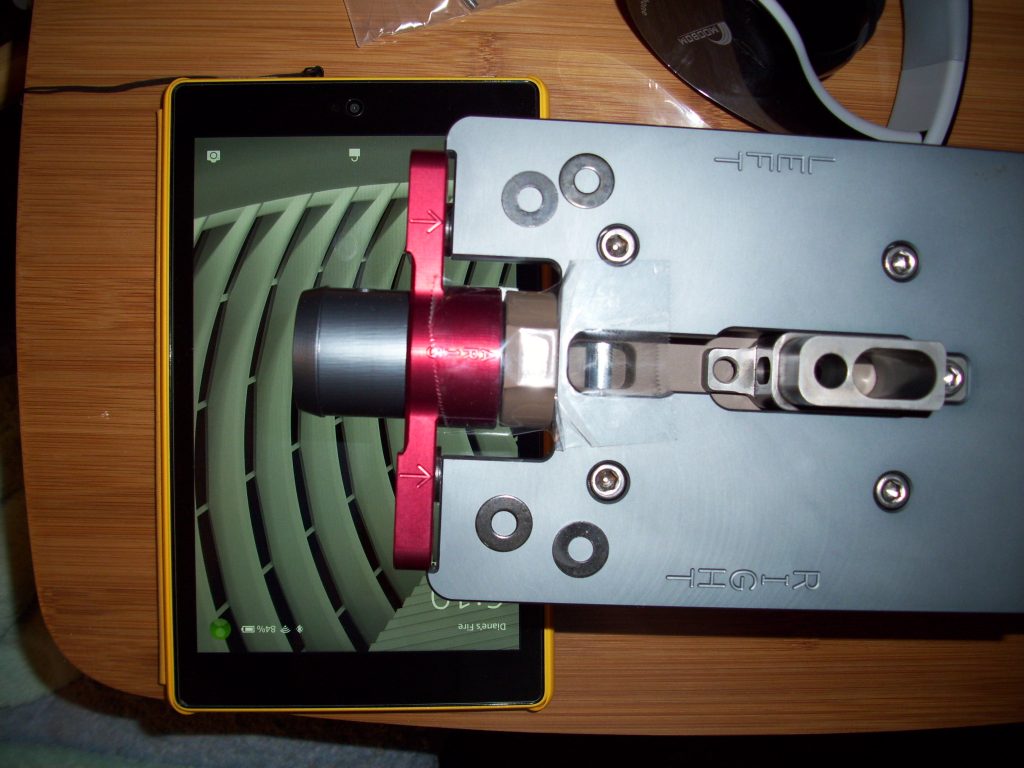
The side plates are connected to the top plate with two cap screws each, which should not be completely tightened in order to allow final fitting. Follow the instructions to figure out which direction to mount them for the model you will be making, and make sure the directional label on each side plate matches the directional label on the top plate. The buffer tube support is screwed to the end of the top plate with two more cap screws which should also not be completely tightened. Follow the instructions to get it into the correct orientation for your model, and put the cap screws in the RECESSED holes, not the flush ones. Slide the receiver into the jig; if there is a gap between the top of the receiver and the bar across the top plate right behind the magazine well, put some layers of painter’s tape on the top of the bar to fill the gap.  Insert the appropriate set of pins through the jig and the pivot and take-down pin holes in the receiver, then get the buffer tube (Shop-Vac port) started in the buffer tube socket and screw it in only three full turns (to allow final adjustment) then tighten the two cap screws holding on the buffer tube support. Screw the long bolt though the threaded hole at the bottom of each side plate, to prevent deformation when clamping into the vise. Now follow the instructions on how to tighten the four cap screws and the buffer tube screw (using the Allen wrench through the two holes) in order to ensure the jig and receiver are assembled square to each other. The receiver should have no movement when correctly mounted in the jig.

The 80percentarms receiver just barely fits in the jig lengthwise, and in fact, some of the cerakote was scuffed and a bit even scraped off the end of my buffer tube socket due to contact with the buffer screw support.  The Tennessee Arms receiver did not fit at all. However, since the buffer tube support is bolted on, placing one or more pairs of washers between the support and the top plate should solve any reasonable length problem. Get “fancy” ones which are all the same thickness to avoid having this part at an angle to the receiver. 80% Arms also has an AR-15 only version of the Gen 2 for less money than the universal Gen 2 version. This has a fixed end bar, so probably will not allow receivers with buffer tube sockets much longer than mil-spec to be inserted. And it looks to be more difficult to modify than the 5D jig.

The last step is to install the pilot hole guide, which can only go in one way with an unmilled receiver installed, and is held in place with the last cap screw. In order to maximize the effectiveness of the Shop-Vac chip removal, use tape to close off the top half (above the jig) of the Shop-Vac port as well as all the holes in and around and between the side plates. The port requires a 1 1/4″ hose, but is male, and most hoses have a male end as well. If you have a spare or dedicated hose, you can cut off the end, or you can get a short length of 1 1/4″ hose from a bigger hardware store to connect a male hose end to the port.

As for the router setup, it is essentially the same as the 5D. The only differences are that it is easier to position the step about 1/16″ below the collet than it is the taper, and there is a centering procedure for the bearing described in the instructions which is pretty important. You will need a Phillips screwdriver and/or whatever tool is used to remove the stock router base.

One thing to be aware of: the thickness of the sidewalls pushes the overall width which needs to be in the vice to 3 1/8″, which didn’t fit into my 3″ jaw drill press vice; so I used a bench vice.

The instructions are very detailed and included in printed form in the package; the latest version is also available in PDF form on the web site. I could not find video instructions on the site, but one was done by an 80% Arms dealer at www.80-lower.com and you may be able to find others.

5D Tactical Jig – Experienced User  

Drilling the pilot holes was about the same as every other jig; just a lot fewer were required. Only two holes are needed, one 3/8″ hole to depth (which requires accurate placement of a drill stop using the built-in depth guides) and one 5/16″ trigger slot pilot hole (which needs to be prevented from drilling into the built-in trigger guard, if present). The guide for these two holes is “flush” to the jig plate, which is necessary to set the drill depth, but does not provide “enough” guide stability for the trigger pilot hole, and has no way for chips to get out except the top of the hole, which makes it a bit more difficult than jigs which have an escape hole or channel at the bottom. My 5/16″ drill (not from 5D) was long enough that even fully chucked it could ding the built-in trigger guard, so I used the 3/8″ drill stop on the 5/16″ bit as a safety. As others have reported, the hole angled to one side, meaning I’ll have a notch in the side of my trigger slot, which is primarily a cosmetic problem. Still, I strongly suggest using a drill press for this hole.

After drilling the holes, remove the four screws and pry out the hole guide (the Phillips screwdriver in the smaller hole works well).

The first pass was a surprise, both good and a bit annoying. The end mill cut like a dream, much better than my previous experience with the 1/4″ end mill in the 80% Arms Gen 1 jig, but it threw the chips EVERYWHERE! There were none in the cavity except for a few in the pilot hole. I found this intolerable, and even though it would not be a “true” comparison, I installed and used the Dewalt accessory vacuum port to keep the chips somewhat under control.  This did not cure the problem, but it did reduce the scope adequately during the passes for depth gauge one. By the time I reached the end of this depth gauge, the hole was deep enough to contain a majority of the chips, and the vacuum no longer had much effect anyway.

After several passes, I noted that the two screws holding the buffer tube disk in place had backed out some. Keep an eye on these; if they are, or work loose from the vibrations, the receiver can move in the jig, which has negative implications for the accuracy of the results.

Also, since the guide system uses two points, if you allow the router base to rotate, the end mill won’t be able to reach all the way to one side. I was standing to the side of the jig to do the milling and after a few passes, I noticed that the side wall on the side next to me was tapered, so had to go back and redo those passes. I suggest ending each pass with a complete clockwise tour around the outside of the cavity making sure the jig base plate is parallel to the sides of the jig plate, as if the base rotates, it changes the geometry of the guide system. I fought this tendency during the entire process and even then occasionally ended up with a bump on the near wall which had to be redone. The previous time I used this jig, I was standing at the buffer tube end and did not have this problem, so I suggest NOT standing to the side during milling.

When I bottomed out on depth gauge one, I would have had to change pins if I had been milling the take down lug pocket. As it was, I could continue with depth gauge two without stopping. Although the suggested depth increments worked well during depth gauge one, I found that using 1/2 mark increments was better during depth gauge two. The marks were a bit difficult to see in limited lighting.

During the depth gauge two phase of this test, the router depth stop loosened, requiring me to re-tighten it and redo some passes to even out the floor. I suggest checking the bit and depth stop tightness right before starting and when you go from depth gauge one to depth gauge two. It would not be unwise to do a final check of these again before doing the last few passes. I was astonished to find an unexpected slot along the grip lug; on measuring the cavity, I found that it was .06″ too deep. Double checking the jig depth gauge, it is correct, so either the bit slipped, the router depth slipped, or I left a gap between the router base and the edge of the jig when setting the final depth. I suggest it is always a good idea to use a digital depth gauge to check the depth of each of the last few passes before completing the pass.

I’ve always thought that using a 5/16″ guide hole for a 5/16″ mill would be a problem, but since my guide hole was off center, I could not verify that; I had to use the “tilt in” method to cut the trigger slot.

The cavity looked to be correct and the finish was very nice. Drilling the selector and pin holes with a hand drill was about the same as any other good jig. The completed receiver accepted the LPK and functioned flawlessly, and the upper fit nicely. If you do your part, this jig can produce top notch results with much less work than with an older technology jig, but it does offer you opportunities to screw things up.

80% Arms Gen 2 Jig – Experienced User  

Drilling the single pilot hole was a joy, at least relatively speaking. The guide is thick enough that it provides lots of support for keeping the drill vertical, encouraging no nicks along the sides of the trigger slot, and along with the 80% Arms length drill, makes it “impossible” to ding up any built in trigger guard. The instructions are very specific that you NOT use a cordless drill. I violated that specification shamelessly, since I have a good (powerful) cordless drill and do not have a good corded drill, and other than possibly for this use, have no interest in getting a good corded drill. My drill worked fine for me. Due to the depth of cut and risk of binding, if you don’t have a powerful cordless drill with good battery capacity, use a corded drill as specified. There is a hole on each side of the guide which aids in chip removal without sacrificing any guidance of the drill. The resulting pilot hole was dead centered in the trigger slot. Usually using a drill press for this hole is best with any jig, but in the case of this jig, it is less necessary and more difficult to do, as the higher guide might not fit, requiring you to play tricks with the table height.

Starting out, the single pilot hole is hard to find with the bit by feel; the quickest way to find it is visually; a small bright flashlight is helpful. Once you get it centered in the hole, it cuts very smoothly. And as you get deeper in the cavity, it seems to be easier to find the pilot hole, getting harder again as you near the bottom. It does not throw chips out the top like the 5D, and with the holes and slots taped up and a shop vac attached and running, the chips are fairly well controlled. Without the vac running, chips still are not much of a problem, except you do need to suck them out manually after each pass. It is wise to check after each pass and manually suck any remaining chips, particularly when using depth gauge two.

The one point guide system has no risk of changing geometry like the two point system does, but it is still a good idea to go around the outside once you think you are done milling a pass. That small circular movement methodology these advanced jigs require makes it easy to miss getting into the corner. The marks were a bit easier to read than the 5D, but the last few in the gauge did need more light to see.

As learned with the 5D jig, I checked the tightness of the bit and the depth stop when moving from gauge one to the second gauge, and I started each of the last passes and immediately checked the depth before continuing. As a result of paying close attention, no equipment dared to act up and the result was an excellent cavity, with a nice finish.

Drilling the selector and pin holes with a hand drill was a bit more stable than with the 5D jig, although there are more holes in the side plate, which can be a bit confusing. When drilling on the other side, I added the accessory stabilizer, which went on easily and did give me more support. But I had to chuck the small drill further out in order to give it enough length. The completed receiver accepted the LPK and functioned flawlessly. The quality of the results was neck and neck with the 5D jig, but I found the Gen 2 easier to use and with fewer ways to screw things up.

80% Arms Gen 2 Jig – Newbie User  

I did all the setup, but for legal reasons, the machining was done by the actual owner under my supervision, so it was not quite a true newbie experience. Since the receiver was quite hard to find in the specific color desired and extra expensive because of that, I wanted to minimize the chances of messing it up … or causing the owner annoyance.

She did quite well although was nervous as all get out. Figuring the right speed to move the router at was difficult for her. Early on, going too fast, the router jumped, and then after that, the nervousness led to slower than necessary movement for a while. Eventually the right speed was found “naturally” by getting used to the sound and feel.

I would say that someone who can follow instructions and has used a router and drill before should be able to make a good receiver without difficulty.  Without tool experience, it would be much better to have someone experienced present to explain things and nip potential mistakes in the bud.

Comparison Results  

In price, the 5D gets the nod if you are doing only AR-15s or you are doing only AR-308s. A drill press is recommended to minimize the fairly high chances of messing up the trigger slot edge. The AR-15 only Gen 2 is price competitive to the steel AR-15 only 5D, but there is no way to ever upgrade the 80% Arms version to AR-308. If it is likely you will be doing both models, the Gen 2 universal model is the price leader.

In universality, the Gen 2 has the advantage. Not only is multi-model capability built in, but the adjustments during assembly can compensate for more variances in receivers, and the bolt-on buffer screw support can be more easily made to handle buffer tube sockets longer than spec than can the solid end bar of the 5D.

As to the two guide methodologies, the 5D system works well if you do your part; however the Gen 2 system does not have problems if you don’t hold the base parallel to the jig plate, and is not subject to the risk of dropping small parts or having to change guide pins part way through the milling.

Assembly of the two jigs is roughly comparable; the 5D uses more screws and needs more tools while the Gen 2 uses less screws and one provided tool, but it does specify final adjustments not mentioned for the 5D. I’d say the defining difference is the buffer tube support. That disk the 5D uses is a bit of a pain, while the tube that the Gen 2 uses is rather more user friendly.  Setting up the router is comparable, although the Gen 2 does have a centering step which the 5D does not require.

The initial drilling of the Gen 2 is way better, only needing one hole instead of two, having more support to keep the drill perpendicular and not requiring any depth restriction (unless the drill bit is extra long). It is best to use a drill press with the 5D to drill the trigger slot pilot hole. It is unnecessary and may be difficult to use a drill press with the Gen 2, because of the height of the drill guide. Drilling the selector and pin holes was slightly easier using the Gen 2 jig, and even easier using the stabilizer block.

When you get right down to it, the milling operation and drilling the pin holes are the most important things to evaluate. And although the 5D can do a good job, it is messier than the Gen 2 and slightly more subject to error.  Adding the Dewalt Shop-Vac helped but did not come close to equaling the Gen 2 built-in port. The 5D milling process is not as continuous as the Gen 2 due to having to change guide pins part way through the process. Finally, it is easier to have the cavity too narrow with the two point guide system than it is with the one point guide system. The Gen 2 did just as good job milling, but it was less messy and provided fewer ways to screw up

Conclusions   

It looks like (at this instant in time) these two choices are the “best” choices in jigs. The 5D works quite well, its “quirks” won’t bother some people and it is possible to overcome them.  It is not completely “idiot resistant”. The Gen 2 avoids these quirks without introducing any significant ones of its own except for the Shop-Vac port being male, and is a bit more “idiot resistant”.  So which jig is “better”?  I’d say the 80% Arms is noticeably better for most people, “better” being defined as “easier to use and harder to screw things up” because both can do an equally good job, which is better than was practical with older technology jigs. Which to choose should be based on each person’s desires and situation. Use the Comparison Results to help you decide.

Breaking News (November, 2017)  

It looks like the 5D jig is being replaced with the “Pro” version, which should probably be better than the original 5D jig since it seems to address some of the concerns I encountered without changing the good parts. And the new end mill bit system has the potential to be a significant innovation. It will be interesting to see what 80% Arms is working on.


The post AR Advanced 80% Receiver Jig Comparison appeared first on The Prepper Journal.


from The Prepper Journal
Don't forget to visit the store and pick up some gear at The COR Outfitters. How prepared are you for emergencies?
#SurvivalFirestarter #SurvivalBugOutBackpack #PrepperSurvivalPack #SHTFGear #SHTFBag