 Midsummer heat is here, along with the dry weather it creates. For those living in the mountains or near forested areas, this is the time of wildfires, and California is receiving their fair share this year.
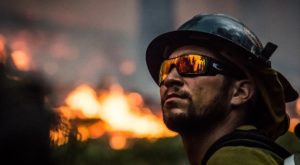
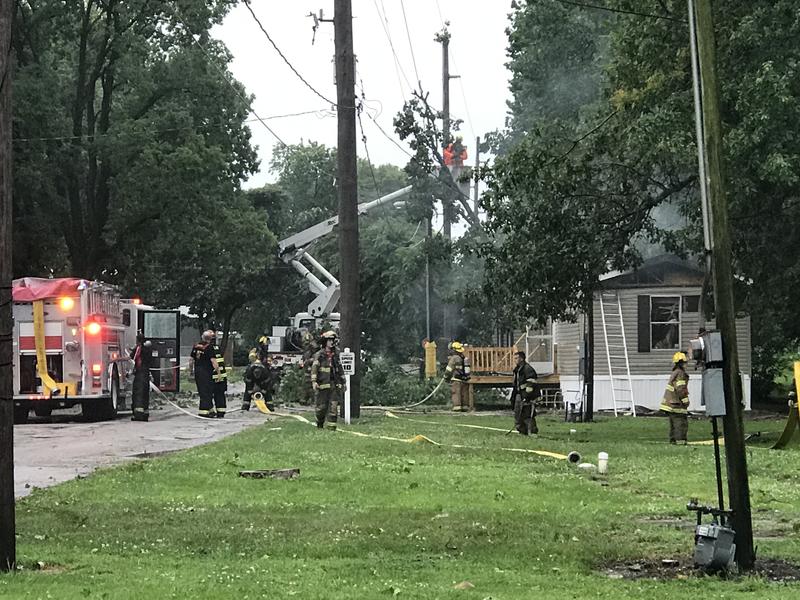
As of this writing, forest fires in California are forcing thousands to evacuate. Nevada is chocking from smoke, while large fires are currently reported in 12 states, on the Western coast of US.
A striking disaster is an opportunity to learn lessons for survival. Keep reading to see what the lessons from the California fires are!
Most forest fires are caused by humans. People being careless with their campfires or tossing out a cigarette butt, without making sure the coal is put out. But some are caused by lightning, a danger that increase during and following times of drought.
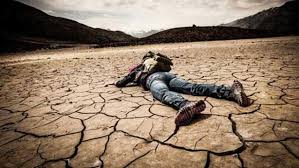
After three years of drought, Southern California is especially susceptible.
Is depopulation the secret aim behind Southern drought?
Forest fires destroy thousands of acres of pristine forest throughout the western part of the country every year, causing people to be evacuated and their homes to be destroyed.
While firefighters work hard to put them out, stopping a forest fire is much harder than fighting a house fire. The massive amount of vegetation in the forest, which the fire can use as fuel, means that fires can spread easily and even bypass areas that firefighters thought were under control.
This year’s fires in California have caused thousands of people to evacuate, and some of whom will never see their homes again. The lucky ones will be able to return home after the fire is over, but others may lose everything they’ve worked for.
The fire is indiscriminate in choosing its victims, burning anything in its path.
Preventing Forest Fires
As Smoky the Bear was famous for saying, “Only you can prevent forest fires.” While fire is an amazingly useful tool, it is also a dangerous one, which is hard to control. Fire doesn’t obey mankind, it does what it wants, and what it wants is to consume fuel. So whenever we use fire, we have to be aware of the dangers and how to prevent them.
More than anything, this means only using fire where it is safe. Lighting a campfire in a fire pit made of steel or stone is fairly secure, especially if that fire pit is in a campground which is used by thousands of people. Any vegetation close to the fire pit would have already been trampled into the ground, leaving the fire with nothing readily at hand, other than the fuel you feed it.
But that’s not to say that a fire in a fire pit can’t escape and turn into a forest fire; it can. That’s especially true if someone builds a massive bonfire, rather than a reasonable campfire. The bigger the fire is, the more chance there is of it getting out of hand. If it gets windy, sparks from that fire can be blown over 100 feet, landing far beyond the campsite and possibly right on some dry grass.
Great care must be taken with any fire, not just campfires. The number one cause of home fires is cigarettes. Those same cigarettes, dropped on the ground in the wrong place, can soon grow into a blaze, consuming everything is in its path.
People who live in the woods need to take extra care, as they not only have more opportunity to start forest fires, but are more likely to suffer from the fire itself.
Clearing land around their home may not make for the most attractive setting, but it could protect their home from being consumed, if a forest fire ever encountered it. But it needs to be a wide clearing, especially on the upwind side, as that is the fire that the wind will try to blow the fire across.
Awareness and Preparation are the Key
Being constantly aware of the fire you have lit is important to protecting our forests. But that’s not the only fire you should keep aware of.
Forest fires can be started by anyone, and the more notice you have of one coming, the greater your chances of survival are. If you can smell or hear the fire, it’s already too late; you’ve got to move. But if you receive the news early, you have a better chance of not only leaving, but taking necessities with you.
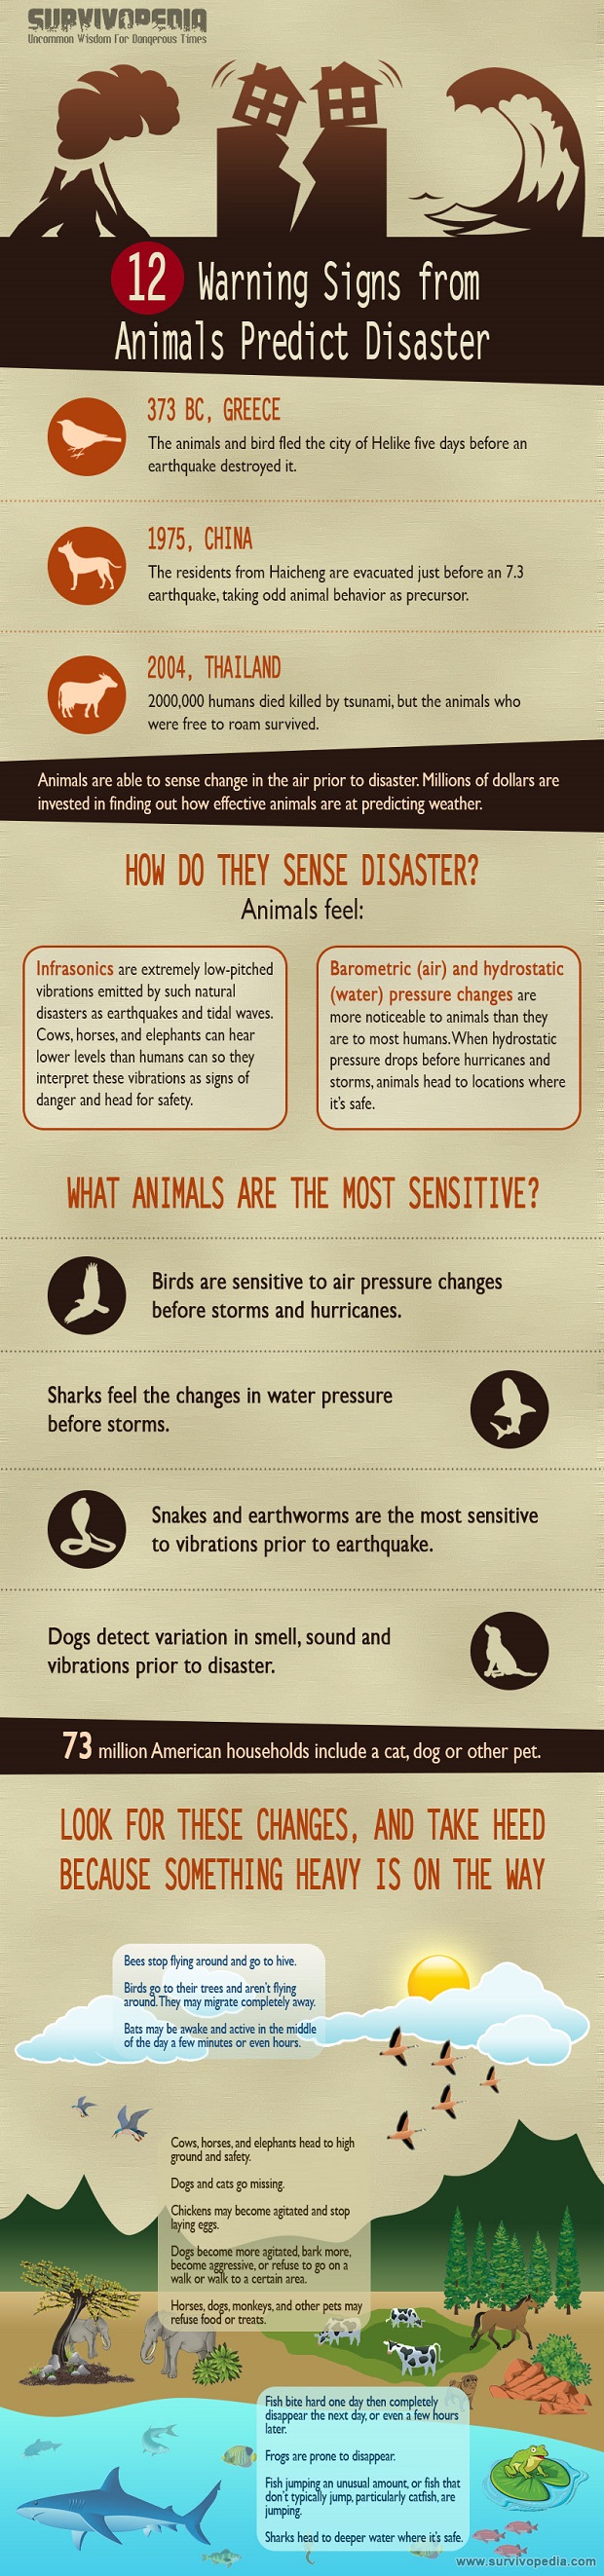
But there’s a better fire alarm than your own senses; that’s the animal life around you. Animals will notice a fire long before you do and will instinctively run from it. So if you see a variety of different animals fleeing in one direction, there’s a good chance that there’s a fire coming up behind them.
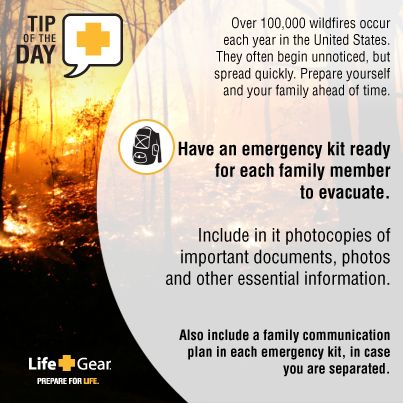
A forest fire is nothing to fool around with. That’s why you must have your bug out bags packed and your car ready for travel at all times. While most of us believe in bugging in whenever you can, this is one scenario where bugging in is just too risky.
Unless your home is built with hundreds of feet of rock all around it, you should evacuate as soon as possible.
Match Your Movement to the Fire
One of the most important pieces of information, for any forest fire, is the wind’s speed and direction. Fire will spread before the wind, so knowing the wind direction will tell you which way the fire is moving. Wind speed will give you an idea of how fast the fire is moving, as the stronger the wind is, the faster the fire will move.
Knowing the wind’s speed and direction will help you determine which way you should go, in order to get away from the fire. If you can see the fire itself, then you’re too close and want to move directly away from it, if the wind is coming towards you, flee before it.
Fire can move as fast as 10 miles an hour, which means you’re going to be hard pressed to stay in front of it. If the wind is moving away from you, then you have more time.
The best thing to do, if you have the time and distance to do it, is move across the fire. This will get you out of its path. As long as you are moving directly away from it, there’s a chance that it can catch up. But if you are moving across it or at an angle across it, you will eventually reach the edge of the fire and get out of the danger zone.
Hills and canyons affect a fire’s movement as well. The heat from the fire will cause it to move uphill faster than downhill. But moving uphill is slower and harder for you. So if you are caught on the hillside, with the fire below you, you need to get over the crest as fast as you can. In some cases, the fire will reach the crest and stop. But don’t count on that until you see that it actually has stopped.
Canyons and draws should be avoided at all cost, as they can act as a chimney, funneling hot air and smoke uphill towards you. While it might be easier for you to travel up a draw, it will also be easier for the fire to travel up that draw too. So there’s a much greater chance of it catching you.
Always watch out for burning tree limbs above you. At times, the fire will move faster through the treetops, than it does at ground level. So you could be perfectly safe on the ground, while the canopy above you is burning.
But if that’s the case, there’s a chance of a burning branch falling on you. Most firefighters who are killed in forest fires die in this manner.
Of course, travel in a vehicle is faster than traveling on foot, but you may not be able to. There are times when you may need to abandon your vehicle, and go on foot, simply because the way the road goes, you would be driving into the fire.
However, don’t abandon your car, unless you absolutely have to. It provides at least some protection from the fire. Better to take your sedan cross-country, ruining it, than to leave it behind and have both you and it burnt.
Forest fires can kill you one of three ways: heat, smoke or oxygen deprivation. It is doubtful that you will actually be burned to death, because you would die by one of these methods, if not all three, before the flames could reach you.
Finding a place where you can be protected from all three is not easy; but your chances are better the lower you are. So head for the flatlands, rather than the mountain peaks, if you can.
If You Can’t Escape
Hopefully you will never be faced with a situation where you are surrounded by the fire and can’t escape. But fires are largely unpredictable, so things like that can happen. If you find yourself in such a situation, your best course of action, even though it is a risky one, is to find someplace safe, where you can ride out the fire.
Before I go any farther, let me just be clear that there is no guarantee that you can ride out the fire safely. But if you’re going to be caught in it, your best chances are to choose the ground which will offer you the best chance of survival. Give yourself time to do that, as you are fleeing from it.
Obviously, you need someplace that will not burn, if you’re going to wait out the fire.
Keep in mind that sparks from the fire can leap 100 feet, so when you’re looking for a safe place, you want one that is more than 100 feet across. Even if it is only 110 feet, that allows you to be 100 feet away from the approaching fire, by staying close to the other edge of the safe zone.
So, what types of places are potential safe zones?
Water
Your absolutely best place to be, other than in another state, is in the midst of water. As we all know, water quenches fire, so there is no way that the fire can reach you, unless you leave a bridge between you and it. Getting a ways off shore in the water can provide great protection.
But this has its own dangers as well. Water will draw your body heat away faster than being in the air, creating the risk or hypothermia (the lowering of the body’s core temperature). So, if you’re going to be in the water, you need to watch how cold you are getting.
It’s important to remain reasonably close to the shore, preferably in water that is not so deep that you can’t touch the bottom. That way, you can get out easily if you need to.
If all you have is a mountain stream, use it. Find the widest place in the stream and lay down in the water, with only your face exposed. The water will protect you from the flames, even if you are only a few feet from shore.
Rocky Areas
The second best place is a rocky area or paved area. Roads may not provide a wide enough area to really provide excellent protection, but a road with a rocky area beside it might. A forest fire won’t burn the rocks, although if the flames lick the edges, they will scorch them.
Often these areas will still have some plant life growing in them. But that’s better than being surrounded by vegetation. You can easily stomp out a grass fire, if you’re wearing boots or sturdy shoes. But watch out for bushes, because they will burn rapidly.
Moving around the rocky area, as the fire burns around you, can be useful, especially if you can move away from the area that is burning the hottest. There will be more oxygen and less smoke in areas which are away from the main part of the fire. As the fire burns past, moving closer to the burned over area could get you to a cooler area, with more oxygen.
Holes in the Ground
Caves, culverts and other holes in the ground are excellent protection from fires. Since heat rises, fire always tries to go up. If you are below ground level, especially in a sheltered place, the fire could pass over and around you, without touching you. You’re also likely to find more oxygen at that lower elevation, than you would on the ground around the hole.
Short Grass
Any grass can burn, but short grass will have a smaller flame. That might not seem like a safe place, but if it’s all you’ve got, that will be better than being in the middle of the forest or even in the middle of long grass.
Look for a clearing that’s at least 100 feet across. While the grass in the clearing might catch fire, you can avoid that fire or stomp it out. Just make sure that you stay on the downwind side of the clearing, so that fire leaping from the treetops can’t reach you.
A Couple of Risky, Last Resort Techniques
Sometimes, it looks like the fire is going to win. But I’m the type who believes in the “Never say die” philosophy. So as I go through my options, I’ll start with the best ones, and then work my way down to those which aren’t so good. But I’ll always keep trying, as long as I can. I don’t know how to say, “I can’t,” my parents made sure of that.
So, if there’s no safe space available, there are still things that can be done. They aren’t the best of options, but they are still possibilities. Using them will depend a lot on the terrain you have available to you and how fast the wind is blowing.
Creating a Backfire
One of the techniques which firefighters use at time is to create a backfire. This is a smaller, more controllable fire, which they light, to burn off an area and create a fire break.
For this to even be possible, you’d need an area where you could light such a fire and be able to control it, such as a meadow. You’d also need enough time to light your backfire and burn off the area, before the fire could reach you.
The key to an effective backfire is controlling it. You don’t want any part of the fire burning faster than you can put it out. To prevent this from happening, you’ll need to be constantly putting out areas which are getting close to the point of losing control, and restarting new parts. This dangerous, tricky dance, could provide you with that safe zone you need, while the fire rages all around your cleared area.
Walking Through the Fire
While a forest fire may seem like an impenetrable wall of fire, it actually isn’t. The fire never burns evenly, and the terrain works against it, especially in rough terrain. There will often be areas that are far ahead of others, leaving gaps that can be exploited and walked through.
Keep in mind that even though there isn’t visible fire in those gaps, there can still be burning coals. Your passage could kick those up or kick off cover which is preventing them from receiving oxygen.
So walk carefully if you try this, with a keen awareness of everything that is going on around you.
The area you would be crossing into will be the area that the fire has already burned through. As such, it will be mostly charcoal and ashes. There will be hotspots and even the seemingly cool ones will still be too hot to touch.
Nevertheless, it will be safer than the area before the fire. Once past the fire line, you should be able to walk to safety.
Stay alert and watch your surroundings. Put your efforts not only into being ready for the disaster which will strike tomorrow, but be prepared for the low-key disaster which we live with each and every day. Be prepared to face a wildfire and the drought!
This article has been written by Bill White for Survivopedia.
from Survivopedia
Don't forget to visit the store and pick up some gear at
The COR Outfitters. How prepared are you for emergencies?
#SurvivalFirestarter #SurvivalBugOutBackpack #PrepperSurvivalPack #SHTFGear #SHTFBag

 “Hello, my friend and welcome back! Today I have a great post for you from Chris Browning and it’s a good one. He is the editor of Gun News Daily – www.gunnewsdaily.com. It’s longer than what I usally post, but well worth the effort. The best way to learn to survive is to learn from those who have had to fight to survive already. Their stories and insights provide the best training you can get. Grab a cup of coffee my friend and have a seat while we visit.”
 “Urban gardening is all about making the most out of the space you’ve got. All it takes to turn your outdoor balcony or back porch into a full-on garden is a pinch of creativity and a dash of strategy.
 “I must say that it saddens me seeing what humans have done to our planet. Any time you find a water source, you will likely find trash scattered along the shore.
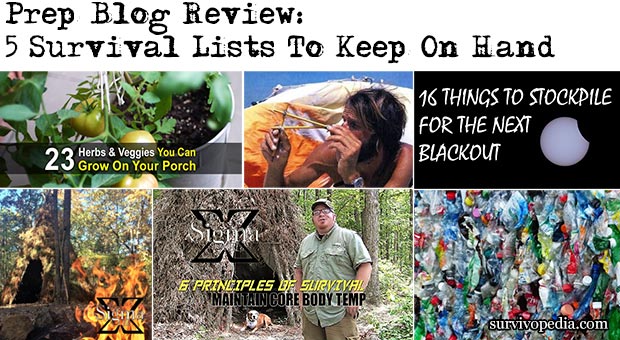
 “Shelter and Fire are ONE. Long term survival requires the proficiency of both. Maintaining Core Body Temperature is vital, and without shelter and fire the body is highly susceptible to hypothermia.


 There is no such thing as a gun that does not need routine cleaning and maintenance. You can count on Murphy’s law to render your gun useless at the worst possible moment unless you take good care of it.

 Solar activity probably has more to do with life here on Earth than we give it credit for. We know that life, as we know it, couldn’t exist without the light and warmth we receive from the sun.


 We all have that one family dish that we’re known for, the one that was passed down to us from our ancestors.