Written by R. Ann Parris on The Prepper Journal.
Editors Note: Another article from R. Ann Parris to The Prepper Journal. As always, if you have information for Preppers that you would like to share then enter into the Prepper Writing Contest with a chance to win one of three Amazon Gift Cards with the top prize being a $300 card to purchase your own prepping supplies!
The Bug-Out Bag is pretty much a ubiquitous prepper topic. As with GHB-Get Home Bags, 72-our kits, and INCH-I’m Never Coming Home bags, there’s usually some mention of water.
For good cause. Dehydration can take effect very quickly, and lead to stumbles, inattention, and poor decision-making. Pack-friendly water options deserve consideration, especially when we’re planning for interruptions in services and other hardships.

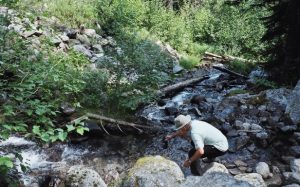
On the Road
Don’t ignore a BOB or GHB and field water resupply just because “I never leave home”. Almost all of us travel. Frequently or infrequently, we depart on trips that take 30-90 minutes by vehicle, if not hours or days.
Some of us go RV’g, camping, hunting, fishing, and off-roading – regularly, somewhere off the daily beaten path. Some of us may still vacation-vacation. Some of us chaperone school trips.
Friends and family draw us out with funerals, weddings, illness or injury, child births, holidays, and boot camp, college, and high school graduations.


Many of us take monthly, quarterly, or annual trips to feed stores, big-box warehouse retailers, and discount outlet malls. We might also infrequently travel to take advantage of back-to-school sales or tax holidays, either a neighboring state or brick-and-mortar locations outside our normal stomping grounds.
Trips that take next to no time when traffic flows smoothly can expand exponentially when roads get gummed up. Should our ride go down, those quick 30-60-minute road trips can extend to hours or days of foot travel.
Even if we keep our vehicle, we may end up needing a water resupply – for ourselves, or to keep that vehicle running.


Plan For Varied Water Sources
Ideally, we have starting points – the silcock valve behind a store that’ll be closed, the exact lay of a drainage canal or duck creek – and we’re familiar with area-specific risks.
Each water source and the approaches to it greatly affect how and what we can use to efficiently and safely resupply. “One is none, two is one” applies hugely to attaining clean, safe water on the move, but at the same time remember that we have to carry this bag (putting BOB on a diet is a whole topic on its own).
Especially if we’re planning to hike across the unknown using maps and terrain cues of surface water, however, and especially if we have kids, pets, injuries, or aging to deal with, we may need to pack differently than originally planned.
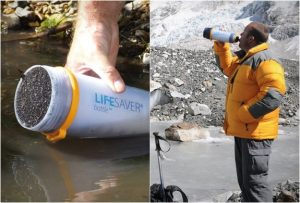
Filters – The Fine Print
Make sure to read-read the information about our portable filters. Most filters have a maximum number of gallons/liters they’ll effectively treat.
The effective lifespan also regularly varies based on how dirty water.
It’s just something to be aware of, and to remember while assessing our needs and distances. Small portable emergency filters tend to filter the lowest volumes. In some cases, they may only treat 3-10 gallons or 15-30 gallons.
We can extend the life of most filters by doing a rough pre-filtration through socks, tampons in a bottle neck, coffee filters, t-shirts, or sand drips.
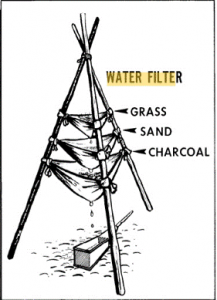
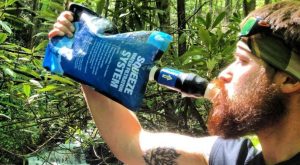
We can also extend our filters’ lives by not using them if we’re accessing water that should be clean, like from a faucet on a trail, somebody’s irrigation line, or outside a building, or if we’ve used the fire we built to drip-catch distilled water.
To avoid the unnecessary use, we’ll sometimes just have to remember to unscrew a cap to drink instead of sucking on the nozzle. Sometimes we may have to get creative.
Water Treatment Tabs & Solutions
If we go for a chemicals to kill off uglies, we have to be as aware of the same total volume we can treat as we do with physical filtration methods. We also want to remember that they typically take some time to work, some in as little as 5-15 minutes, but others 1-2 hours.
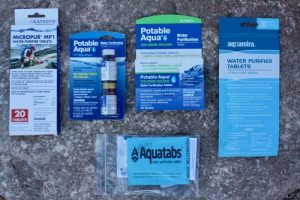
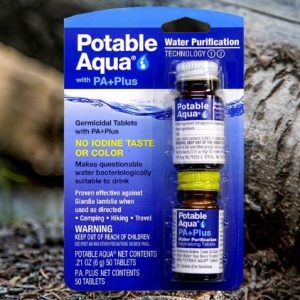
That means we’re mostly likely going to want at least two water containers (which isn’t a terrible idea, anyway, especially for those of us who ascribe to that other “rule of threes”). One bottle is in use, while the other is going through its treatment process.
When we use chemical treatments, don’t forget to let it start working, shake it, then partly unscrew the cap and shake it again. Doing so gets the treatment solution into all areas of the threads and caps – which we’ll touch with our lips, and which can re-contaminate the whole container. If we have a sipper-nipple or sports top, open or pinch that, too, to fully expose all areas.
That goes for Camelbaks, too. Especially Camelbak-type bags, really. They already have some issues with stagnant areas to contend with, but it’s especially true of bags and hoses that are going to be lowered into water sources directly.
Which brings us to …
Water Access Capabilities
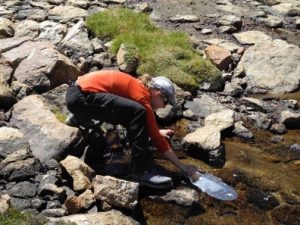
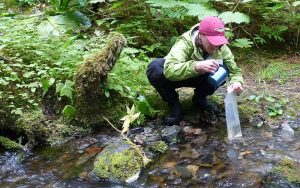
Filling a Camelbak without a faucet can be “funtastic” (at least Camelbak-type bags have that nice, wide opening). It gets more funtastic yet with a water source that’s barely trickling, shallow pools, ice, or a sketchy bank. Same goes for most types of canteens and narrow-neck bottles. Cold, moving water and slick rocks add to the adventure, especially if you don’t have a bottle or mug to use as a baler (which gets contaminated in the process).
It’s something to keep in mind when loading a get-home or bug-out bag, especially with kids, pets, and seniors.
The various straw types are fantastic, and they have a lot of benefits, but they also have some huge drawbacks.
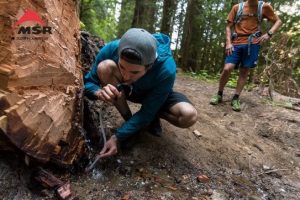
One, you have to get your face right down 6-18” from the surface of water to use them.
That lowers audio-visual observation. It also regularly requires holding a push-up or squat (I hope your bag is well balanced) or laying flat on the ground, all of which decrease fast-response capabilities. It also increases the chance of soaking clothing and getting muddy (pack non-rip, sturdy rain gear).
Second drawback: If all you have is the life straw and a quart canteen or bottle, you’re going to be sourcing water again before long, especially in high heat. That’s going to slow you (significantly).
Third: You can’t use them to filter water for a pet or someone who can’t access that water source. (Workaround: Play the suck-spit game to fill a container.)
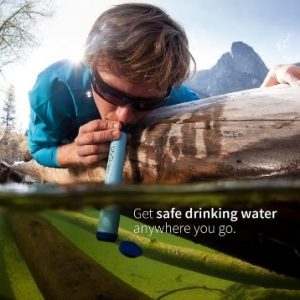
To reduce all the drawbacks, source a container that can be contaminated – even a plastic bag will work (if you have a name-brand LifeStraw, double check the amount of depth/width you need). Fetch and carry water in that and stick the straw in to drink. It’s not an option for pets, though.
Some of the pump-draw filters have nice 2-3’ intake hoses on them, but some of them require you to be just as close to the water surface as those LifeStraws. That can be handy.
Even so, we also have to consider the times when banks are frozen, wet or slick, steep, there’s an overhang and-or ice shelf.
It’s not actually a difficult fix.
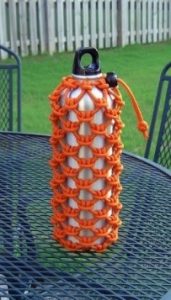
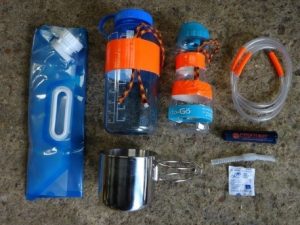
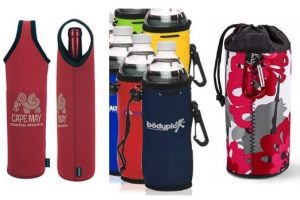
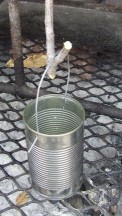
Use a coozie with a strap as a pouch or source a container with a wide mouth to use as a mini well bucket, even something like a used Powerade bottle or a tin can we can punch/drill some holes around the lip of – anything we can duck-tape a carabiner to or get 550 cord tied around securely. We can pitch them out and haul them back up to skip sketchy approaches.
Psst … Remember that on most lanyard-ready bottles the clip/loops are attached to the lid, not the bottle, and bottle-lid attachments are regularly flimsy. Plan for that.
Some of my stand-alone, inner-bag, and vehicle kits are in soft mini-coolers or thermal lunchboxes. They’re handy for a whole host of tasks and reasons, but I increased their use specifically to expand my water capabilities.
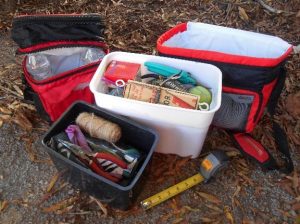
Most have a hard plastic liner, and the bags themselves will hold some water long enough for me to haul them up or toward me, even if they don’t have a film liner or the liner gets punctured. I can use them to lift water up to me safely, and I can carry (and be treating) a gallon-plus of water, even if my bottles get lost or damaged.
A wet-dry bag or pouch of the type with open handles or a cinch closure can also be used to bring up water with less observation loss and less risk of getting soaked, slipping, or falling.
Both beat the pants off a bottle, canteen cup, and Camelbak when there’s a skim of water over ice and for catching solar-still drips, and they haul up more per load as a well bucket when access is iffy.
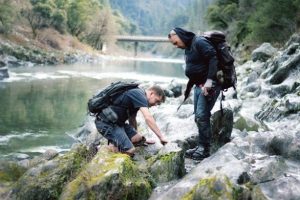
Water on the Go
Over even just hours, we can easily dehydrate (even when it’s cold) and any circumstances that slow us down increases that risk. Don’t neglect a BOB/GHB, and don’t neglect practical water resupply for it.
Longtime through-packers and multi-day hike-in campers can be excellent sources for information about water options for our bags. The military can also be an excellent source for gear and reviews.
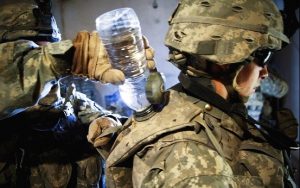
It’s important that we remember their context, though, especially the military, campsite, and trail hikers. Things that work or are available to them – like faucets and bottled water – aren’t always an option for us, and won’t be as safe or as readily obtainable in a scenario where we’re actually using a bag, short term or long duration.
Follow The Prepper Journal on Facebook!
The post Bug-Out Bags – Water on the Move appeared first on The Prepper Journal.
from The Prepper Journal
Don't forget to visit the store and pick up some gear at The COR Outfitters. How prepared are you for emergencies?
#SurvivalFirestarter #SurvivalBugOutBackpack #PrepperSurvivalPack #SHTFGear #SHTFBag

No comments:
Post a Comment